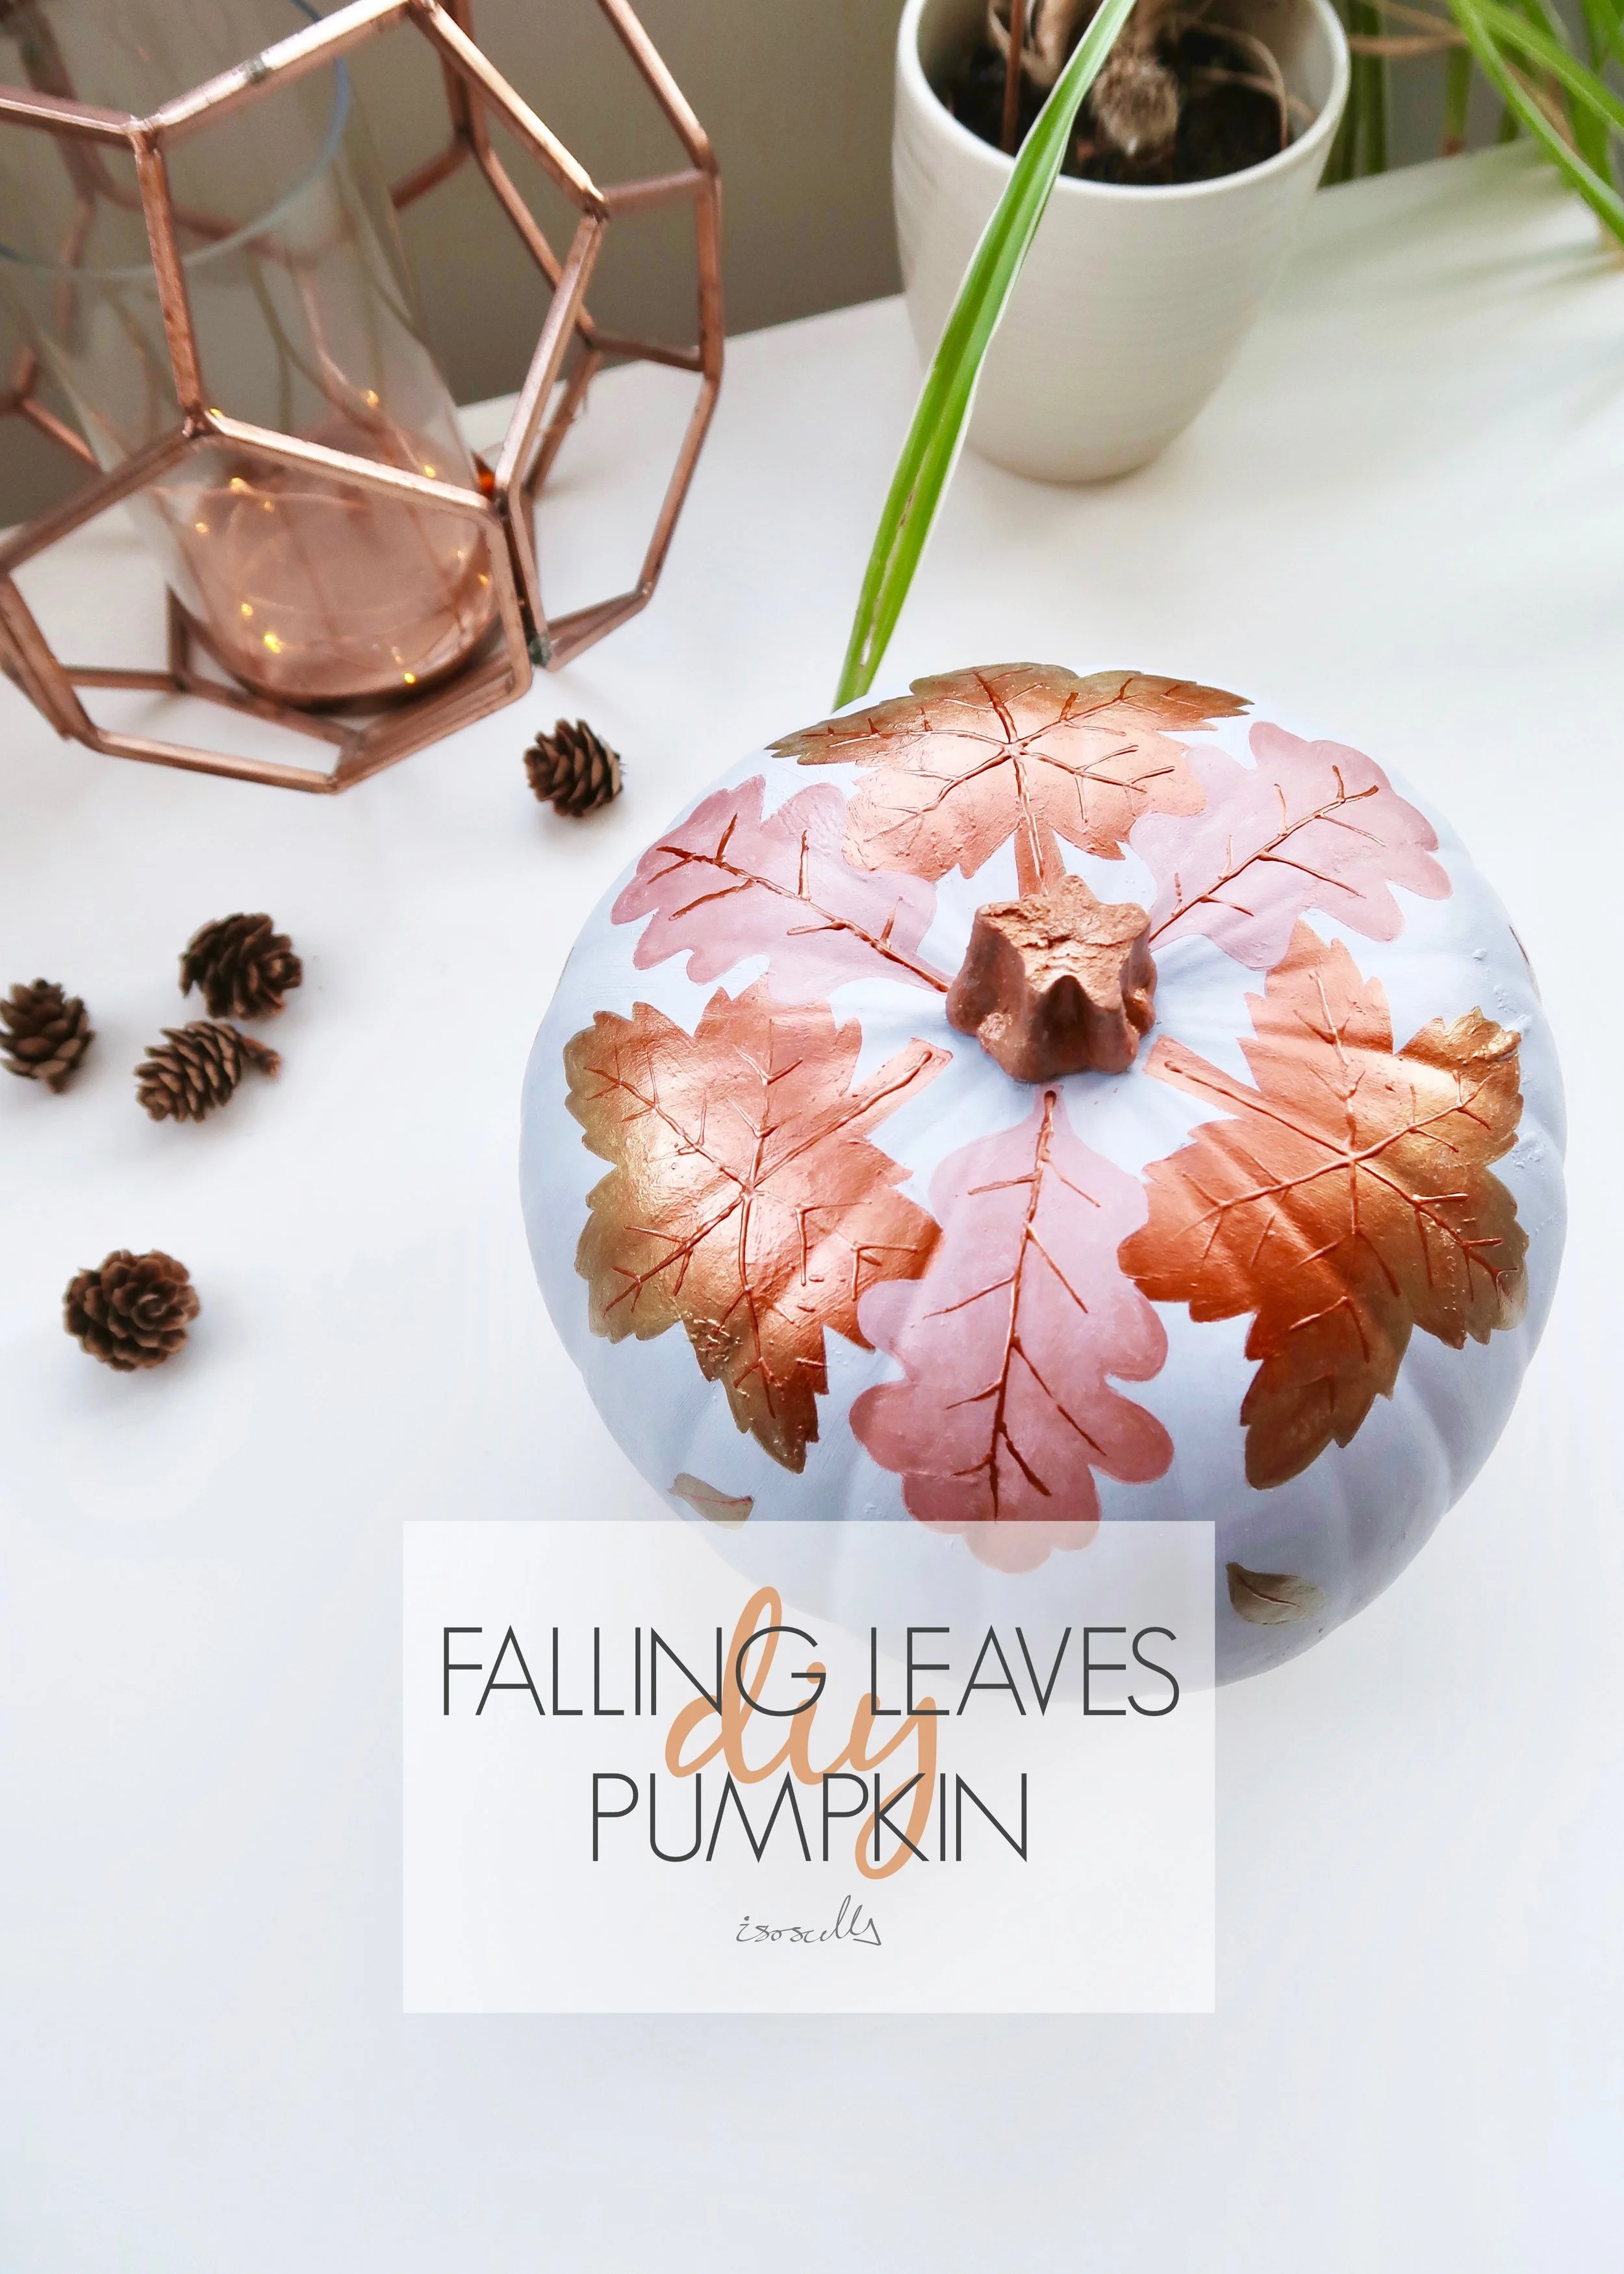
With Halloween just over a week away, it is most definitely the time to crack out those pumpkins. As someone who loves to paint on pretty much any surface that I can get my hands on, I usually avoid pumpkin carving and instead opt for the challenge of pumpkin painting. This year I’ve kept my pumpkins less spooky and more sparkle with this metallic gold and copper falling leaves design.
Having been unwell and signed off work for a weeks recently, it’s been a real struggle to get back into the swing of work, life and blogging. When I get home from work I’ve been far too tired to craft or paint, and if I’m completely honest with myself, I’ve not been feeling all that creative or even really quite myself. I’m hoping that once the tiredness and brain fog subsides that I’ll be firing on all cylinders, and that I’ll be able to get back to enjoying both work and my creative hobbies. It’s funny how a relatively short period of ill-health can really unsettle you. Autumn is arguably one of the best times of year, if not the best time of year, and so when I saw a stack of pumpkins in one of my local shops, I couldn’t help but feel inspired. I’m so happy with how these painted pumpkins turned out, and just love using pumpkins to decorate my flat at this time of year. Keep reading to find out what I used and how I made them…
1. First of all, make sure your surface is clean. If you’re using a real pumpkin like me, give your pumpkin a wash in warm water and make sure it is completely dry.
2. Next, spray all over your pumpkin with a clear sealer or primer. This is particularly important if you’re using a real pumpkin as the skin can be a bit waxy, which makes it difficult for paint to adhere to it.
3. Once your sealer or primer is dry, use acrylic paints to paint a base colour all over your pumpkin. I chose a pale grey to match my living room, but obviously you can chose any colour you like!
4. Using a pencil, lightly draw leaves around the stem and down the sides of your pumpkin. At the stem, be sure to draw your leaves large enough so that they can be seen from the side of the pumpkin. Here, I chose to alternate between maple and oak leaves. On the side, draw some smaller leaves ‘falling’ down the side at different angles.
5. Next, grab your acrylic paints and start to fill in your leaves. For my maple leaves, I created a gradient effect by painting the top in copper and bottom half in gold before blending them together. For the oak leaves, I mixed my copper with some white to create a pinky-orange colour. For the smaller leaves on the side, I alternated between gold and pinky-orange.
6. Finally, paint on the stems and veins of the leaves. To do this, I used a metallic dimensional fabric paint, which last year I discovered worked really well for raised details on pumpkins.

