Add a bit of magic and whimsy to any space with a hand-painted floral arch mural
This was a project that took me what felt forever, and there was definitely a point somewhere in the middle that I questioned my life choices. Despite that, I absolutely love how it turned out and overall, I did really enjoy the process. There’s something about painting flowers on the walls that is just intrinsically enjoyable, and although it took me a while, it was the perfect gentle project for me during my baby’s naps after some very disturbed nights.
PAINTING ON THE WALLS
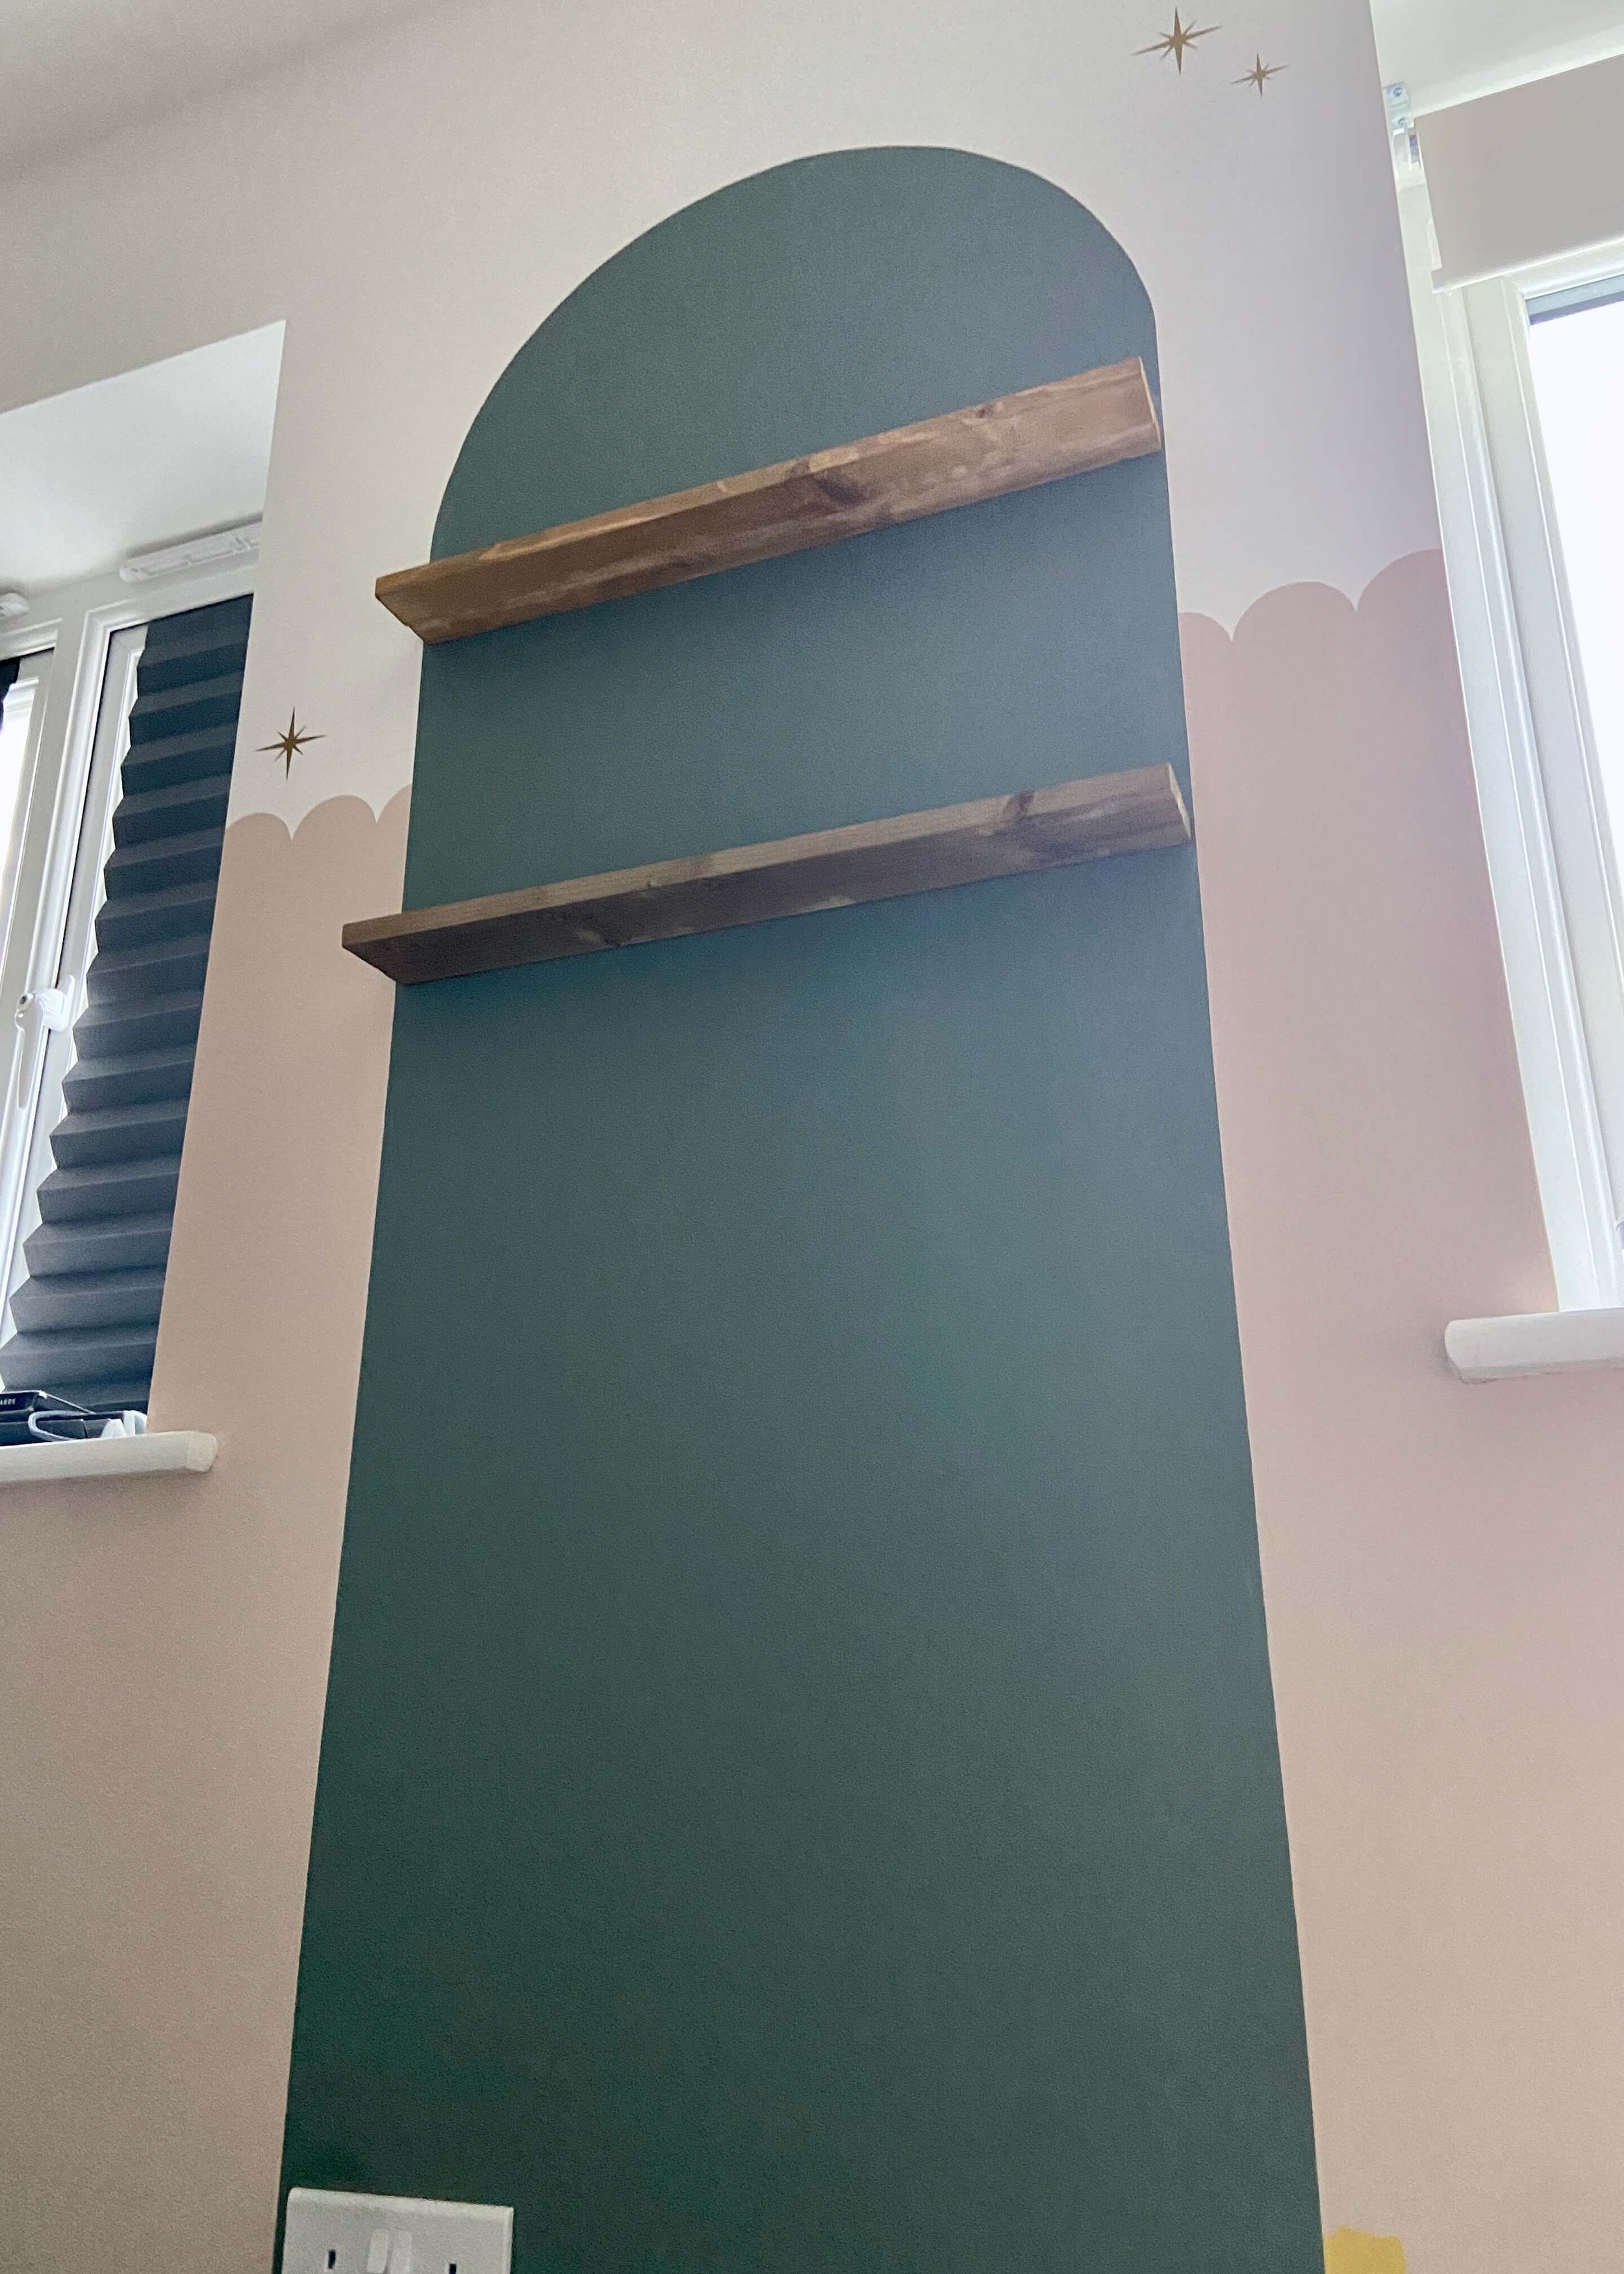
The nursery already had a green arch colour block from when it was the guestroom. I knew I wanted to make this feel like a doorway into a floral garden, and that I wanted to hand-paint it myself. You can buy peel and stick arched murals, but at this point post-partum I was craving painting some flowers on a large scale and so I decided to do it myself from scratch.
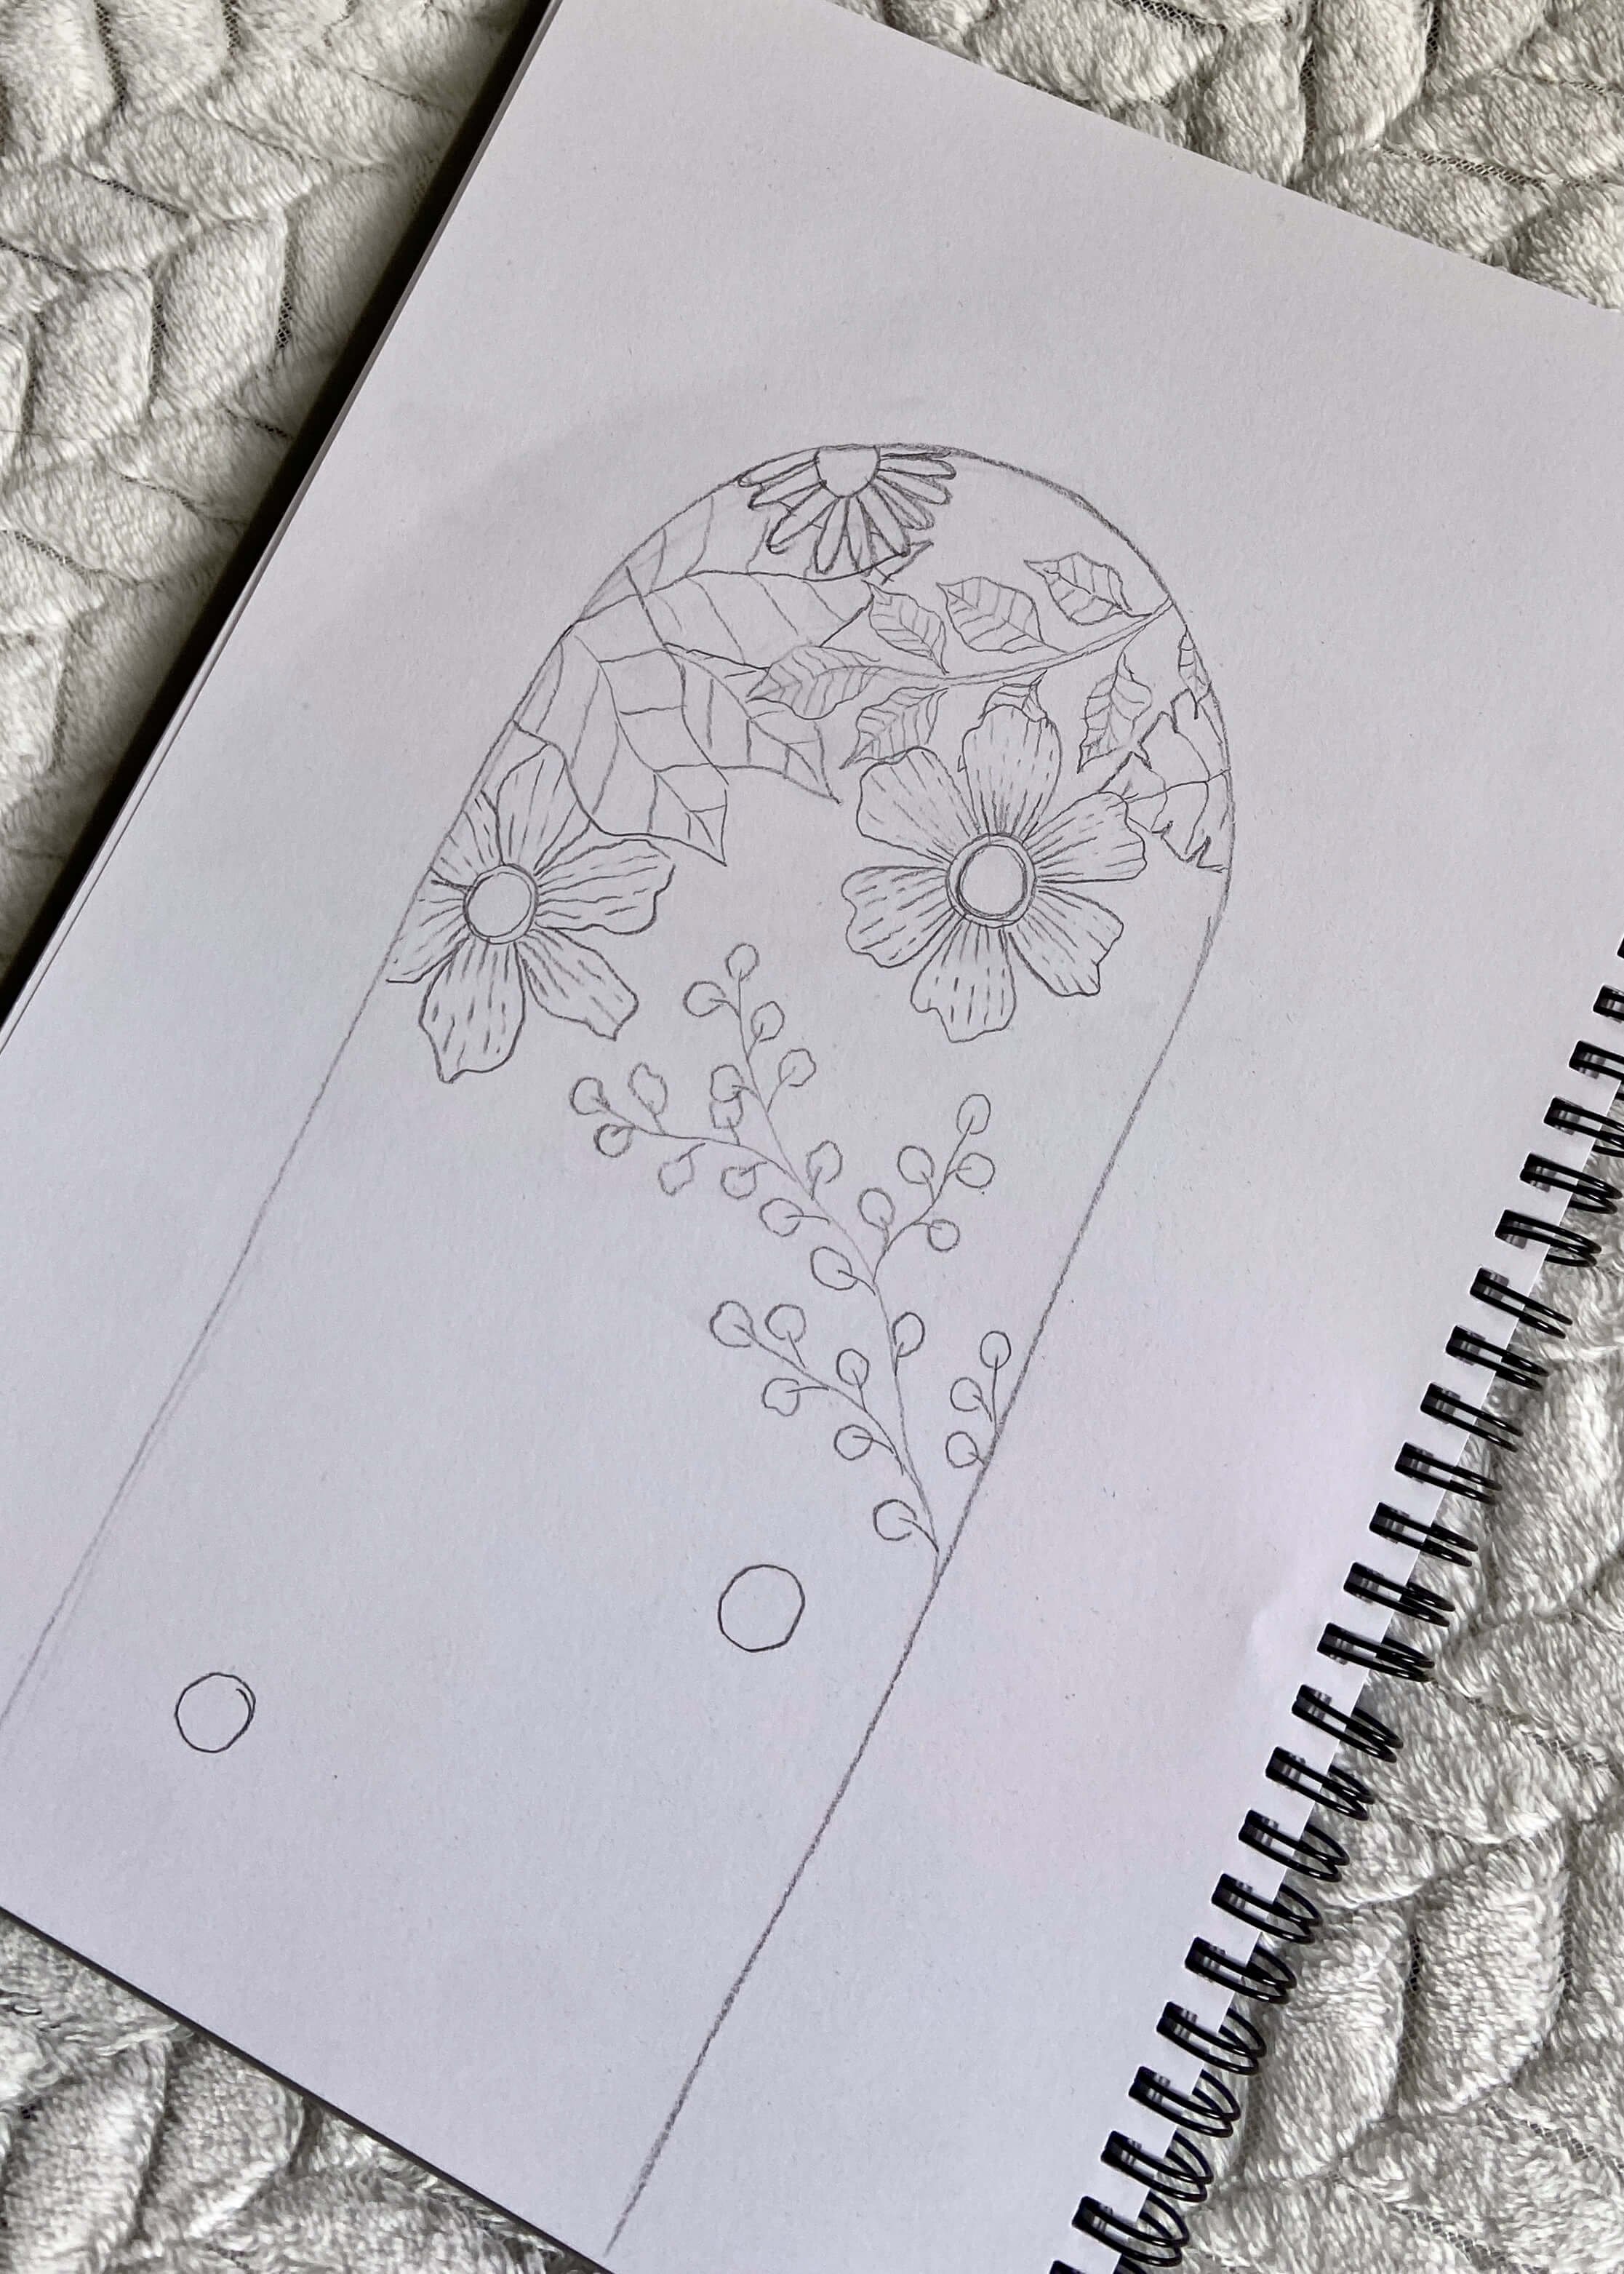
First of all I doodled some ideas down into my sketchbook, but to be honest I was so excited to get started that I started painting before I’d finished this and ended up eyeballing and just making the design up as I went. I wanted the colours to complement the peel and stick mural on the nursery feature wall whilst also bringing in some darker pinks, greens and gold accents. I used a variety of paints; wall paints, acrylic paints and posca pens, which made my life so much easier and really allowed me to just let go creatively. Keep reading to see how I did it step by step…


Acrylic Paint
Wall Paint Samples
Posca Paint Pens
Paint Brushes
Painters Tape


1.
First of all, I grabbed my sketchbook and had a quick doodle to have a think about how I wanted to draw my flowers and foliage. I did intend to plan out the design but I was too excited and so I ended up starting and making it up as I went.

2.
As I was painting over a dark green arch, and I only had a sample of the colour I wanted to change it to, I first used a white wall paint to over the arch. This helped minimise the number of coats i would need to get a good coverage of the colour I had chosen.

3.
Once this was dry, I painted over the now white arch in a beige colour called Skimming Stone. I used painter’s tape on the straight sides of the arch to make sure my edges were neat and just painted very carefully at the top where the arch was curved.

4.
Next, I used a pencil to draw on the large flowers I wanted and I painted the outline of these using another Farrow & Ball paint sample, in the colour Sulking Room Pink. I wasn’t sure if I wanted to flll in the flowers at this point and so I left it as it was for the moment.
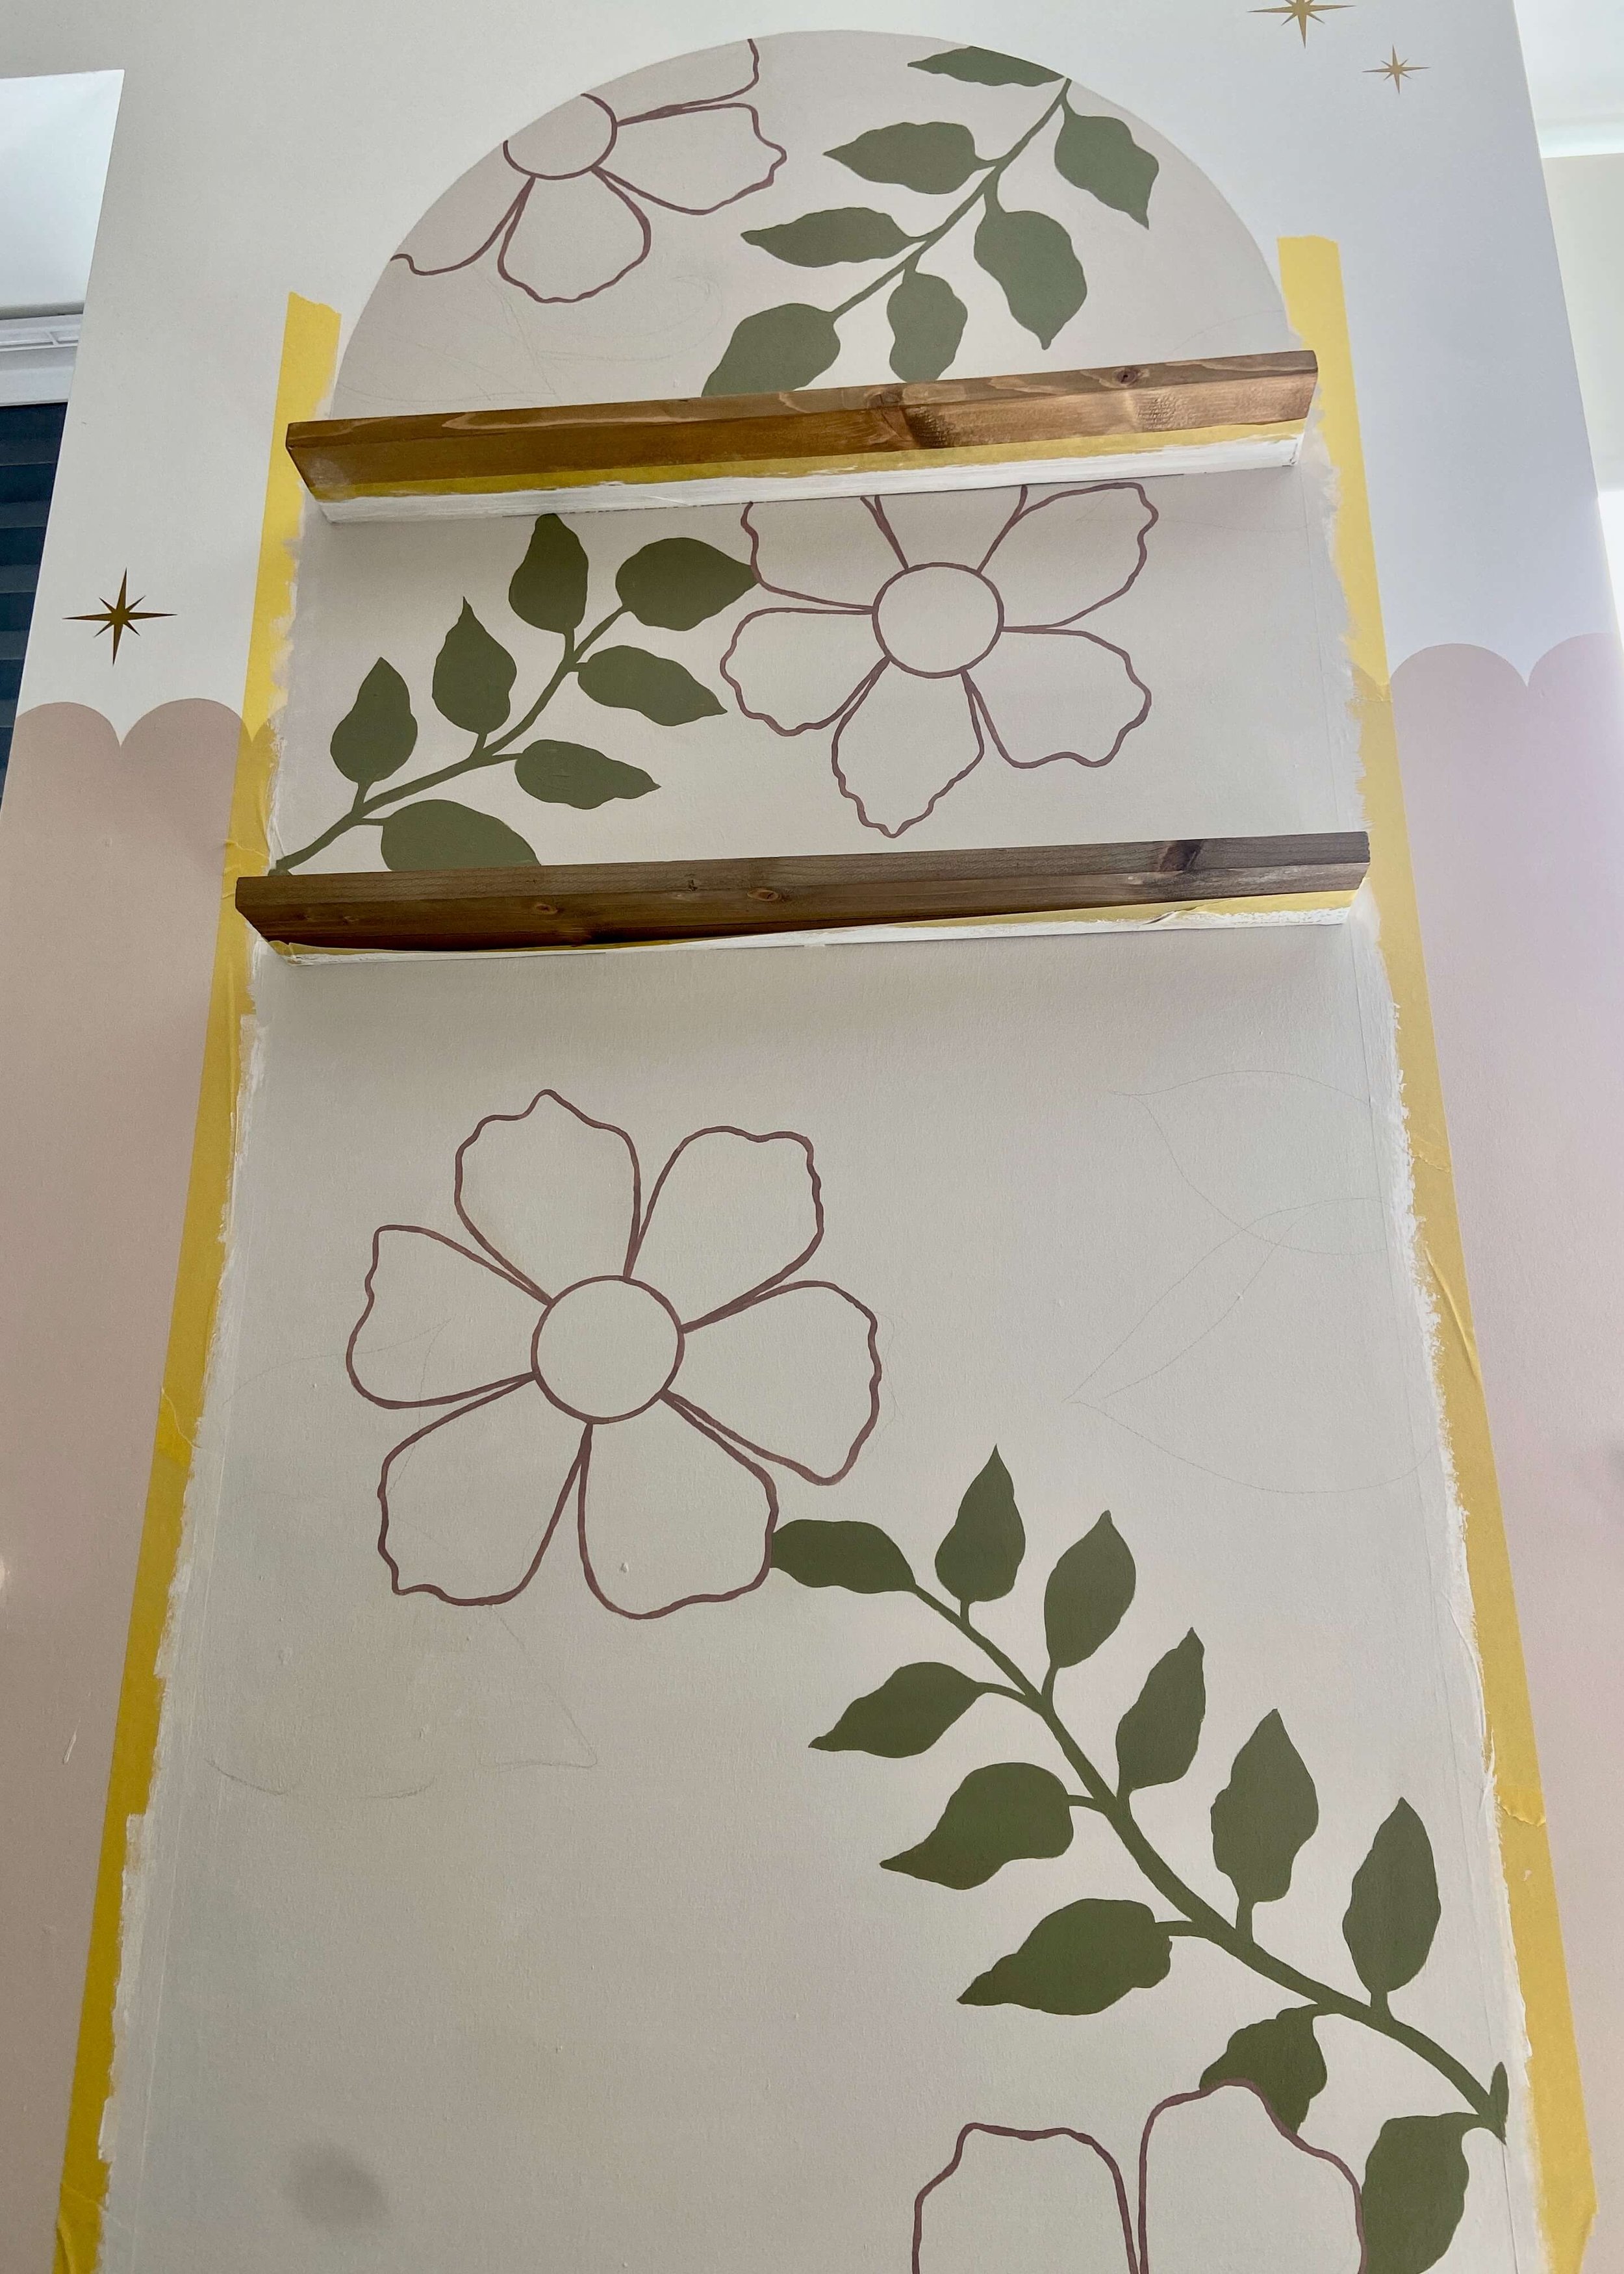
5
Next, I drew on some foliage in pencil and mixed up an olive green colour to paint the brnahc like foliage. It took a couple of coats to get the coverage I was after.
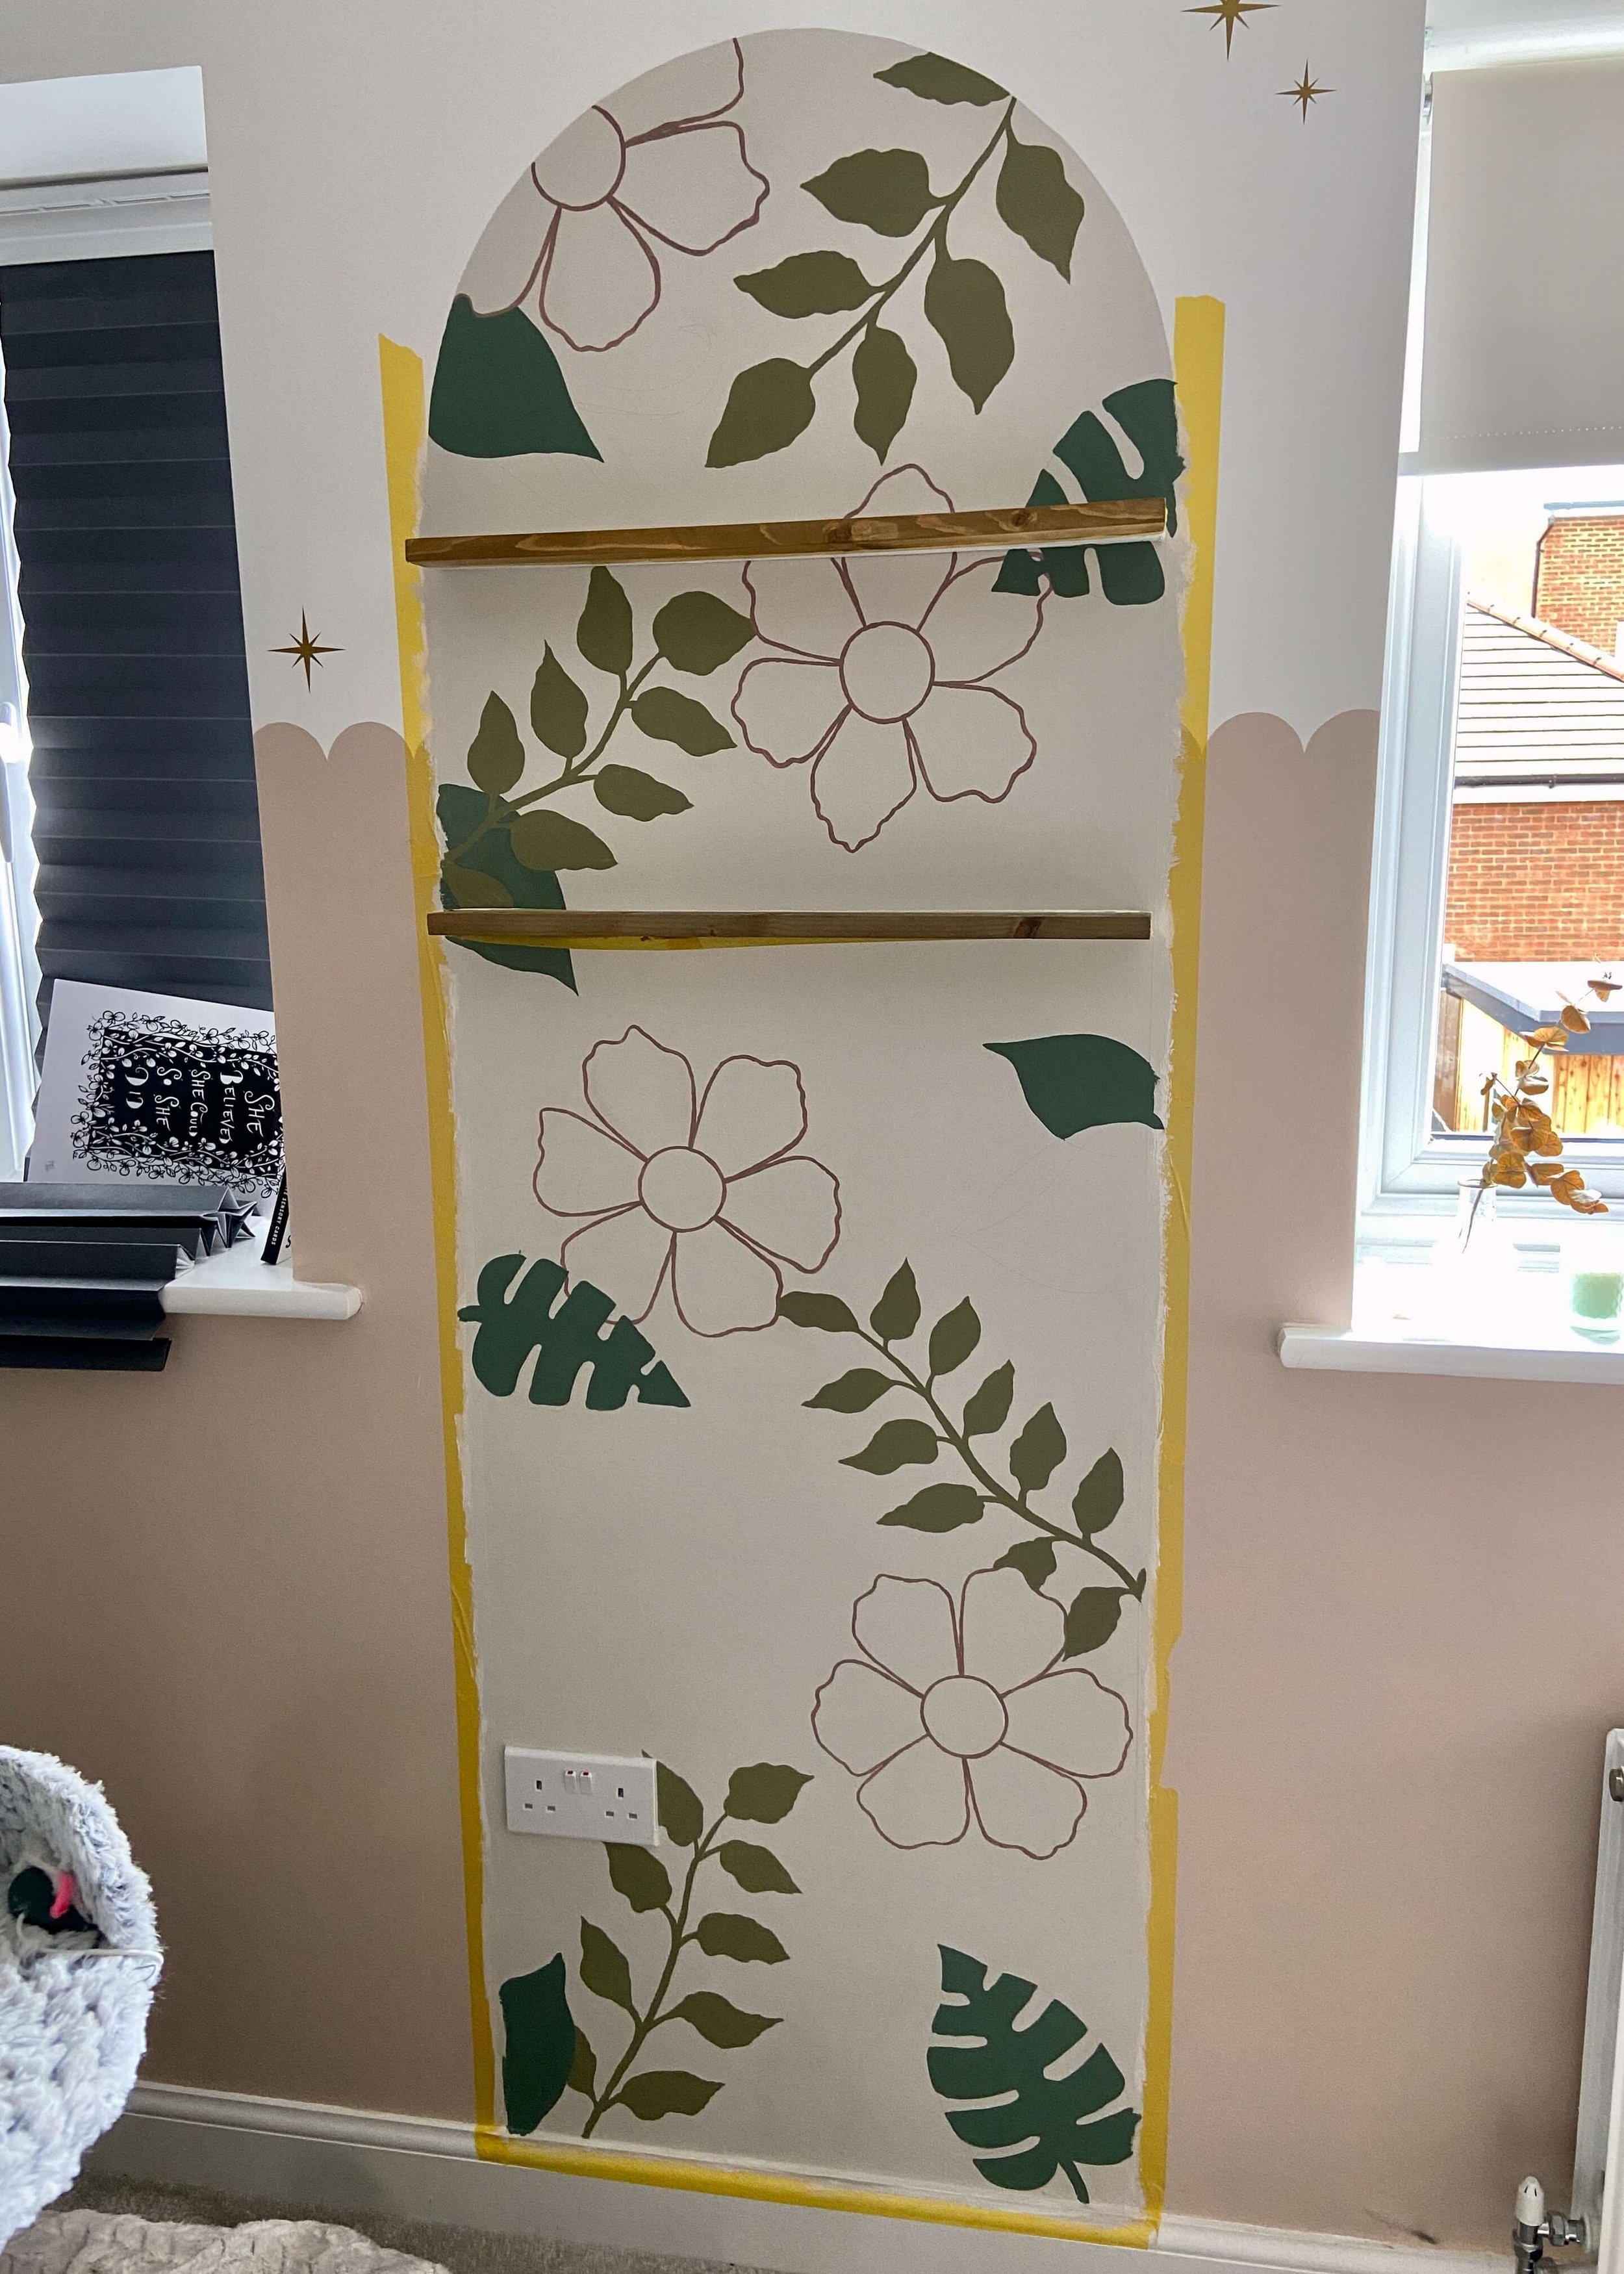
6.
Next, I mixed up a darker forest green to paint the large leaves and monstera looking leaves. I felt this was too ‘jungle’ in the end, and so ending up painting over all of the leaves in either an off white or a metallic gold.

7.
To bring in some of the autumnal colours and browns from the peel and stick mural on the nursery feature wall, I added some brown branches with berries on. Again, I used acrylic paint for this and it took a couple of coats to get a good coverage.

8.
finally, I used a white posca paint pen, and gold mettalic paint pen, to add in some grasses and detaisl to the flowers and leaves.

9.
Once this had all dried and I was happy with the design, I peeled off the painters tape.