


Use clay to make this all-seeing eye mirror wall decor!
My gallery wall has been a work in progress for some time now. I have a couple more frames to add but before I put them up I felt like it needed something else. A bit more colour, a bit more shape and something to help it feel less structured. After looking through my craft drawers, I came across some air dry clay and small round mirrors, and having seen many an ‘all-seeing’ eye mirror on instagram and Pinterest in various forms, thought I’d have a go at making one myself. I had a look to see if anyone else had attempted anything similar and couldn’t find any attempts with clay. I love these versions in card and wood, but if like me you tend to have clay lying around, then this may well be the tutorial for you. Keep reading for the step by step guide…


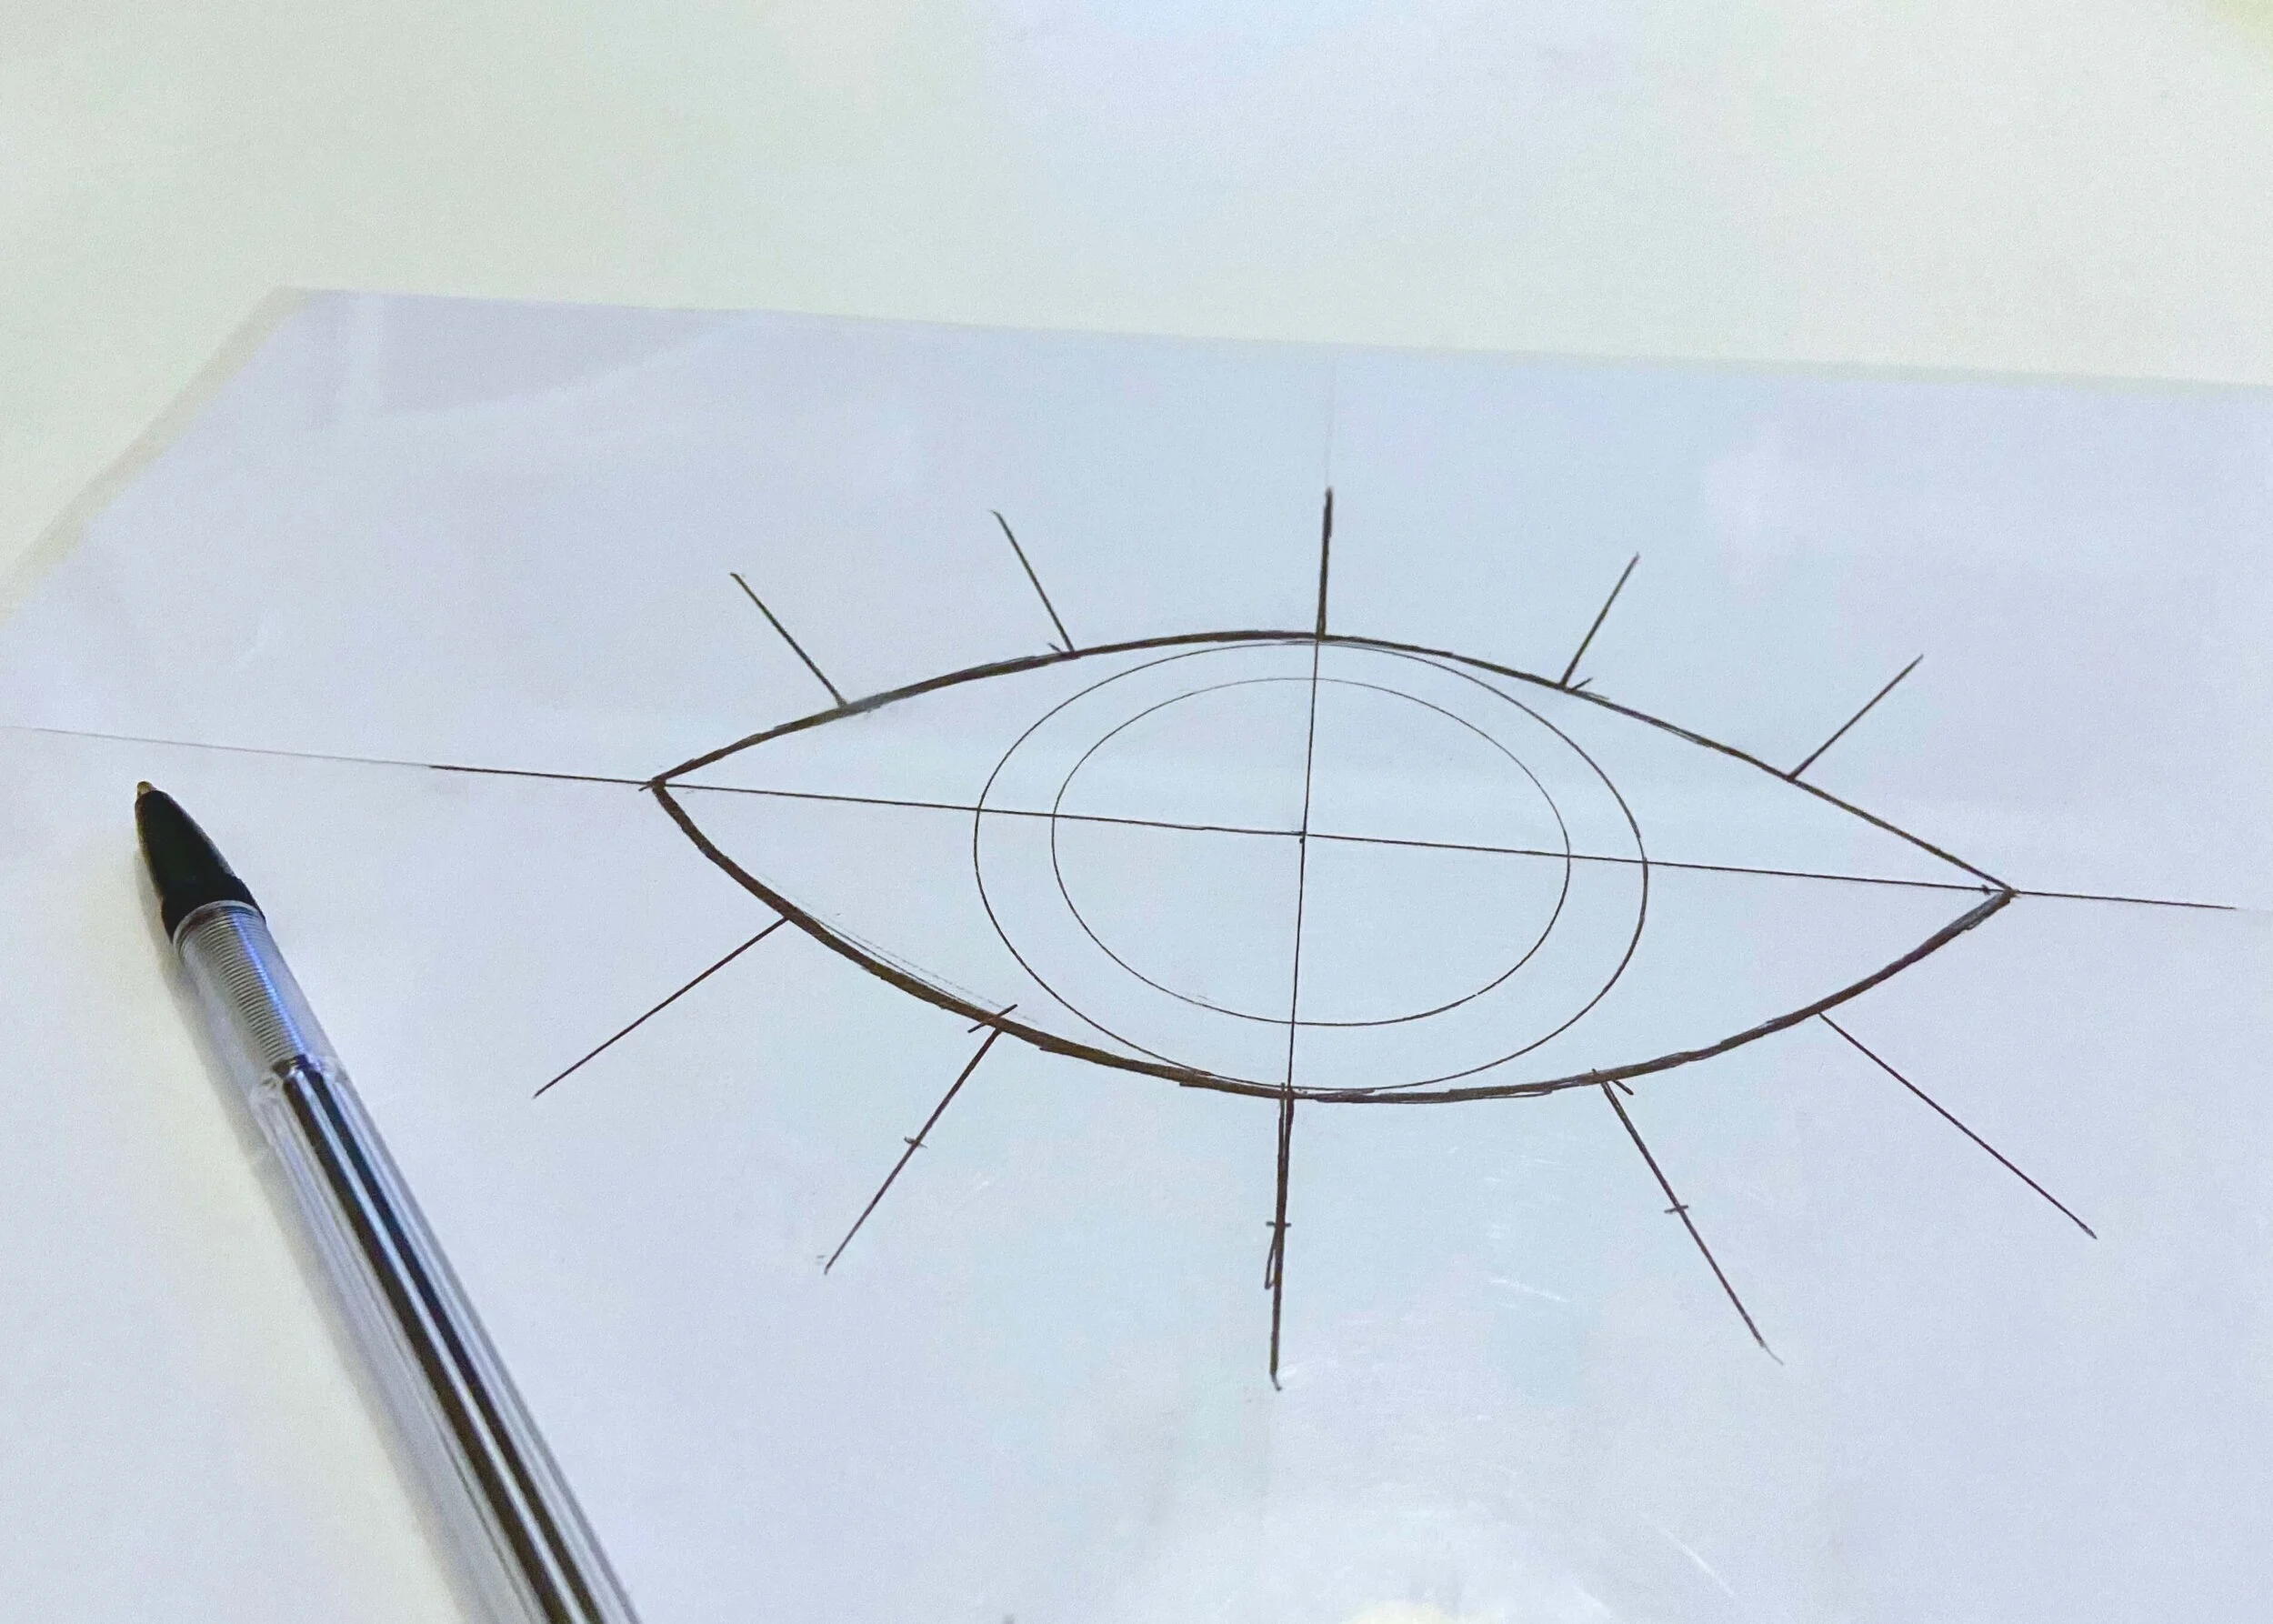
1.
First of all, draw around a glass just slightly larger than your mirror onto a piece of paper. Next, draw an eye shape around this circle, ensuring the top and bottom to touch. To do this easily, draw the top of the eye, fold the paper in half and trace it to create the bottom of the eye. Next draw out 5 straight lines on top, and 5 shorter lines on the bottom (these are the lashes).
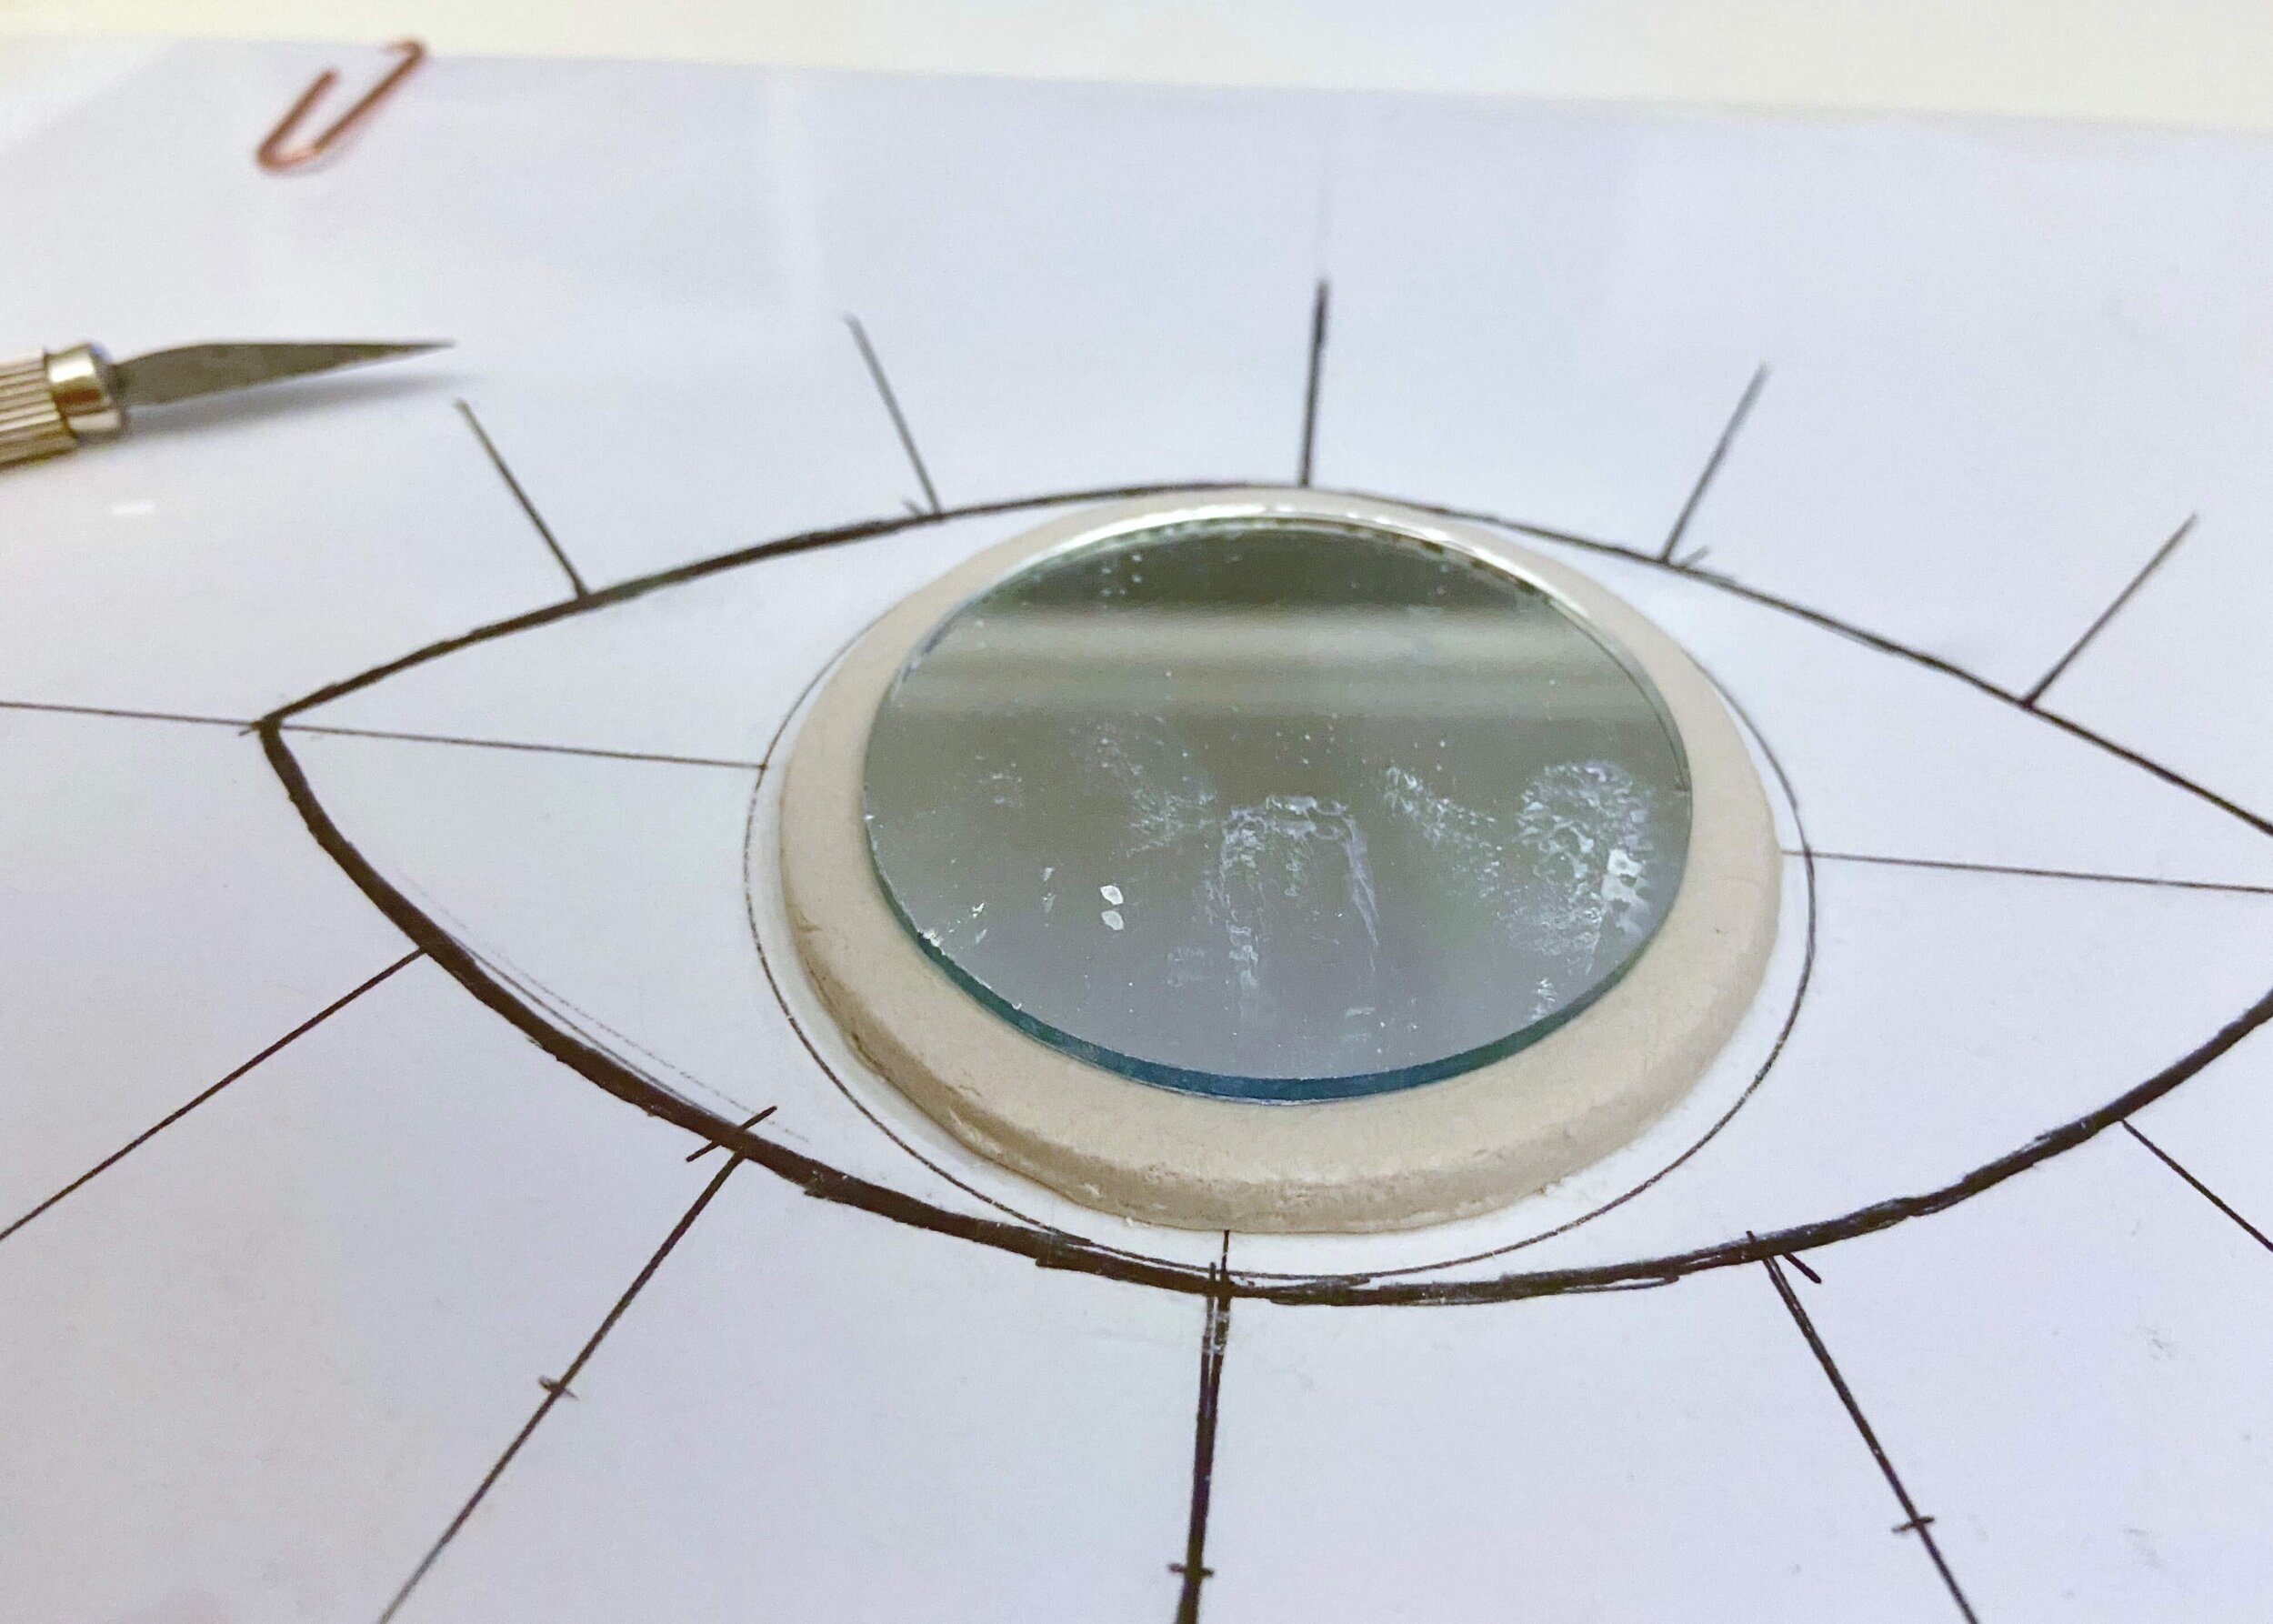
2.
Next, paperclip some acetate on top of your paper template. Cut off some air dry clay, and roll this out to on the acetate. Using the glass from step 1, cut out a circle of clay. Remove the excess and place the circle in the centre of your eye template. Grab your mirror and press this into the clay.
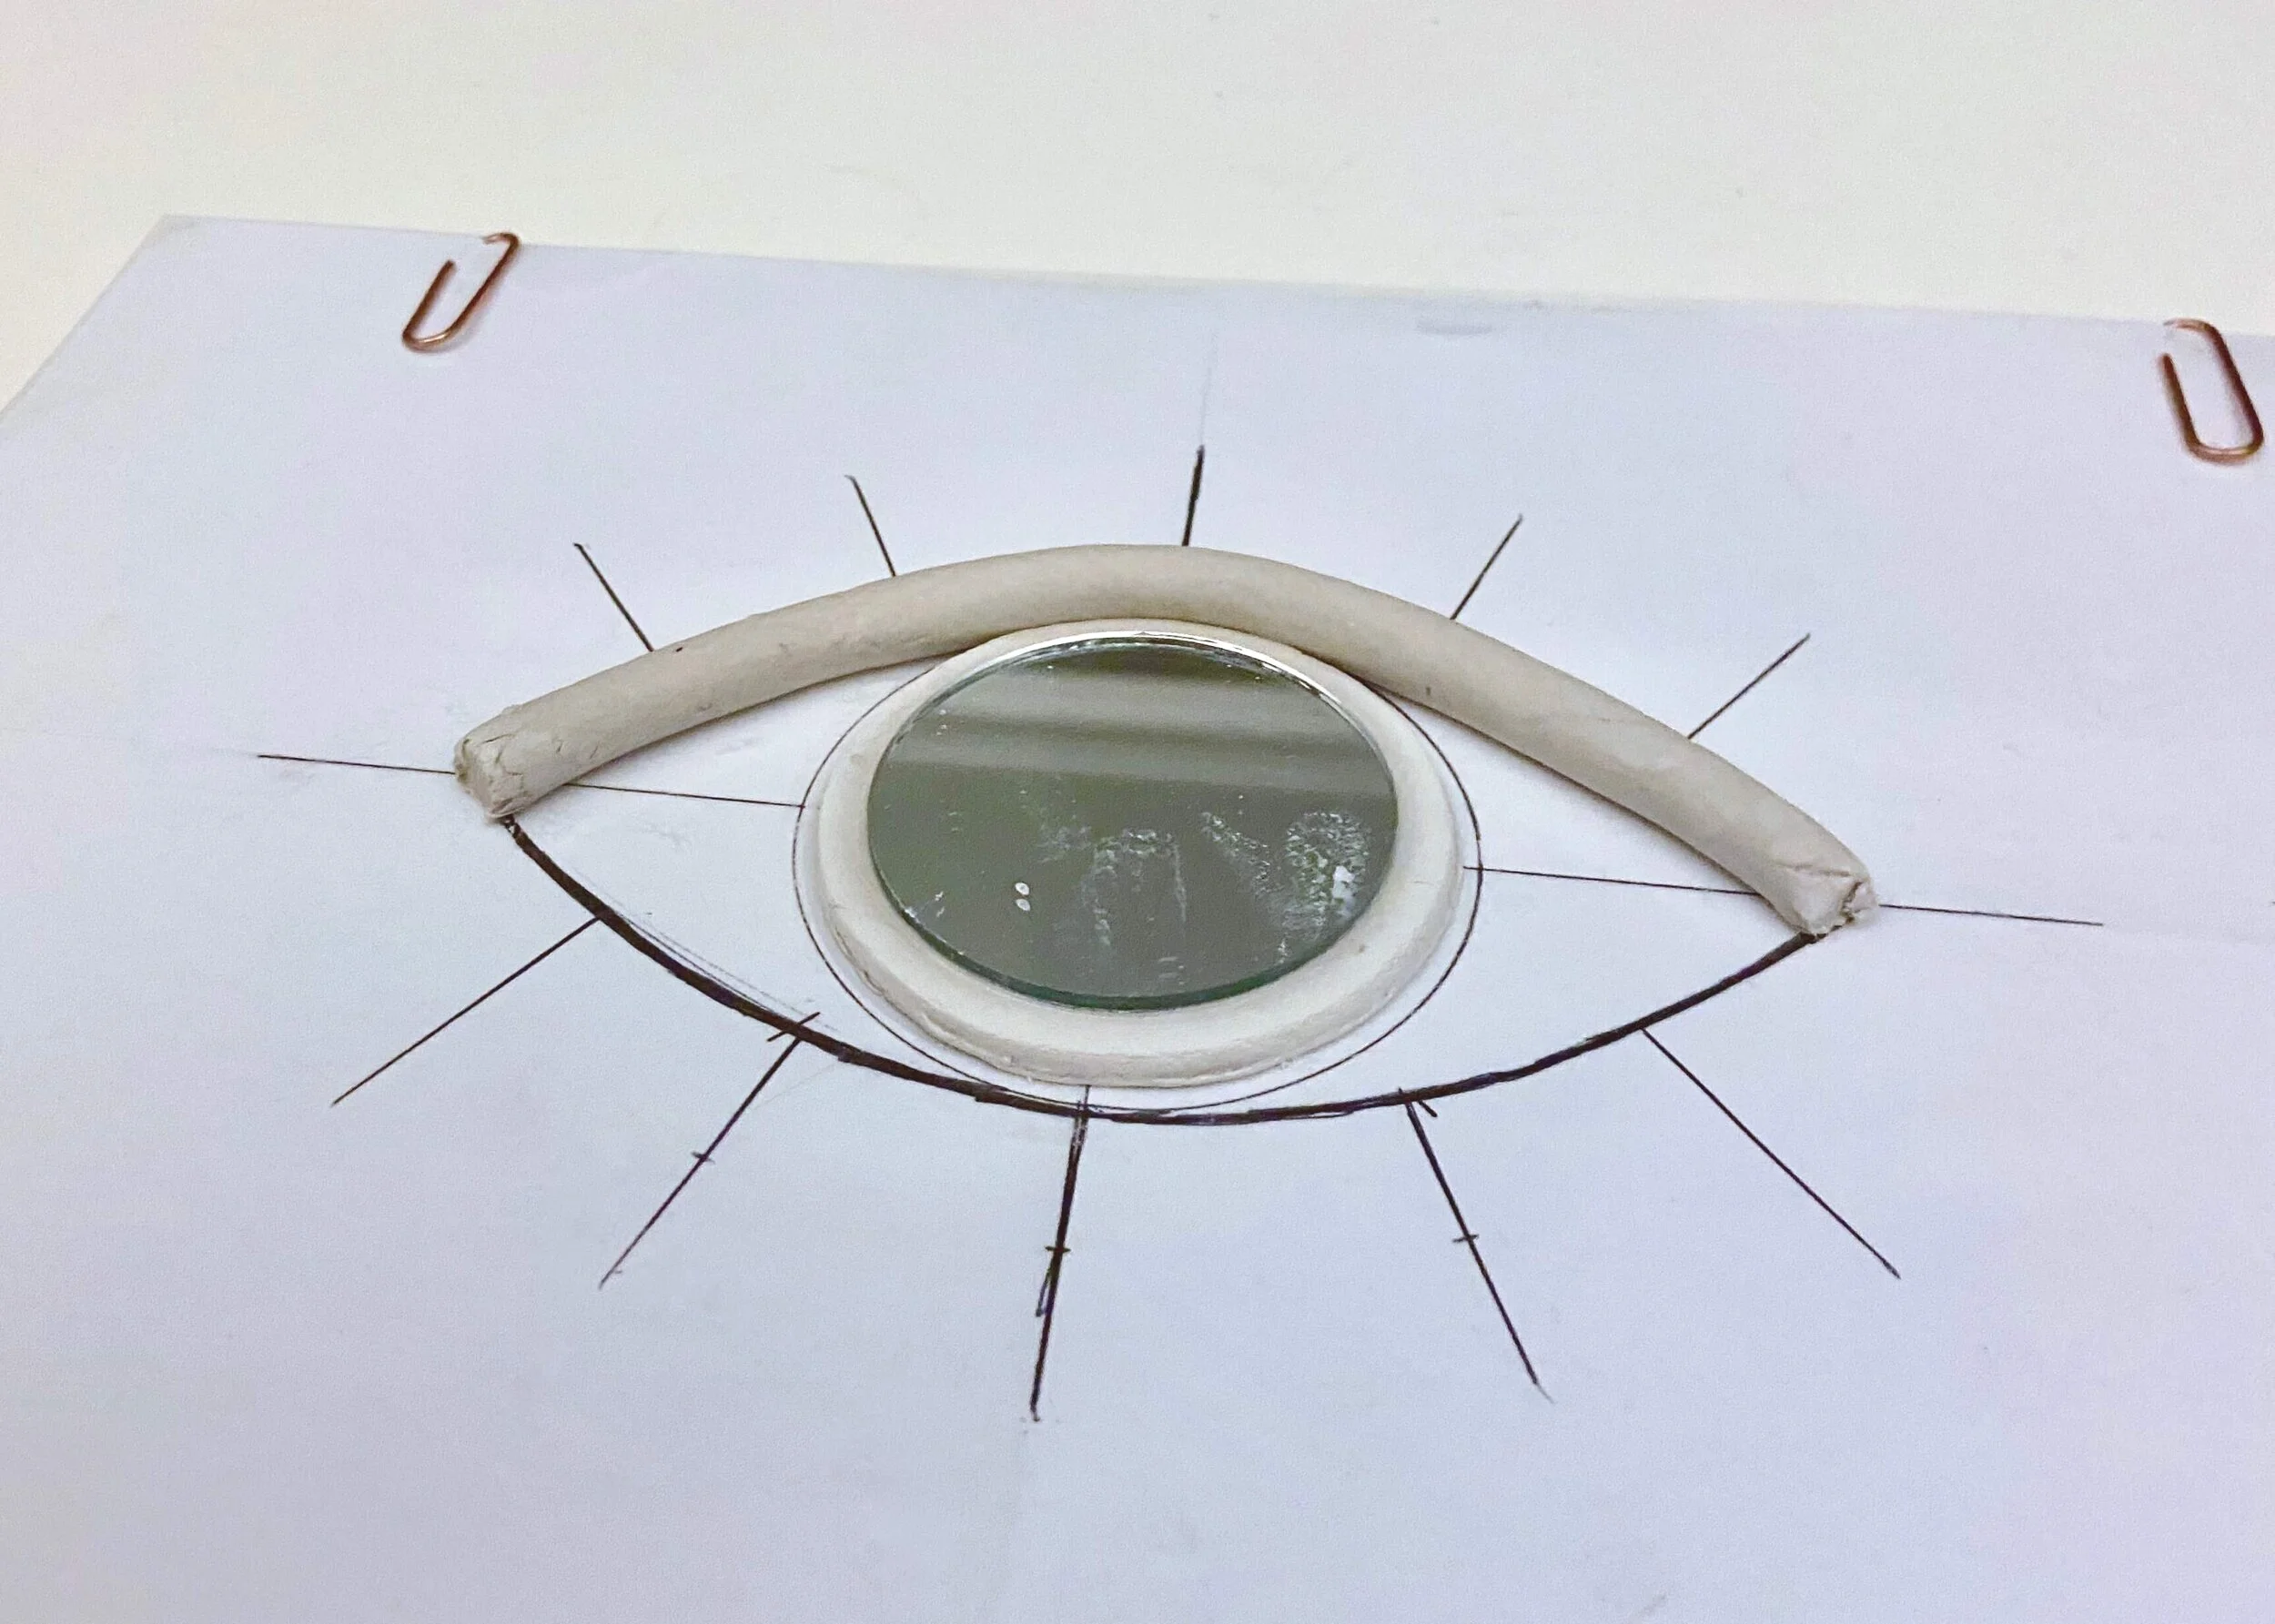
3.
Cut off some more clay, and carefully roll out an evenly thick roll for the top of the eye. Air dry clay can start to crack and stiffen whilst you’re using it, so have some water on hand to keep your clay moist. Position this roll on top line of your eye on your template, ensuring it is pressed against the clay circle.

4.
Repeat step 3 to create another roll of clay that is approximately the same thickness as the top and all along. Place this on the bottom, pressing against the clay circle. Carefully press the top and bottom together. Mix some water and excess clay together to create a pulp. Using this and a paintbrush, blend the top and bottom of the eye together.

5.
Next, create 5 rolls for the top eye lashes, and 5 slightly shorter rolls for the bottom eye lashes. It was so hot when I was doing this my clay was drying really quickly. Use a mix of water and excess clay to create a pulp and use this to ensure the lashes are stuck to the top and bottom of the eye. Use this pulp to ensure the top and bottom of the eye are also properly stuck to the inner circle.

6.
When the top looks completely dry, carefully remove the whole structure from the acetate and turn it over. Using the clay and water pulp, fill any gaps and make sure all of the clay pieces are stuck together,

7.
Leave this until it is all completely dry, use your nail to gently remove any clay from the top of the mirror. Mix up the colour you would like your eye to be in acrylic paint and then paint the clay all over. Leave to dry thoroughly. Finally, choose where you want your eye to go, and using a command strip stick it to your wall.


