• ABOUT ME
    • PRIVACY POLICY
  • COLLABORATE
  • BLOG
    • ART
    • WEDDING
    • LIBRARY
    • DECOR
    • JEWELLERY
    • STATIONARY
    • NAIL ART
    • BAKING
    • CHRISTMAS
    • EASTER
    • ART PRINTS
    • WEDDING STATIONARY
  • CONTACT
Menu

ISOSCELLA

Street Address
City, State, Zip
Phone Number

Your Custom Text Here

ISOSCELLA

  • ABOUT
    • ABOUT ME
    • PRIVACY POLICY
  • COLLABORATE
  • BLOG
  • ART
    • ART
    • WEDDING
    • LIBRARY
  • DIY
    • DECOR
    • JEWELLERY
    • STATIONARY
    • NAIL ART
    • BAKING
    • CHRISTMAS
    • EASTER
  • SHOP
    • ART PRINTS
    • WEDDING STATIONARY
  • CONTACT

DIY // POM POMS WITH A FORK

April 4, 2016 isoscella

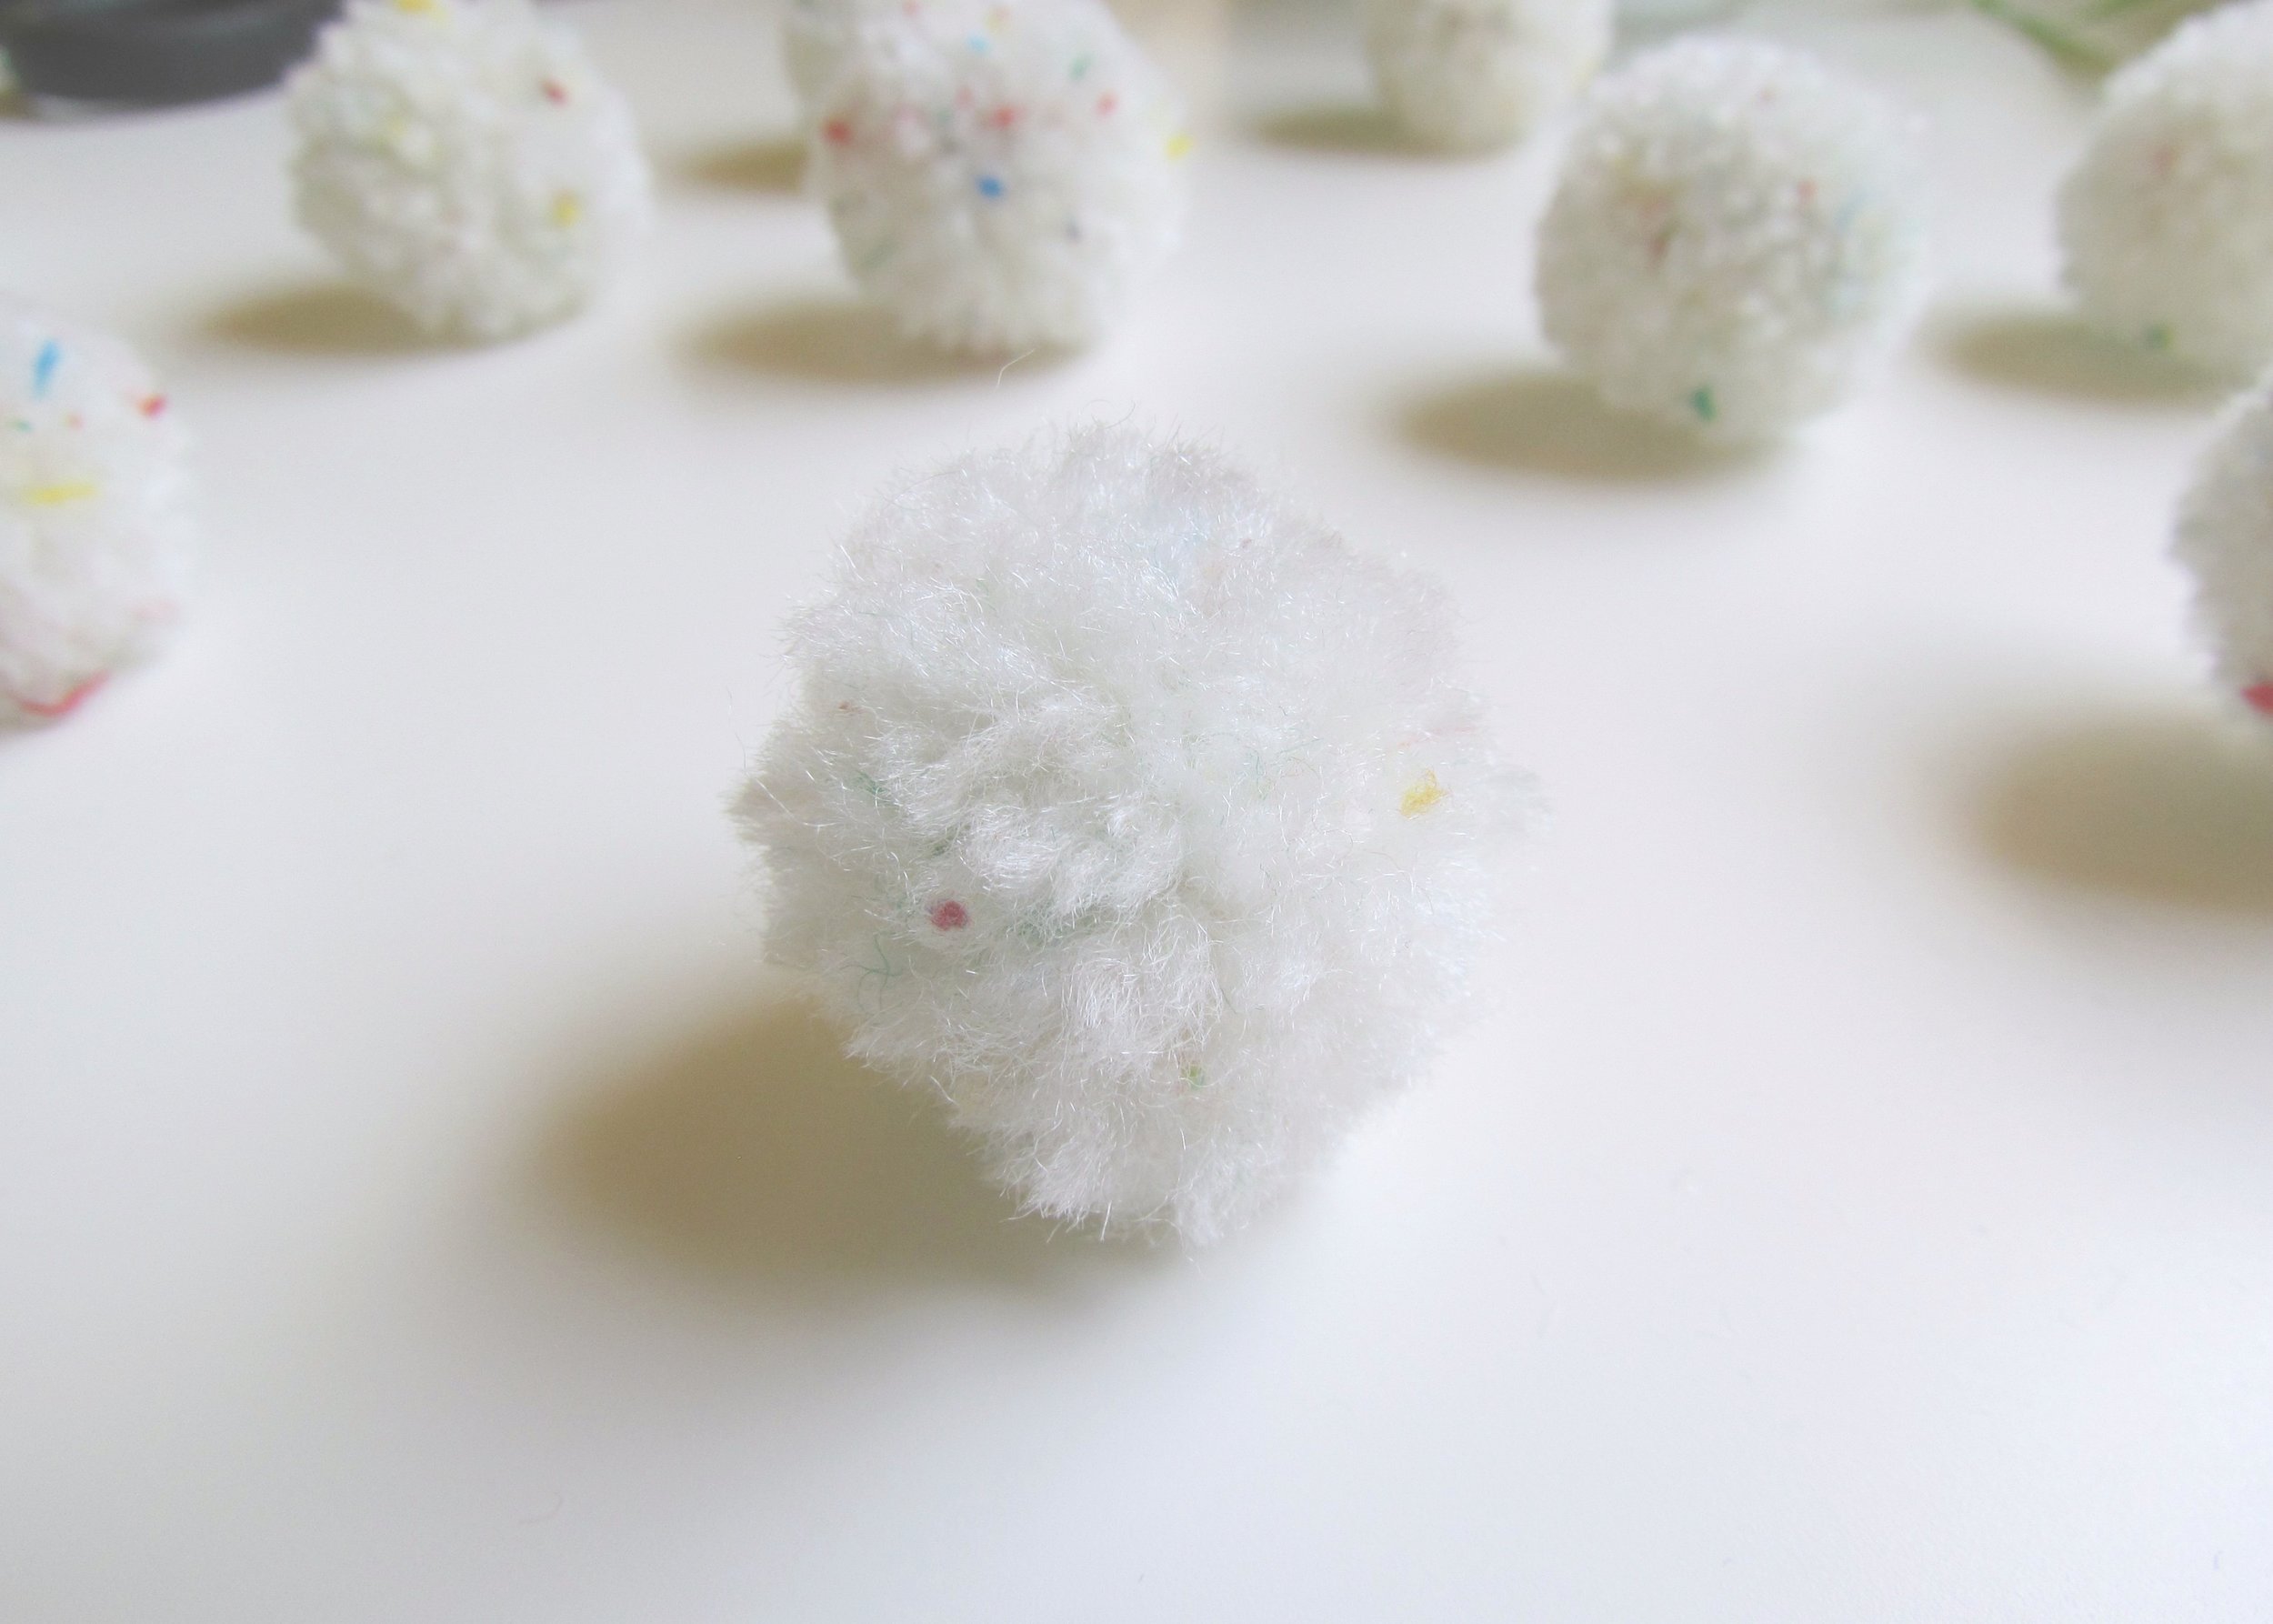
It's not long until my birthday (yipee!) and although very exciting, I typically hadn't given it much thought until Easter Sunday; when the family gathered and everyone started asking me what I wanted for my birthday. I'm pretty useless when it comes to my birthday, I never know what I want and so after a lot of deflecting, my mum finally pinned me down and we went shopping. Whilst out, I stumbled across a jumper covered in pom poms and it got me thinking about making some of my own. On my way home, I popped into a craft shop and bought myself some wool. I wanted something subtle but colourful (contradictory I know!) but found this gorgeous Dolly Mix white wool which has flecks of red, yellow, green and blue in it. I've got lots of ideas for future pom pom-based DIY's and so thought it would be helpful to start with the basics and share with you how I made them.

Wool or Yarn                         Fork                          Sharp scissors

1. Cut off a short length of wool (Wool A). This piece of wool will act as the middle of our pom pom and hold everything together. I have this as the first step as it can be handy to have it ready and waiting for when you need it.

2. Take the end of the wool (that is still attached to the ball; Wool B) and place it in the fork. This wool needs to between the first and second prong of the fork (as above). Hold the fork in your left hand, and use your thumb to hold this end of wool down.

3. Wrap wool B around the fork approximately 50 times. Holding the fork in your left hand and holding wool A down with your thumb, use your right hand to wrap the wool around the fork on top of the end your thumb is holding down. Wrap around approximately 50 times.

4. Cut the wool (Wool B) so that the ball is no longer attached. This should be holding itself in place nicely now so put the fork down and cut wool B so that it is no longer attached to the wool ball.

5. Using wool A wrap a single loose knot around the wrapped wool (wool B). To do this, keep hold of the end of wool B and push the wrapped wool up the fork so that you have some space above and below it. Push the short length of wool (Wool A), through the second and third prongs under the wrapped wool (Wool B) and bring the two ends up and over the wrapped wool to tie a single loose knot.

6. Remove the fork and secure the knot with a second tight knot. Holding on to wool A, pull or push the wrapped wool (wool B) off of the fork. Tighten the knot in wool A and secure it tightly with a second knot.

7. Using the scissors, trim off any excess wool. At this point, you are likely to have 3 pieces of wool that are wider than the radius of the wrapped wool. Trim all of these so that they are the same length as the radius or just slightly longer.

8. Cut through the loops of the wrapped wool (Wool B) to create the pom pom. For this step you need really sharp scissors. Pick up your wrapped wool (which will be something like a flat-ish disc at this point). Holding it in one hand, use your scissors at the edges of the 'disc' to cut through the loops of wool.

9. Shape the pom pom in your hands roughly. Now that all the wool is released, you should have something that looks a bit like a disheveled pom pom. Roll this between the palms of your hands to make it a bit more spherical.

10. Using the scissors, trim the pom pom to make it more uniformly round. This is possibly my favourite step and each and every time makes me question whether I should have been a hairdresser. Use your scissors to give your pom pom a lovely little haircut and make it look as uniformly round as you can.

This is such a simple way of making pom poms and even better, you only need a few materials, 2 of which (the fork and scissors) you've probably already got! Once you've got the hang of it, its quite a cathartic process and one in which it is pretty easy to mindlessly bash out one pom pom after the other. I'm not sure who first came up with this particular method, sadly it wasn't me, but whoever you are, I applaud you! 

Let me know if you guys found this post helpful and be sure to follow me on bloglovin, twitter or instagram to stay up to date!

♥

YOU MIGHT ALSO LIKE...
Wooden Mushroom Decor
Apr 26, 2025
Wooden Mushroom Decor
Apr 26, 2025
Apr 26, 2025
Hand-Painted Floral Mural Arch
Mar 29, 2025
Hand-Painted Floral Mural Arch
Mar 29, 2025
Mar 29, 2025
Easy IKEA Antilop Makeover
Mar 1, 2025
Easy IKEA Antilop Makeover
Mar 1, 2025
Mar 1, 2025
Clay Leaf Shelf
Jun 29, 2024
Clay Leaf Shelf
Jun 29, 2024
Jun 29, 2024
Nursery Feature Wall
Jun 15, 2024
Nursery Feature Wall
Jun 15, 2024
Jun 15, 2024
Hallway Wall Niche
Jun 8, 2024
Hallway Wall Niche
Jun 8, 2024
Jun 8, 2024
Ikea Hemnes Drawer Hack
May 4, 2024
Ikea Hemnes Drawer Hack
May 4, 2024
May 4, 2024
Pressed Flower Taper Candle
Apr 20, 2024
Pressed Flower Taper Candle
Apr 20, 2024
Apr 20, 2024
Pressed Flower Egg Ornaments
Apr 10, 2024
Pressed Flower Egg Ornaments
Apr 10, 2024
Apr 10, 2024
Scalloped Edge Colour Blocking
Mar 2, 2024
Scalloped Edge Colour Blocking
Mar 2, 2024
Mar 2, 2024
In DIY Tags home
← 5 FAVES FRIDAY // DIY GIFTS FOR MUMART // HAPPY EASTER! →
 

Decorating, DIY-ing and doodling my way through life. Have a look around and let’s get creative!

>> FIND OUT MORE <<

Follow
The office is still one of my favourite transformations in the house! 😍

I started by panelling the wall with MDF strips and then painted the wall with a mix of colours. I used three IKEA drawer units for the base of the desk and then secured the de

ART

DIY

LIFE


THE LATEST

Featured
Wooden Mushroom Decor
Apr 26, 2025
Wooden Mushroom Decor
Apr 26, 2025
Apr 26, 2025
Hand-Painted Floral Mural Arch
Mar 29, 2025
Hand-Painted Floral Mural Arch
Mar 29, 2025
Mar 29, 2025
Easy IKEA Antilop Makeover
Mar 1, 2025
Easy IKEA Antilop Makeover
Mar 1, 2025
Mar 1, 2025
Clay Leaf Shelf
Jun 29, 2024
Clay Leaf Shelf
Jun 29, 2024
Jun 29, 2024
Nursery Feature Wall
Jun 15, 2024
Nursery Feature Wall
Jun 15, 2024
Jun 15, 2024


THE GREATEST

Featured
DIY // IKEA LACK TABLE INDUSTRIAL HACK
Sep 22, 2020
DIY
DIY // IKEA LACK TABLE INDUSTRIAL HACK
Sep 22, 2020
DIY
Sep 22, 2020
DIY
DIY // CLAY ALL-SEEING EYE MIRROR
Aug 14, 2020
DIY
DIY // CLAY ALL-SEEING EYE MIRROR
Aug 14, 2020
DIY
Aug 14, 2020
DIY
DIY // CLAY FACE DISH
Apr 29, 2020
DIY
DIY // CLAY FACE DISH
Apr 29, 2020
DIY
Apr 29, 2020
DIY
DIY // ABSTRACT ART FLORAL EGGS
Mar 25, 2020
DIY
DIY // ABSTRACT ART FLORAL EGGS
Mar 25, 2020
DIY
Mar 25, 2020
DIY
DIY // WIRE FACE EARRINGS
Feb 16, 2020
DIY
DIY // WIRE FACE EARRINGS
Feb 16, 2020
DIY
Feb 16, 2020
DIY

Follow
^^ BACK TO TOP
How does Monday come round so quick?!Wishing I could cosy up here today ✨

#mondaymood #storyofmyhome #mydailyhomesquare #interiordesign #budgetdiy #realstylishhomes #ourdiyhomes #femalediycollective #discoverunder5k #myhousethismonth #myhousedownsou
I&rsquo;ve got the day off today (woop!) and although it&rsquo;s not quite warm enough to sit out here yet, the sun is shining and I think a little walk to blow out the cobwebs is exactly what I need. Hope Monday is treating you well! ☀️

#summerdrea
Had such a lovely day seeing one of my besties and her adorable new baby that I completely forgot to share today&rsquo;s new blog post!

Head over to the blog for all the details of this easy DIY ring dish 🔝✨

#diy #diyhomedecor #diyhome #diyvalenti
That sunshine 👌🏻☀️

#mycosyhome #livingroomdecor #livingroominspo #mydiymydecor #homeobsessed #lovemydecor #homeinterioruk #discoverunder5k #diyhome #diyhomedecor #myhousethismonth #myhousedownsouth #realstylishhomes #ourdiyhomes #happythursday #in
A little corner our home on this chilly Tuesday morning ✨
.
.
#interior #homeobsessed #mycosyhome #homeinterioruk #instadecorating #homesofinstagram #happymonday #mondaymotivation #instainteriors #cornersofmyhome #myhousethismonth #myhousedownsouth #

Copyright 2021 isoscella. All rights reserved.

Powered by Squarespace