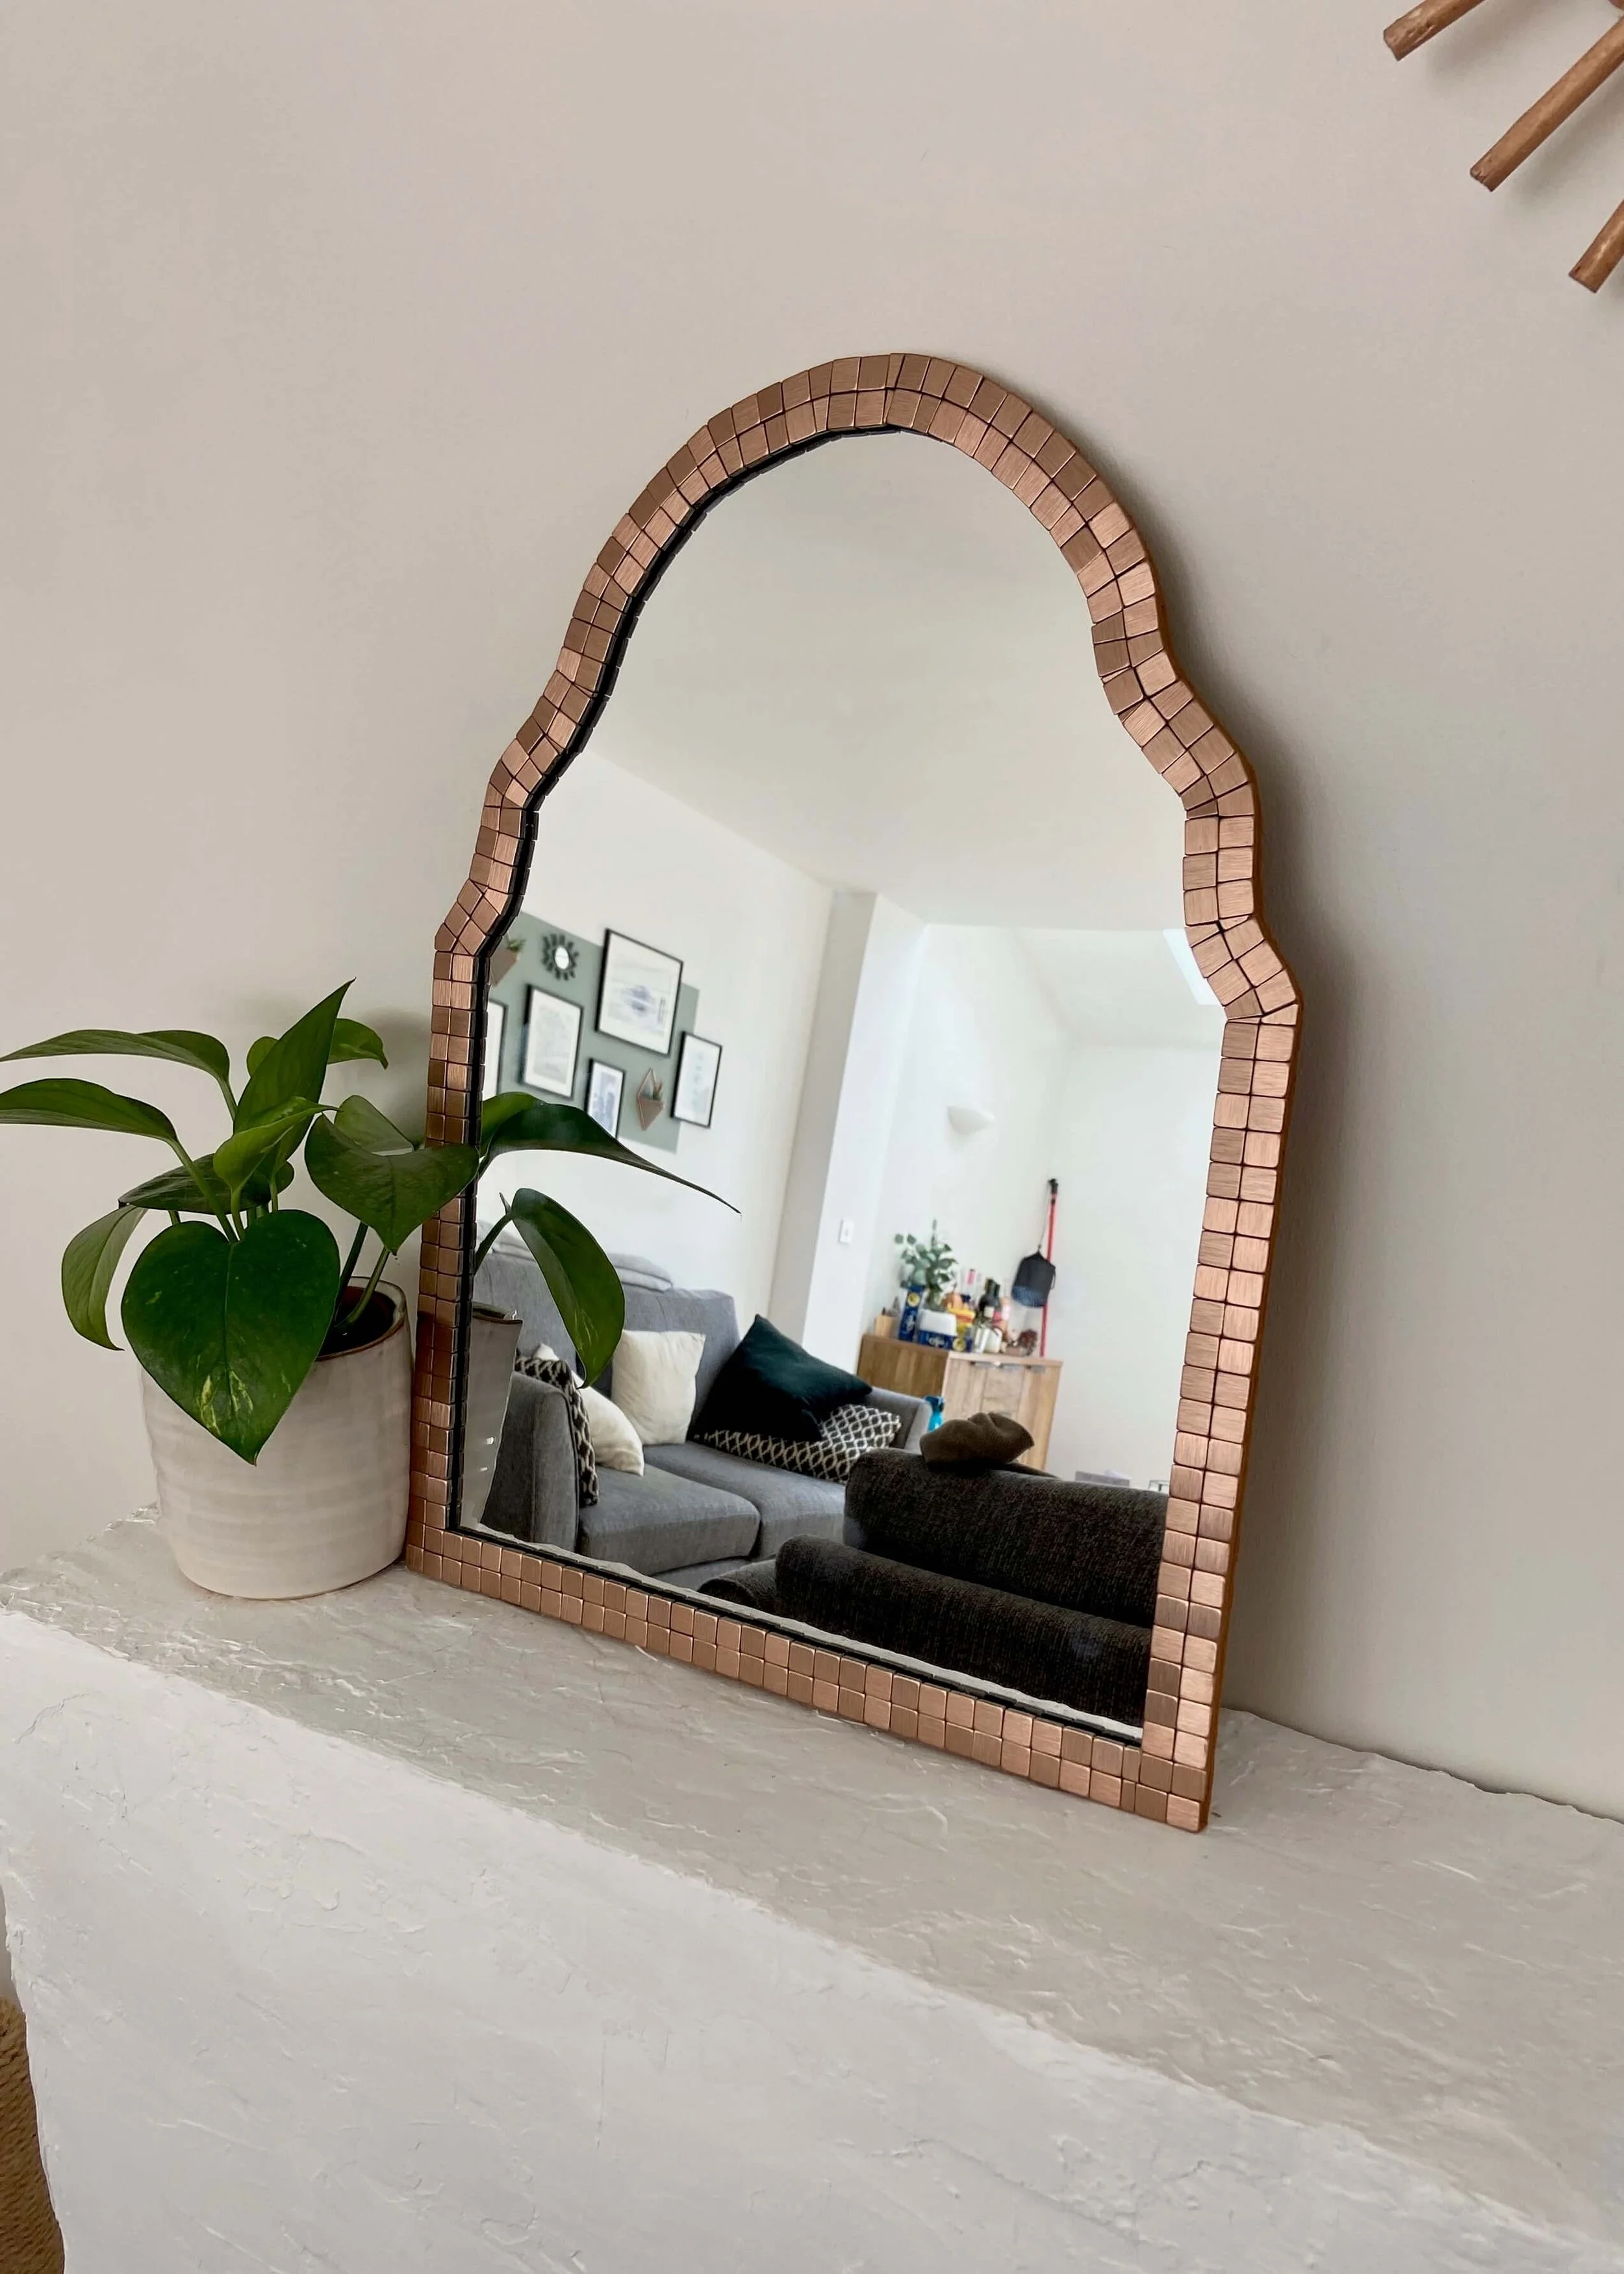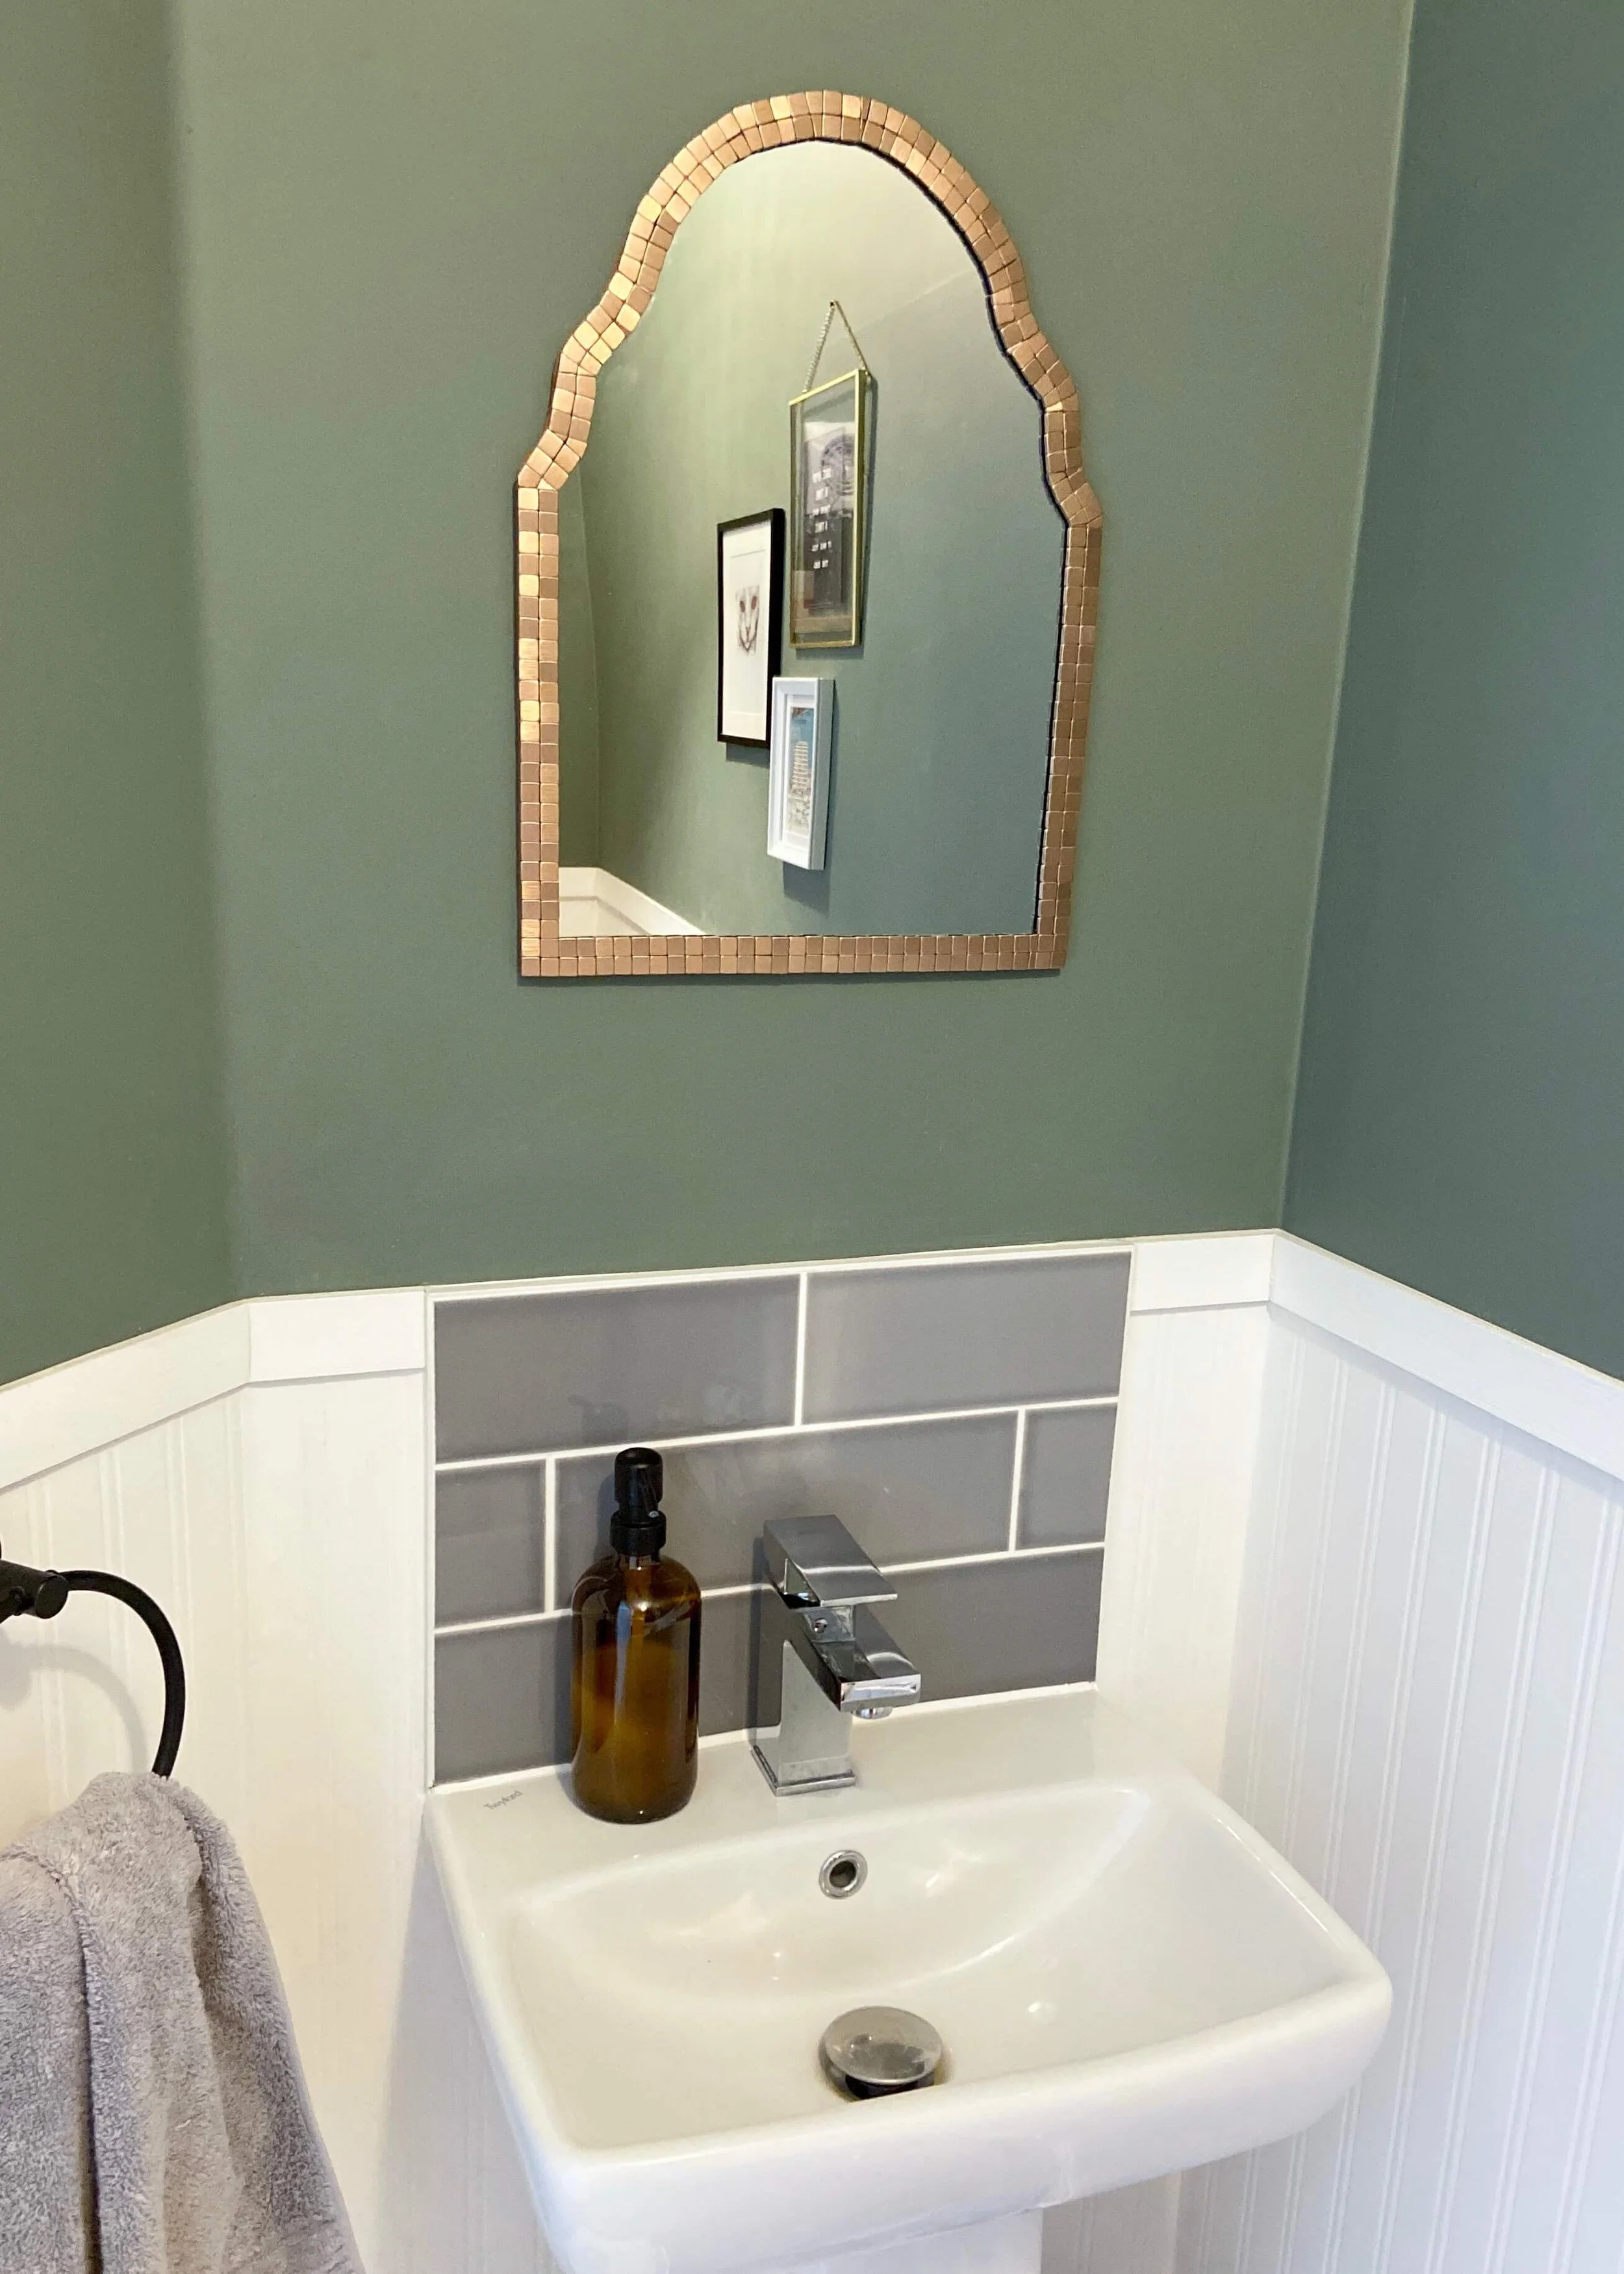
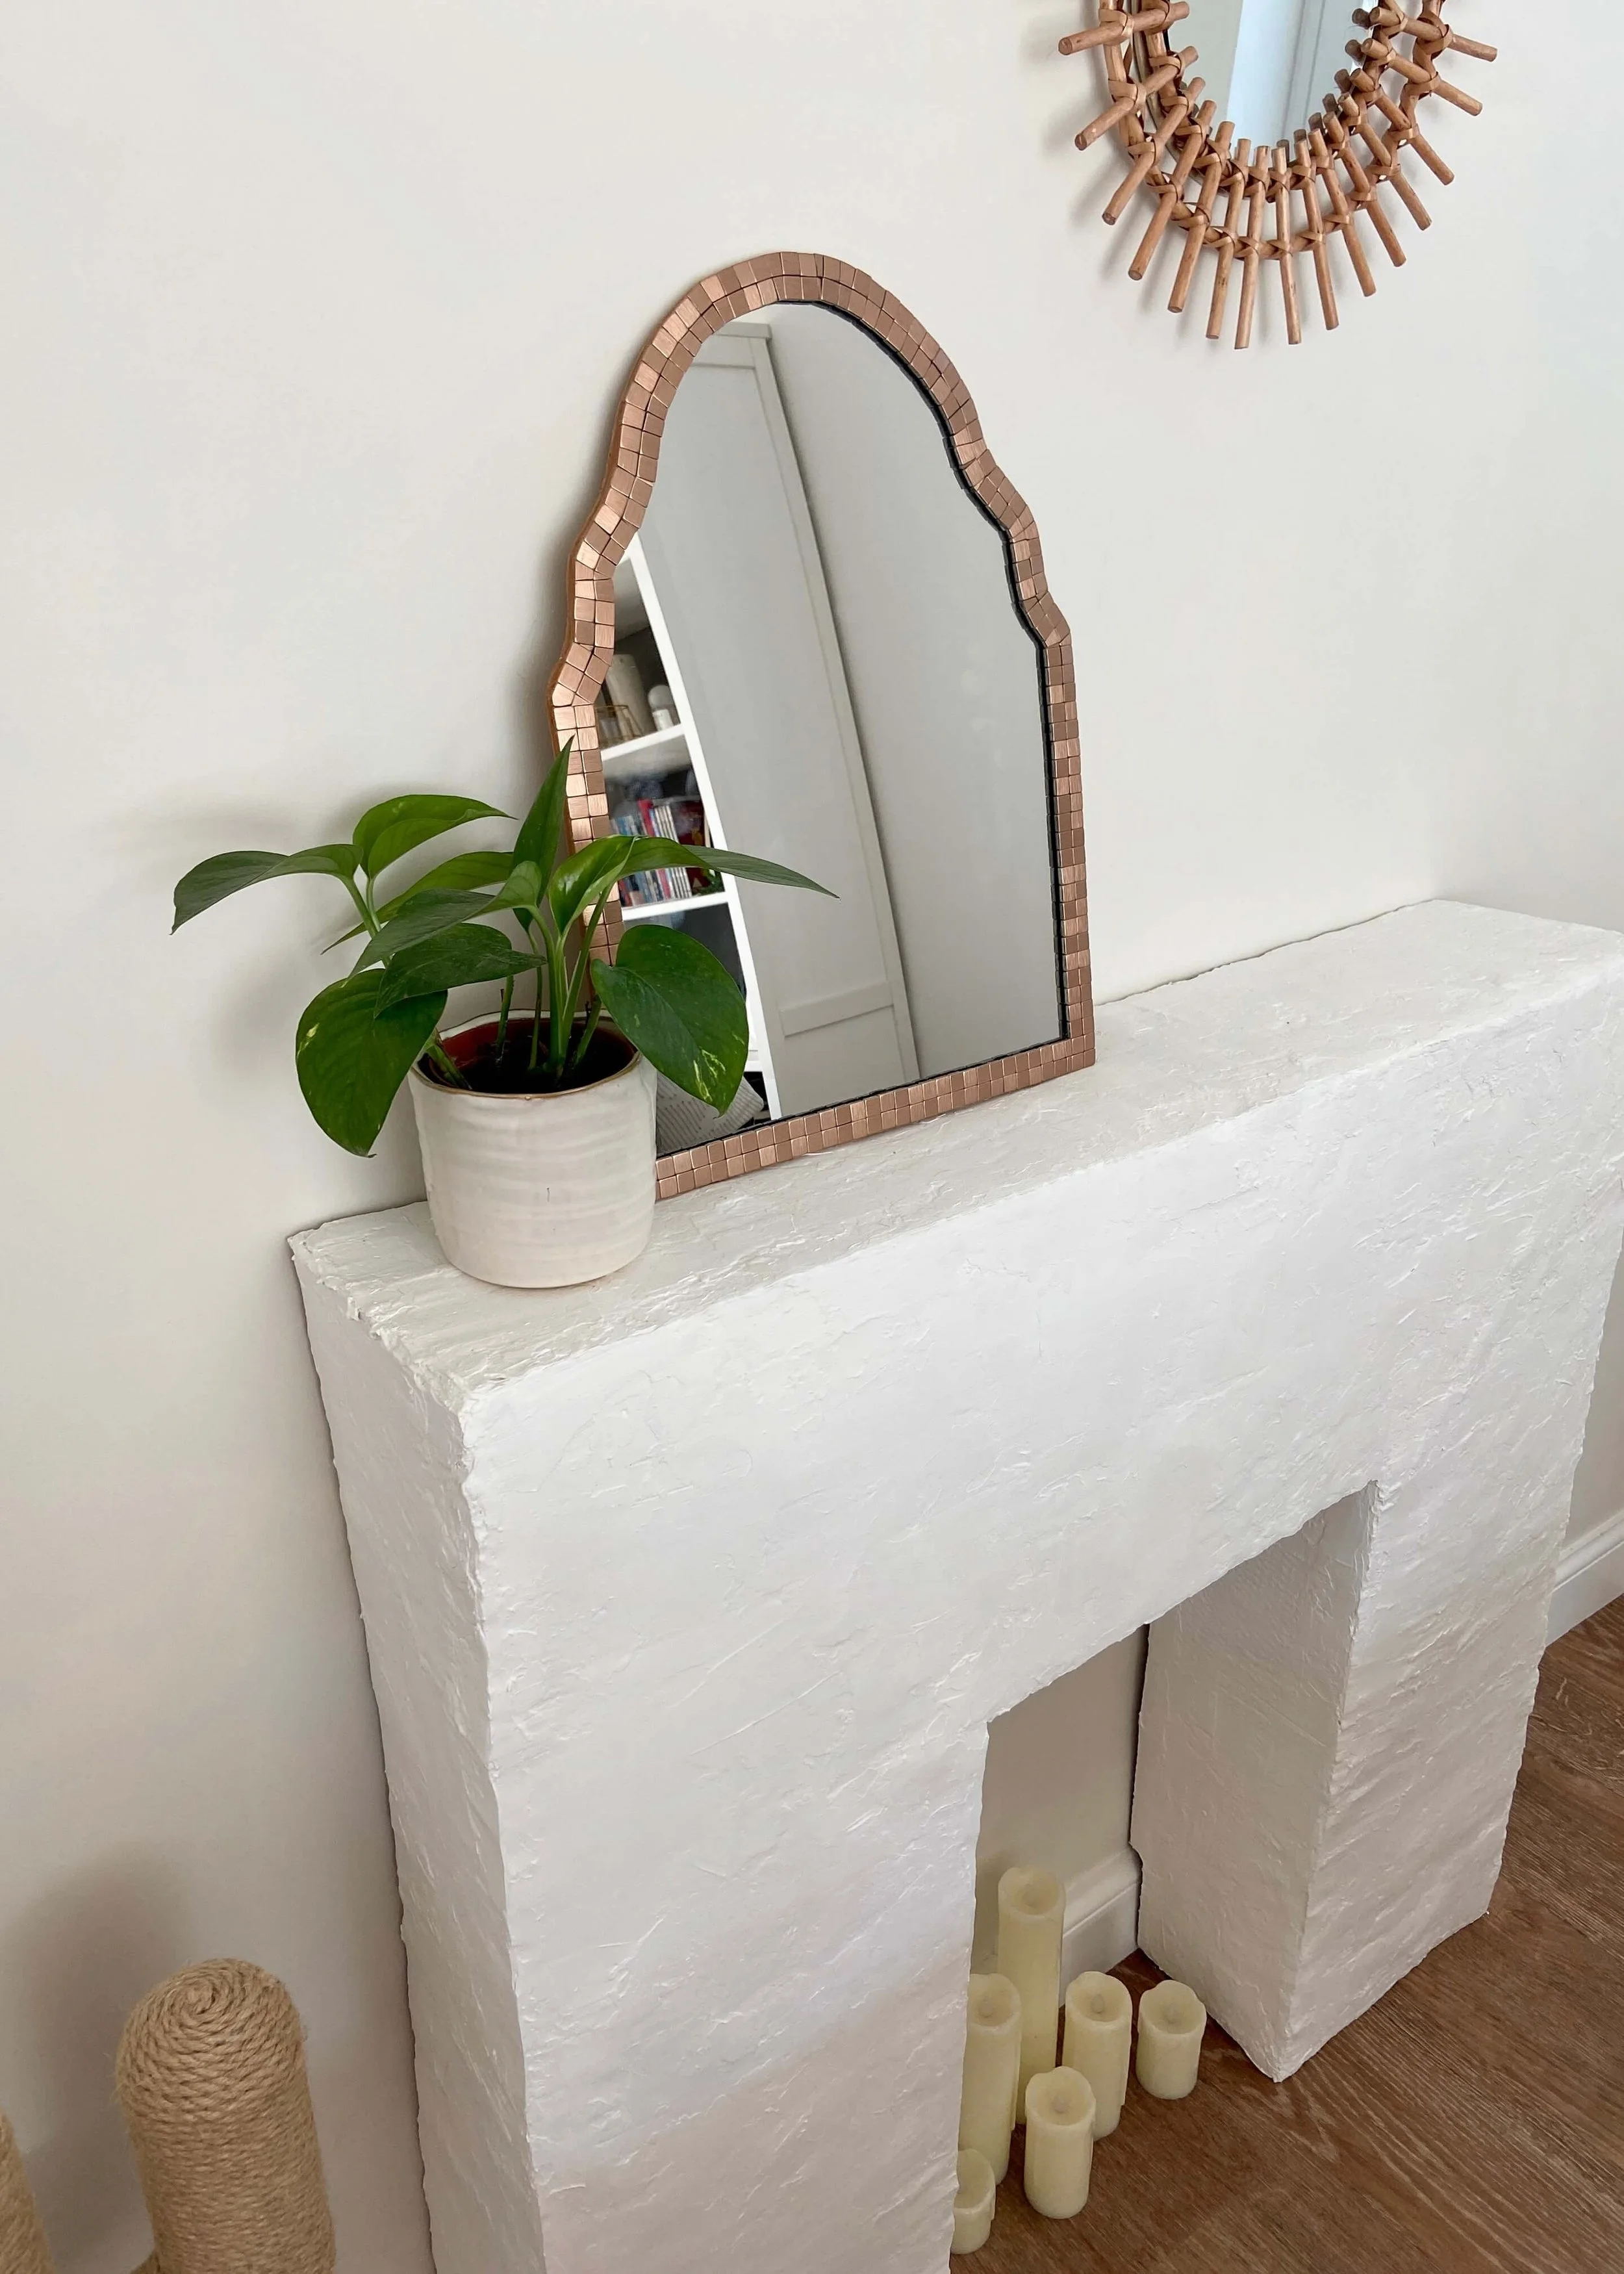
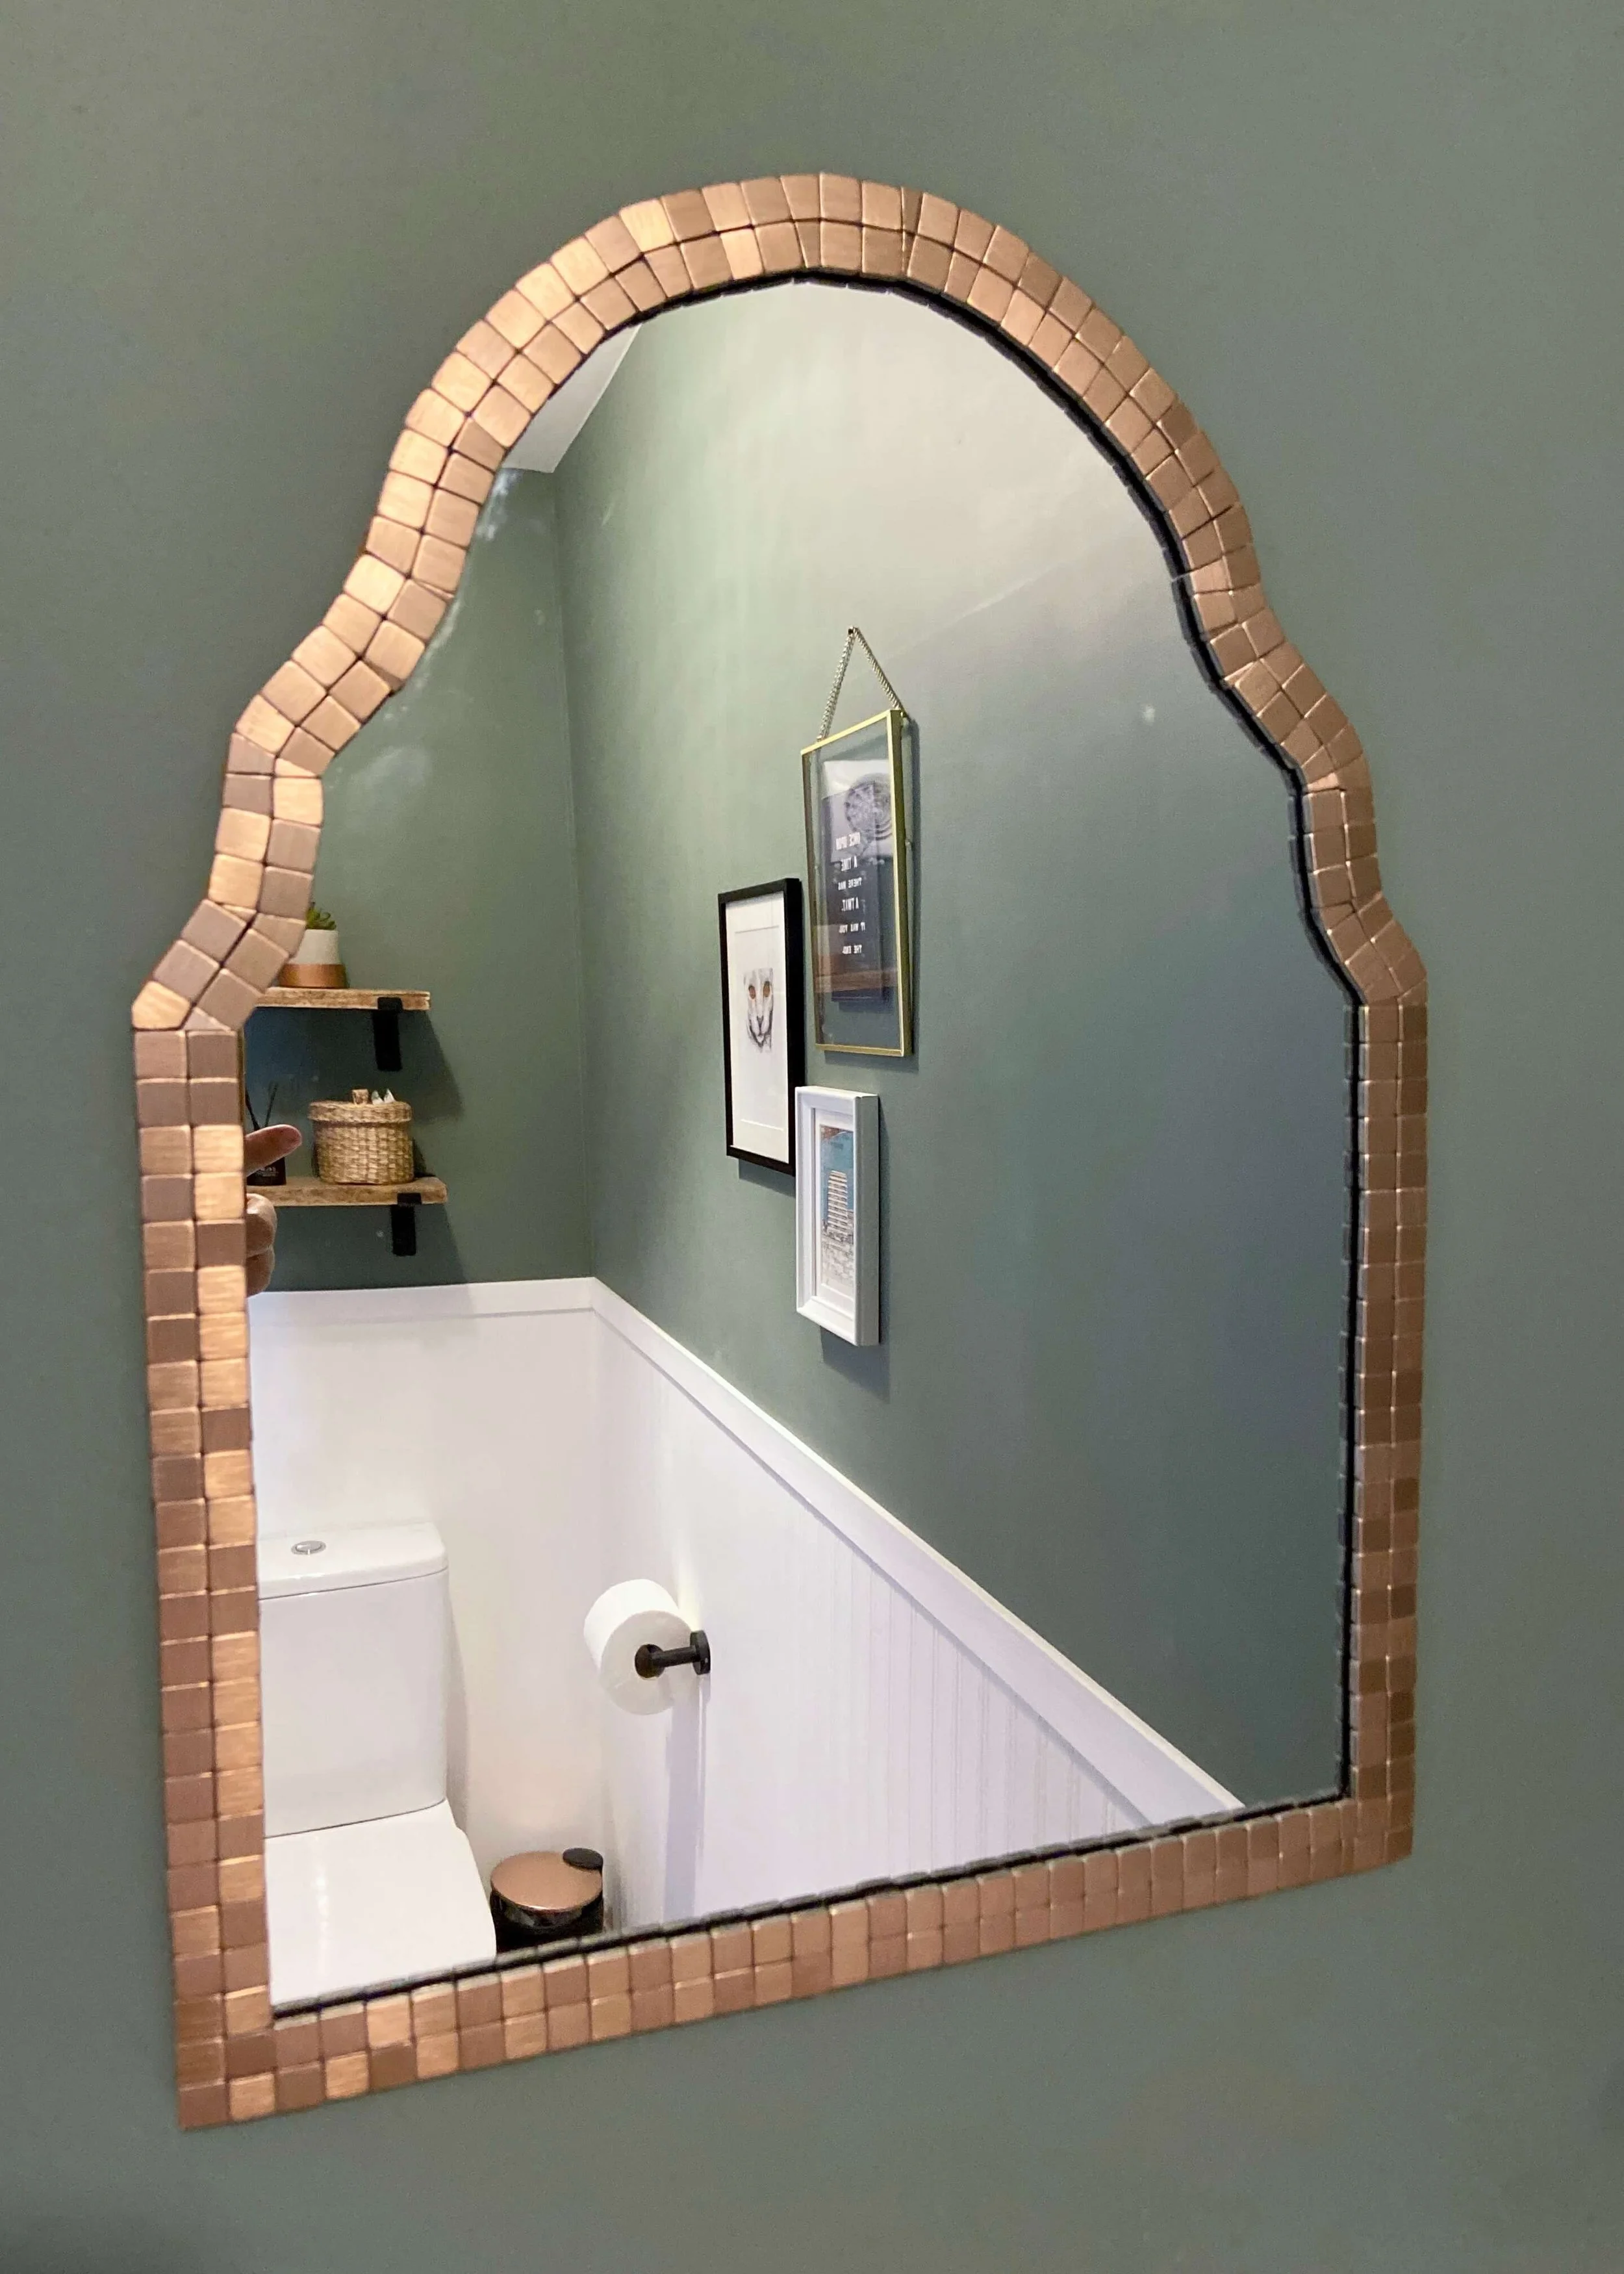
Hack your own moroccan-inspired mirror in a few steps!
Morocco is by far one of my favourite places to have ever visited and I have long since been in love with it’s architecture and textiles. Recently, I’ve noticed so many shops stocking moroccan style mirrors, which adopt the beautifully detailed arches and curved doorways and details that are characteristic of traditional moroccan architecture. I’ve been looking for some moroccan patterned tiles for the garden and already have a berber rug in the lounge, so when I was looking for a mirror for our cloakroom, this one from Oliver Bonas just made sense. I love how how it adopts the moroccan curved design whilst bringing in hints of art deco with the mirrored tiles. Of course, the bronze version that I wanted was both on sale but out of stock, and so I knew I had to try and make my own version. Keep reading to find out how I made my own version of the organic-shaped mirror…


1.
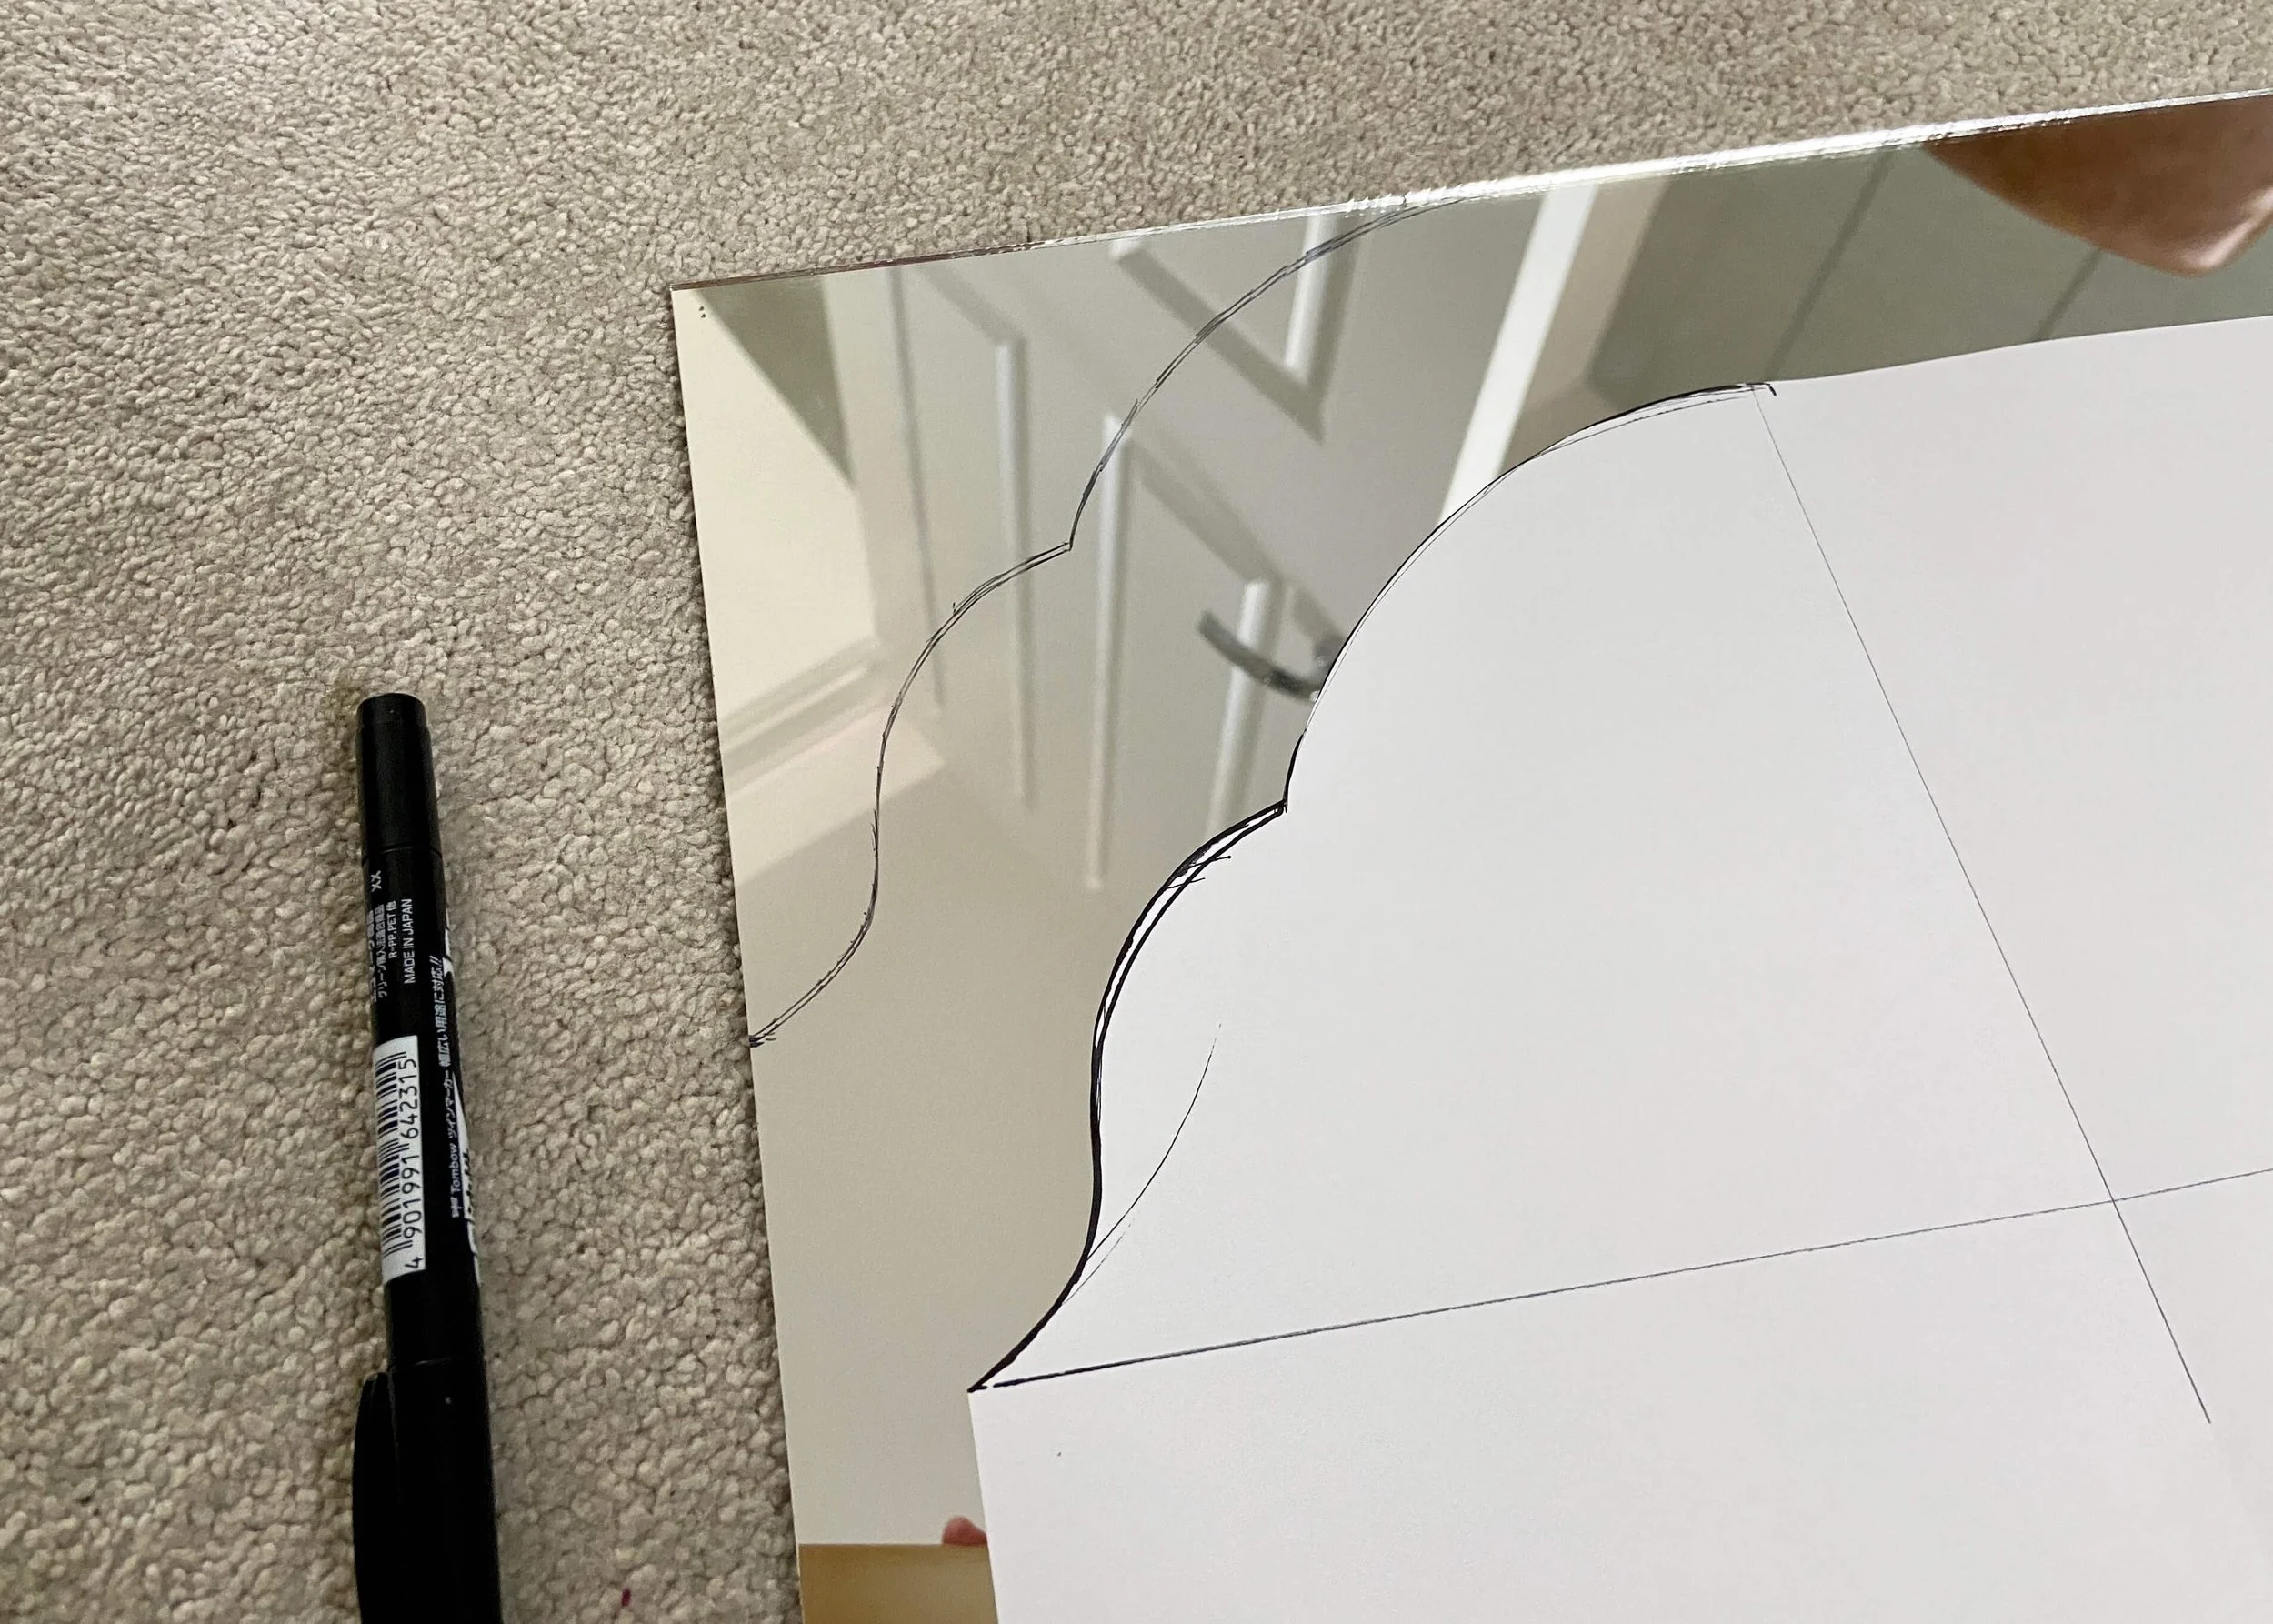
First of all, measure the mid point of your mirror and use a piece of paper to draw out half the arch shape you want. Cut this out and transfer onto your mirror with a permanent marker.
2.
Flip this template over and use it to draw the arch shape on the other half of the mirror. Using the same template will ensure it’s symmetrical.
3.
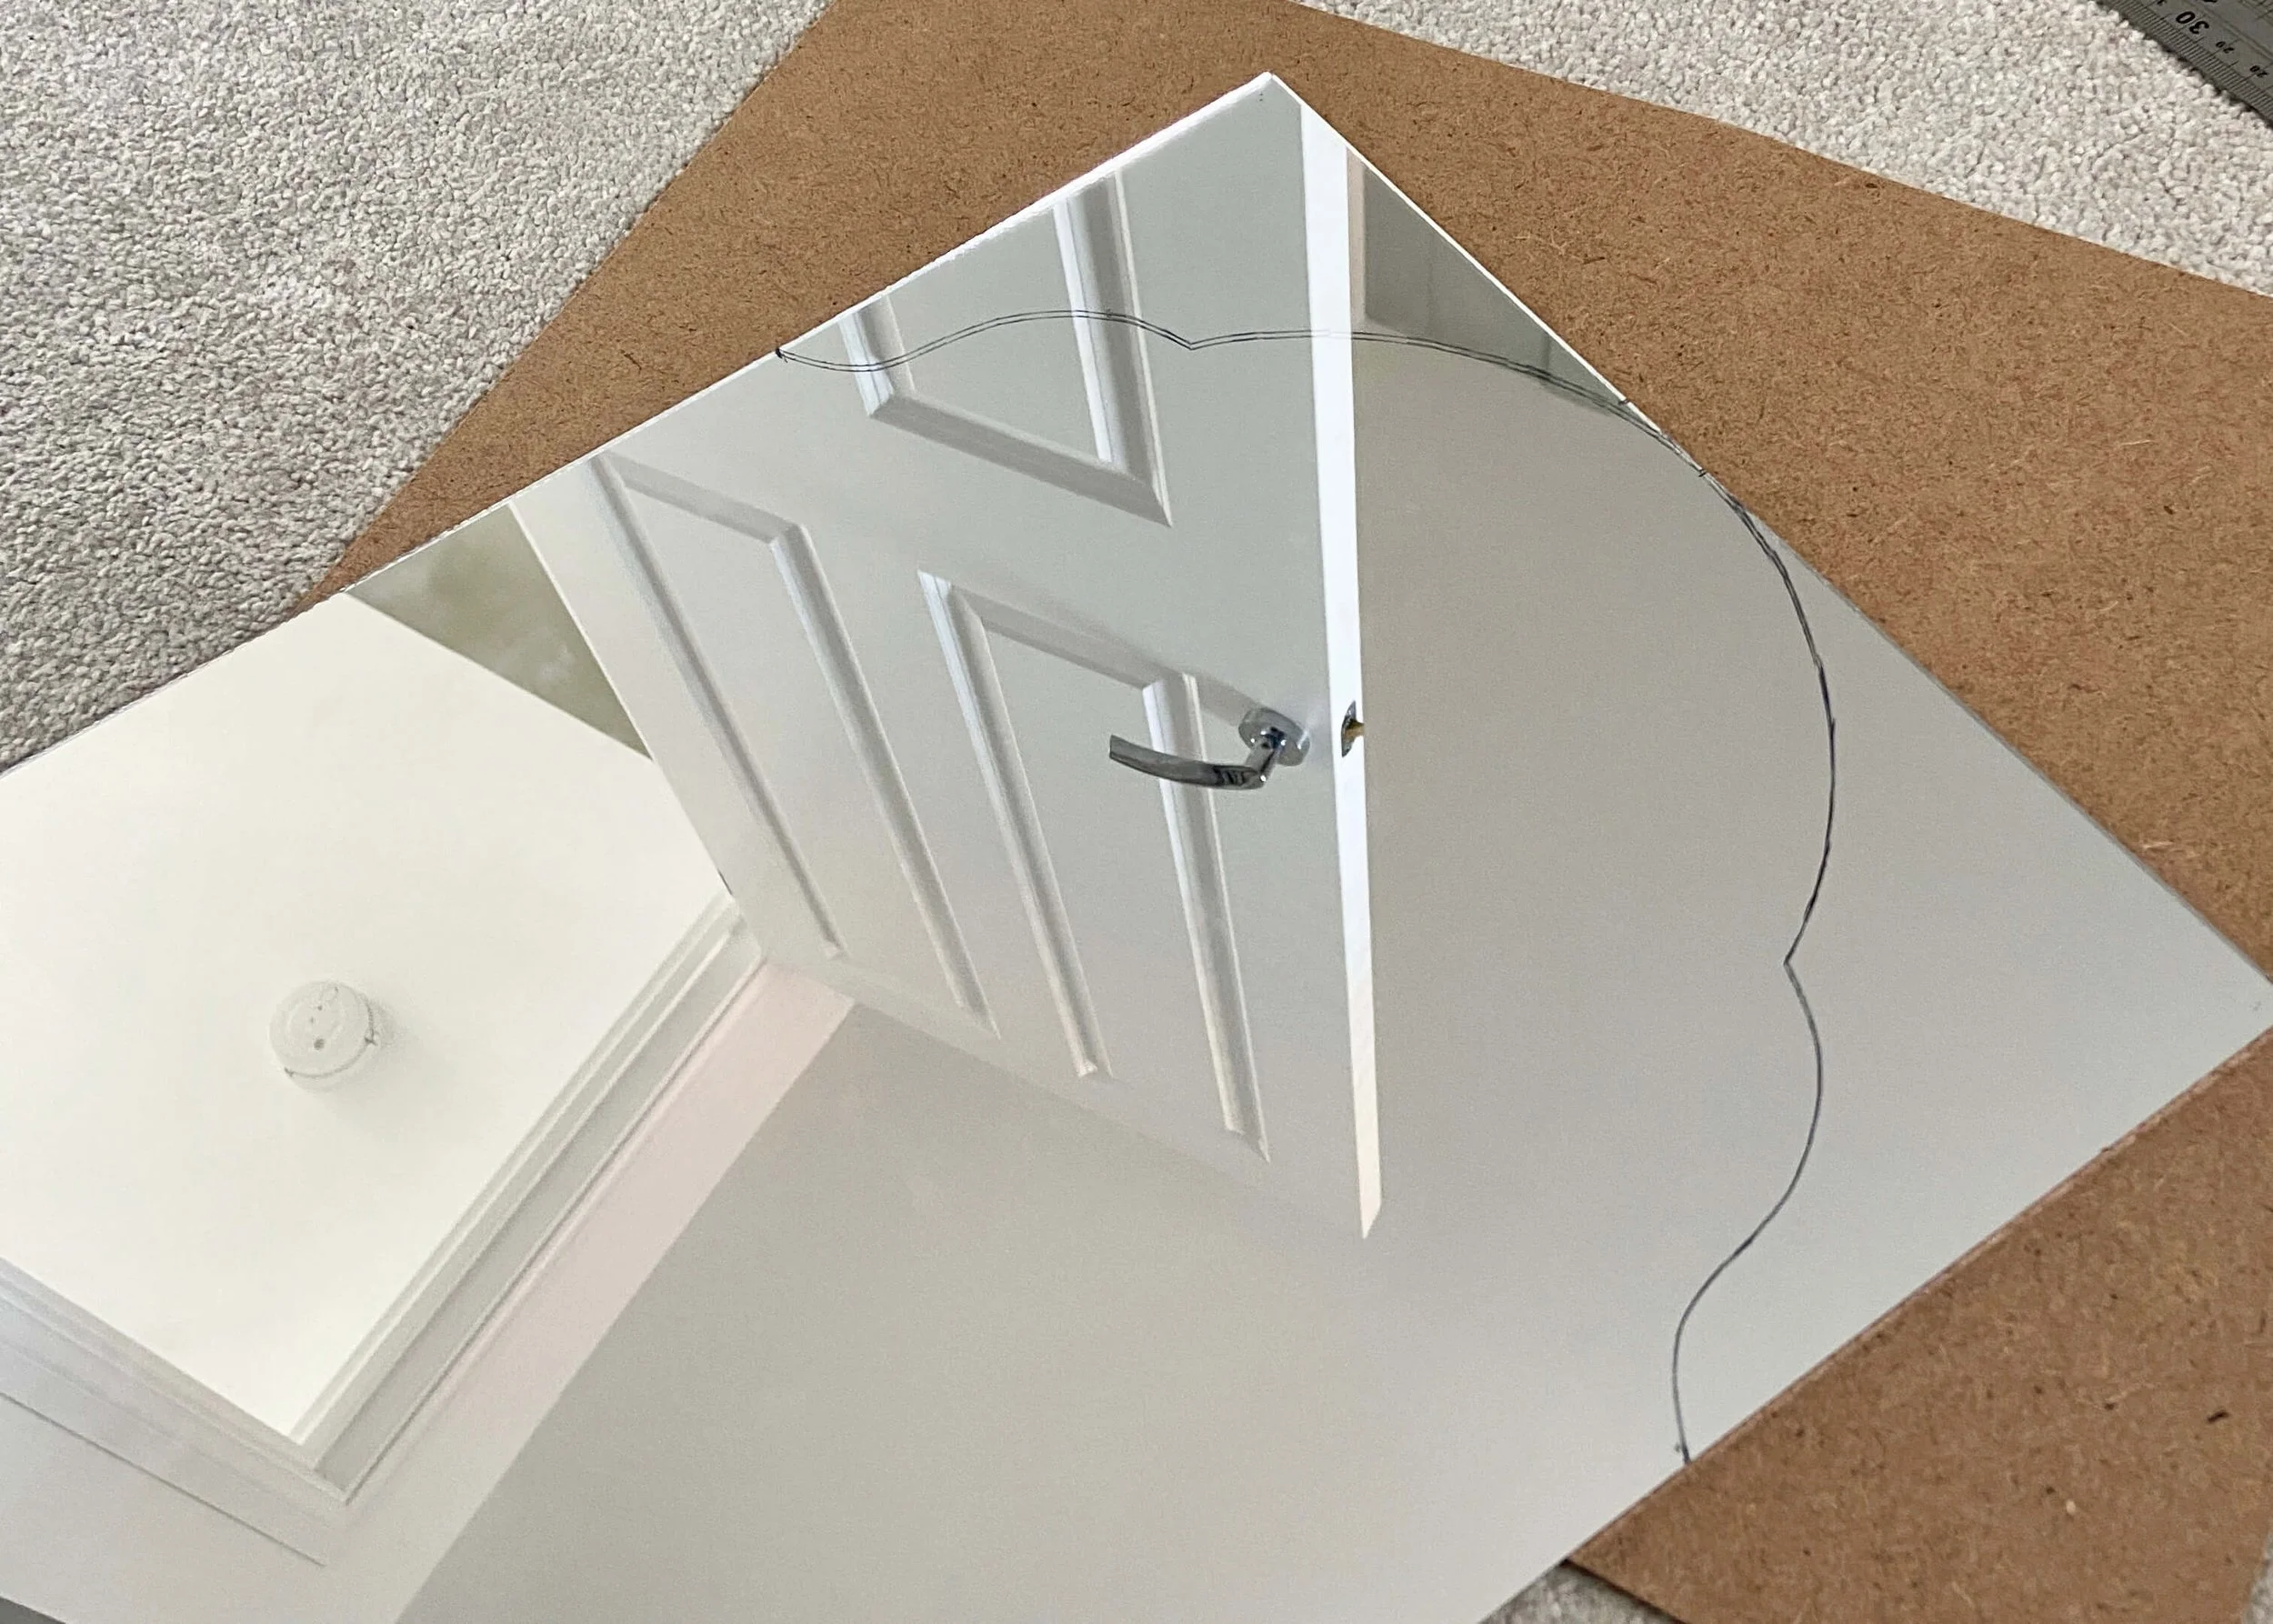
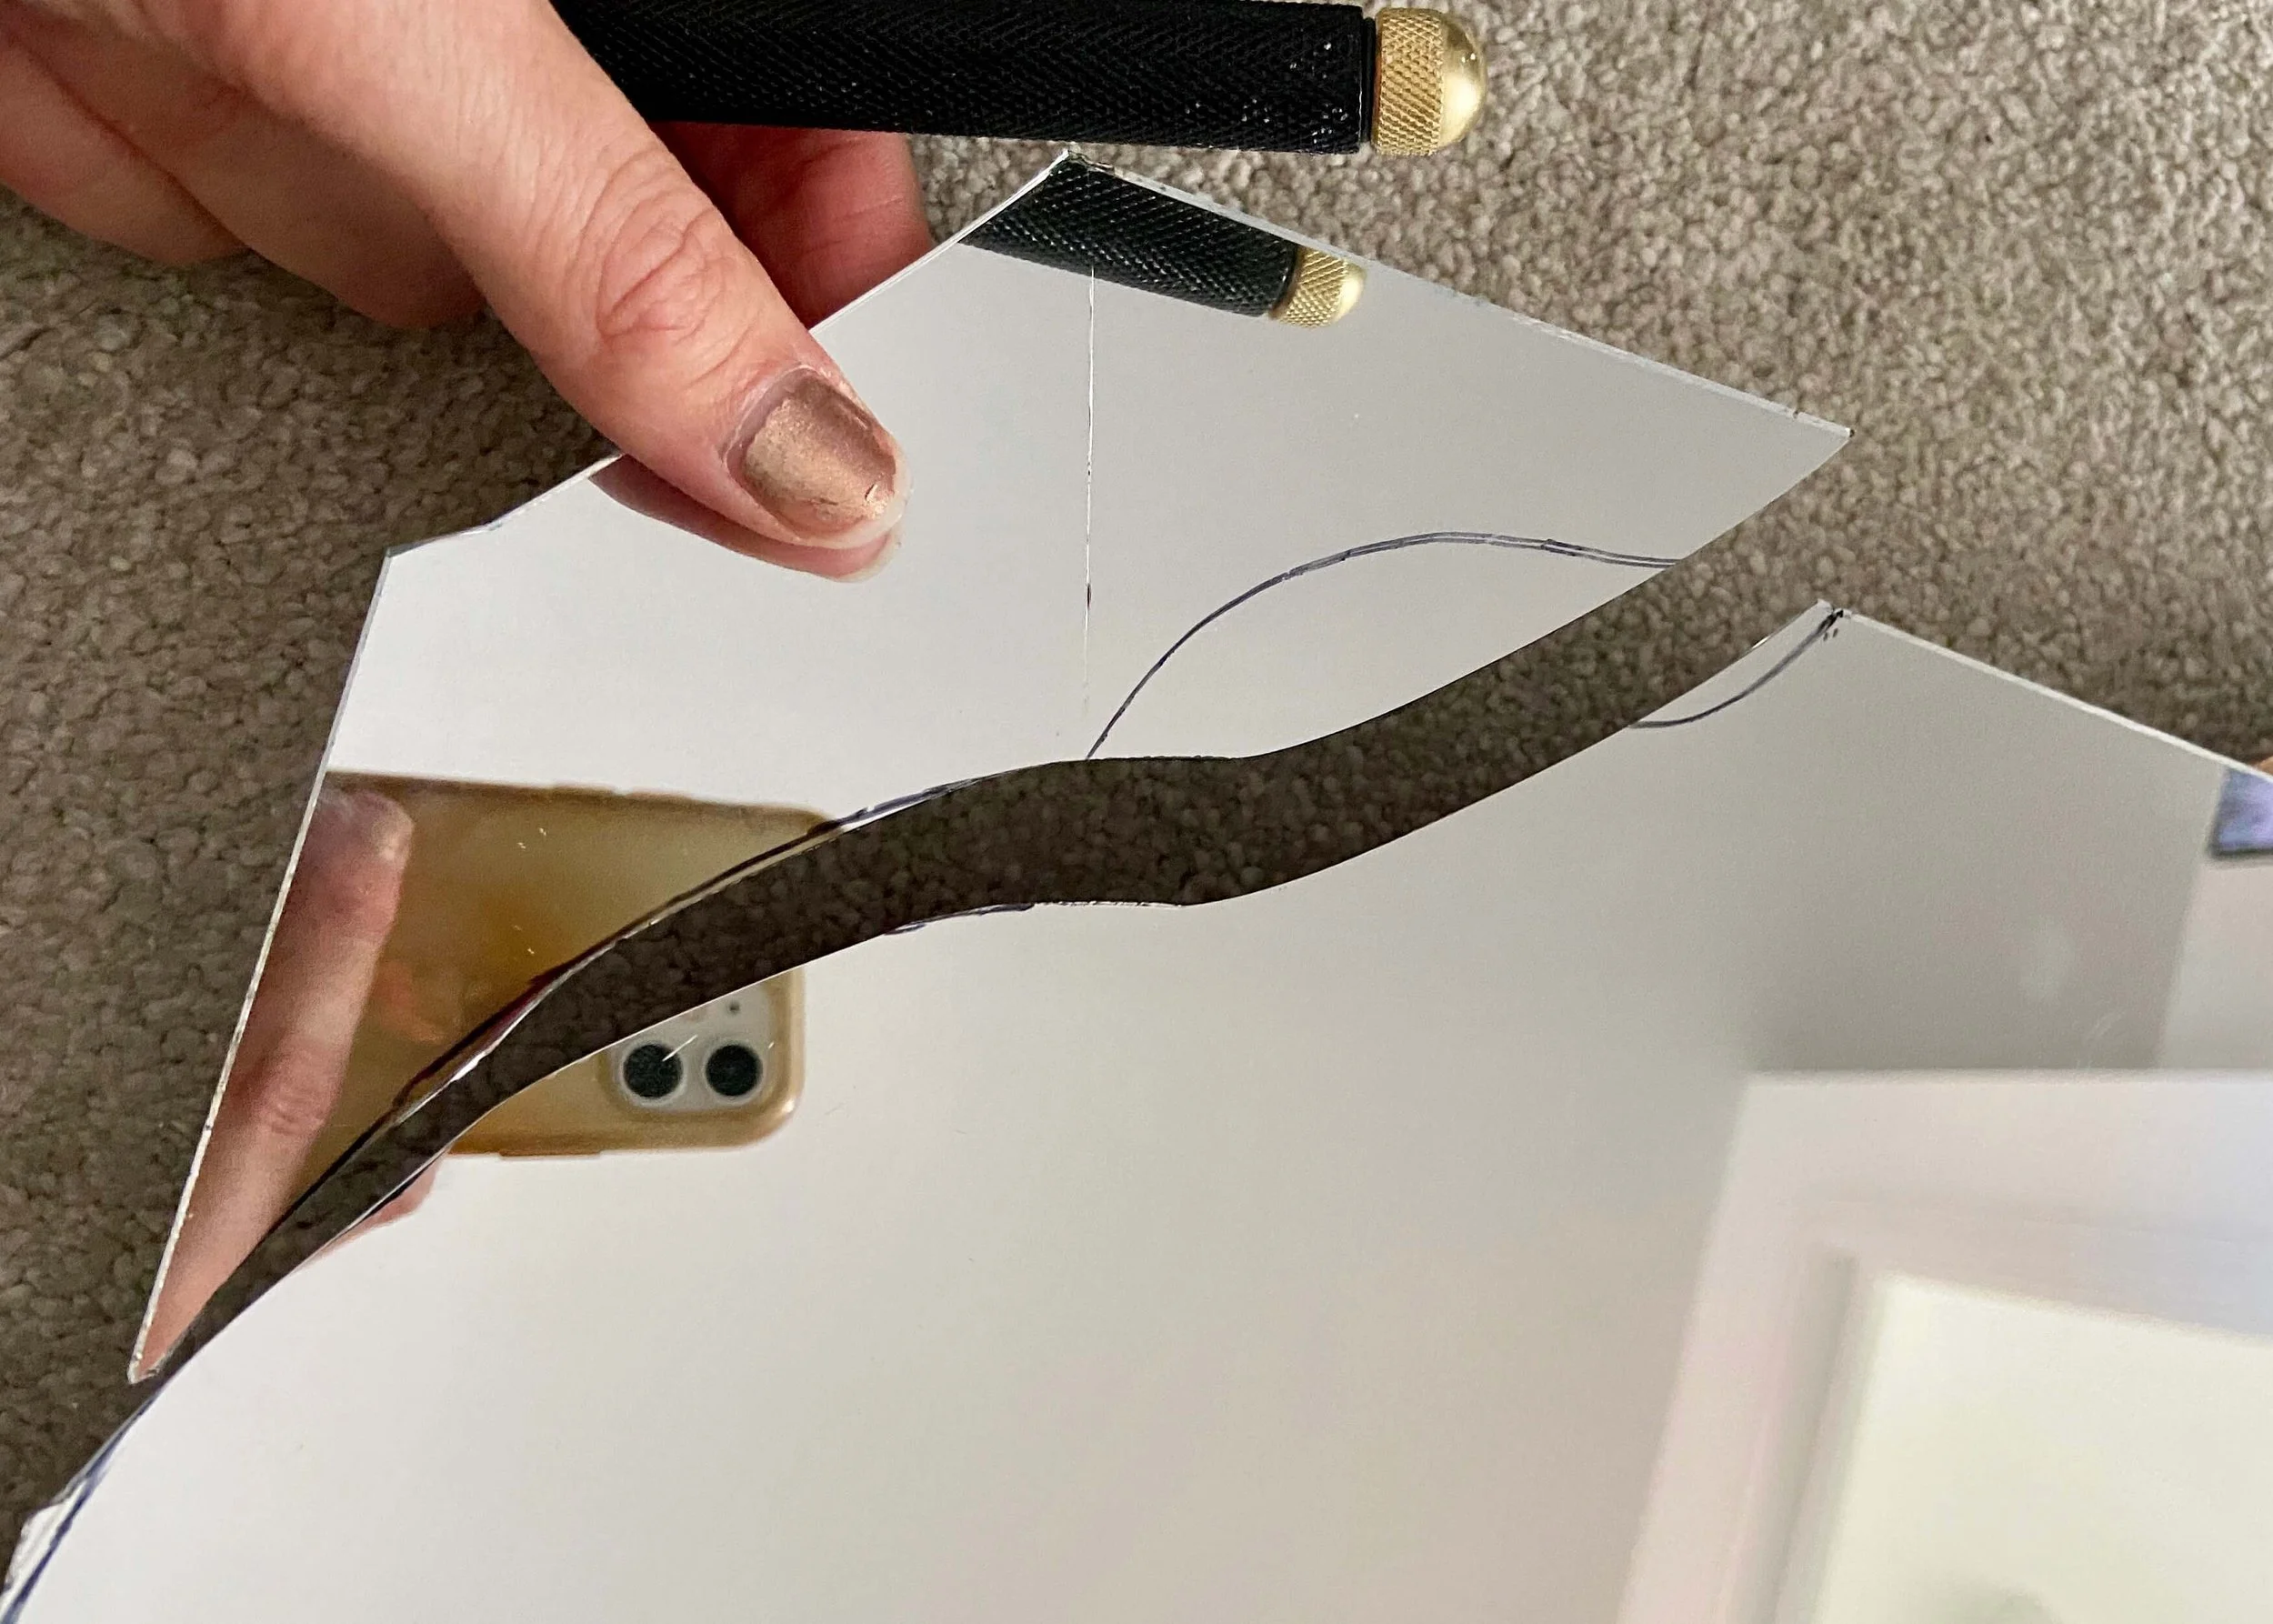
Next, follow the instructions on your glass cutter to score and cut this shape out. I found it helpful to hold my cutter at a 45 degree angle, and to do sections at a time. Be sure to wear eye protection and gloves.

4.
If like me cutting the first side of your mirror doesn’t quite go to plan, trace the first side onto a piece of paper and transfer this shape to the other side. Then cut out this new shape to make your mirror symmetrical.

5.
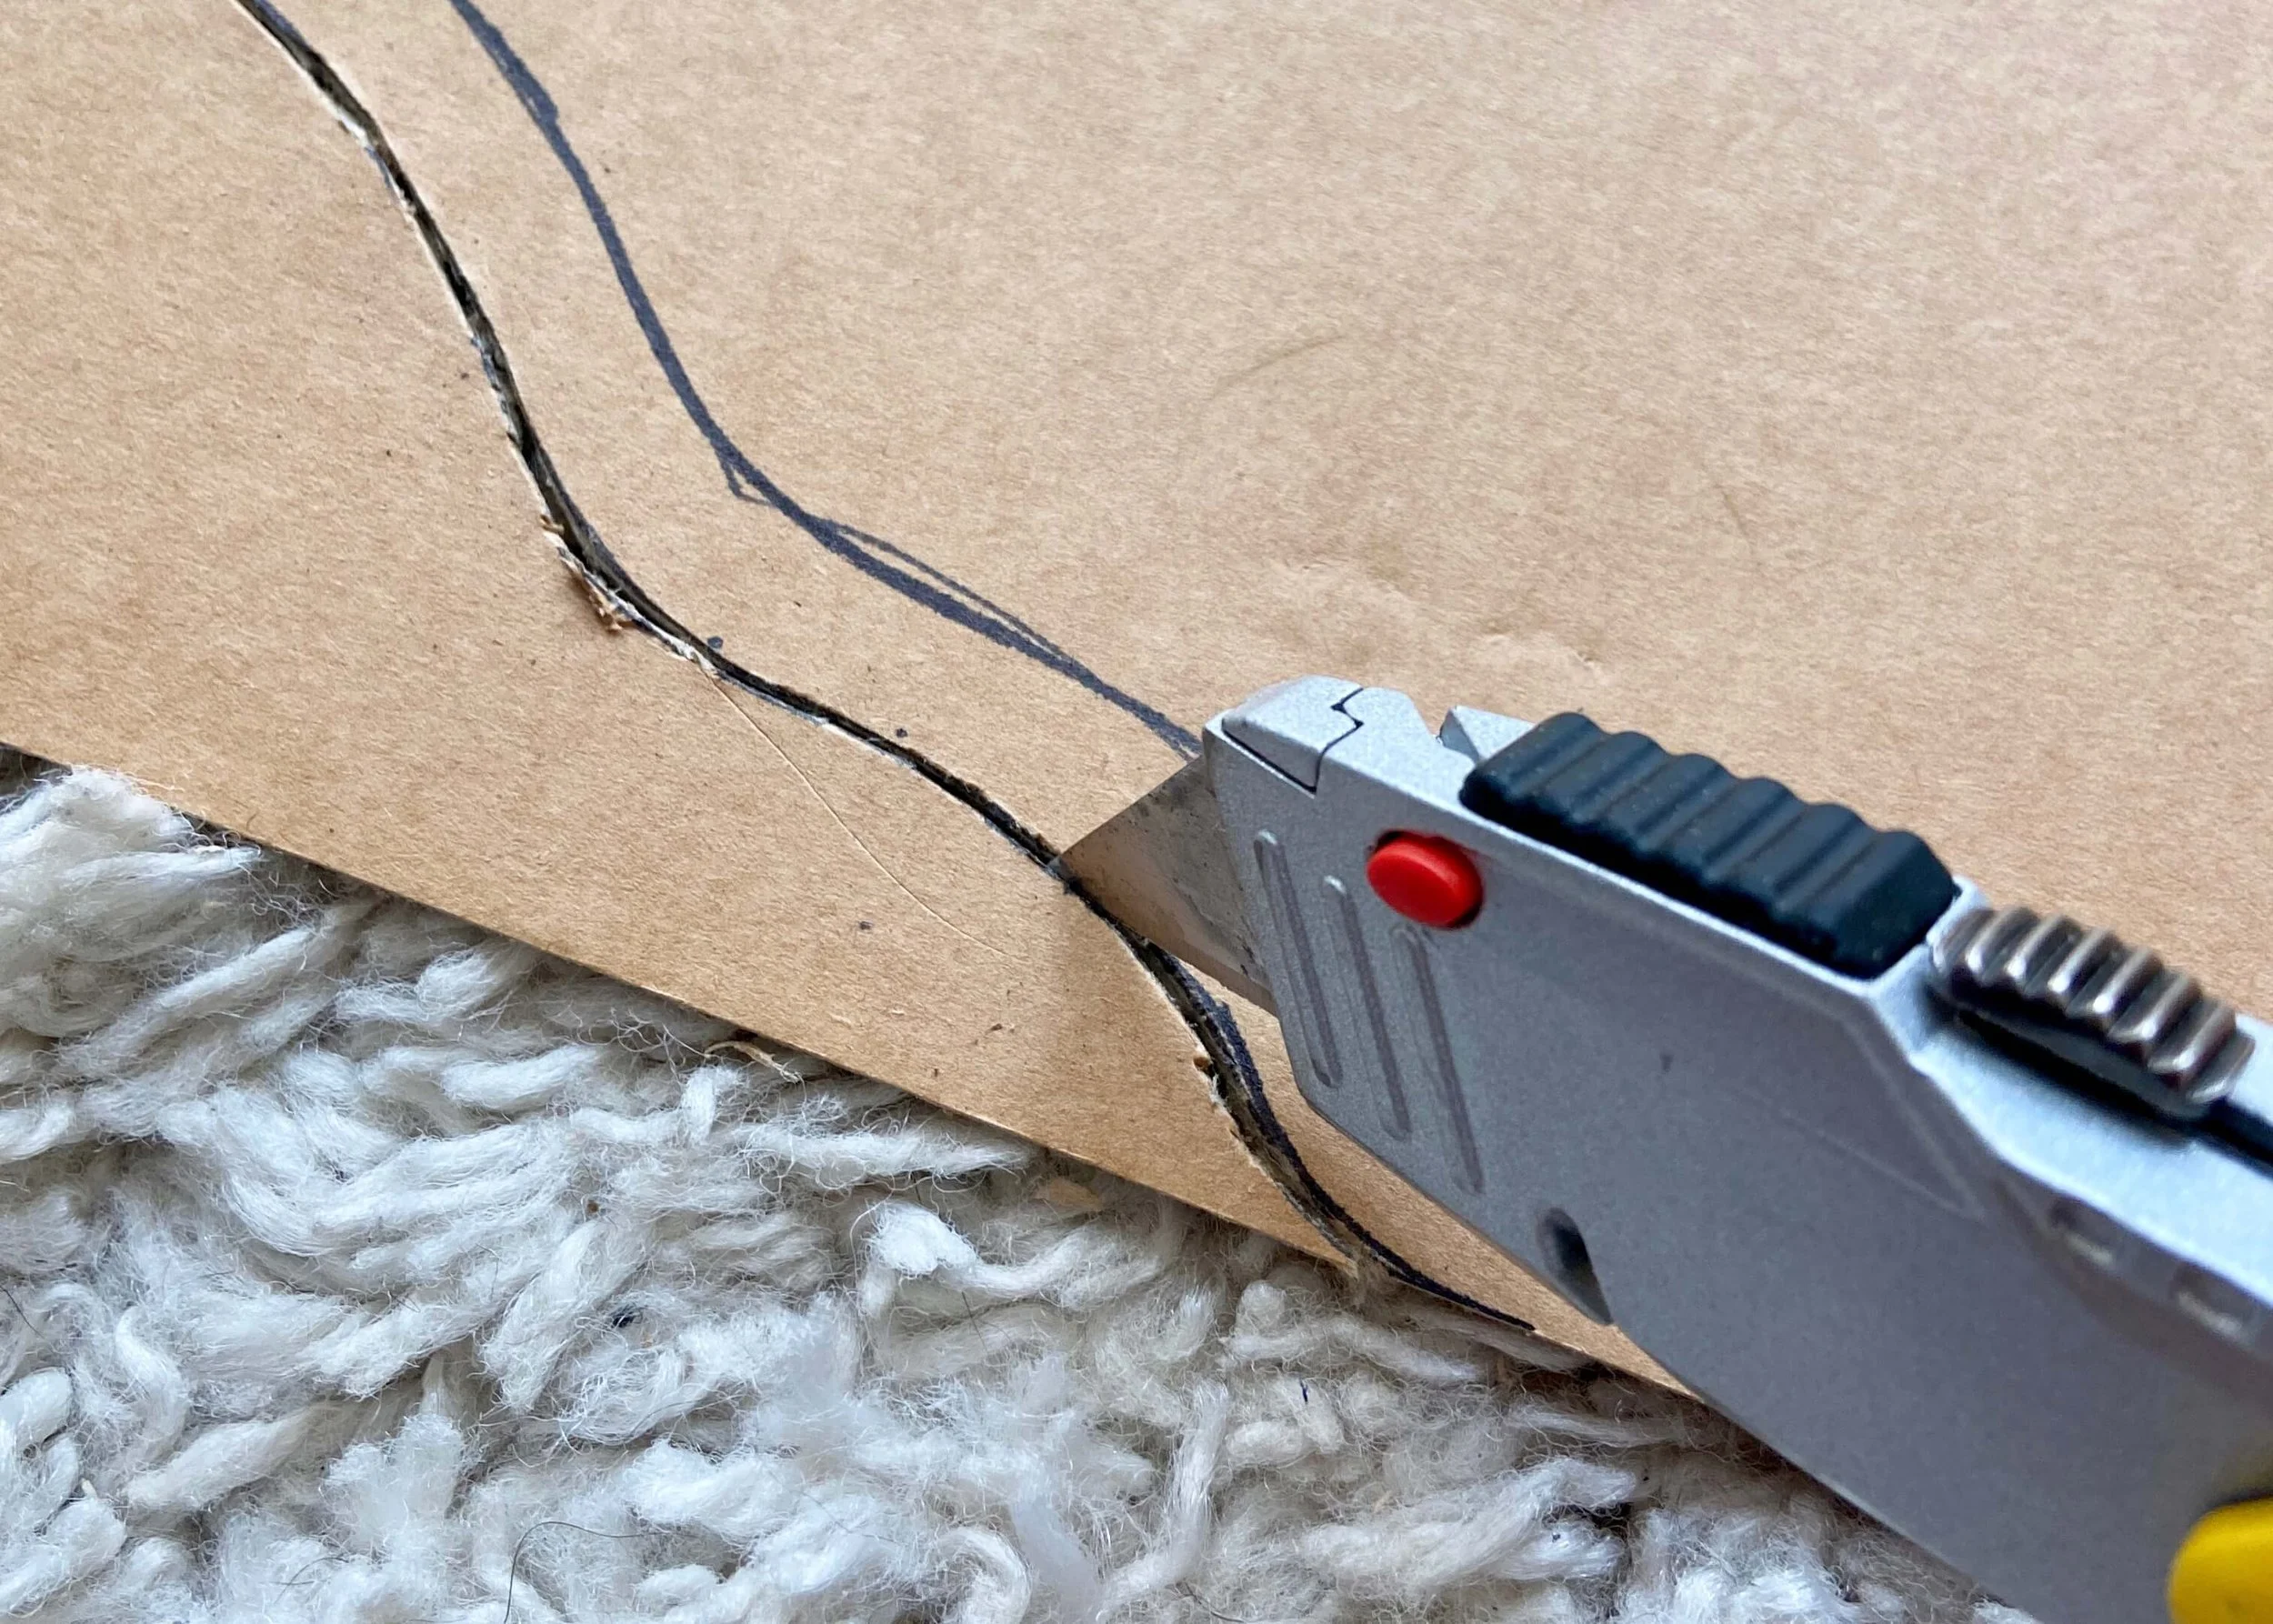
Next place your mirror onto a piece of chipboard and draw around this. Using a ruler, mark 1cm around this and connect the dots.
6.
Use a stanley or craft knife to cut along this outer line. Now you should have your moroccan arched frame.
7.
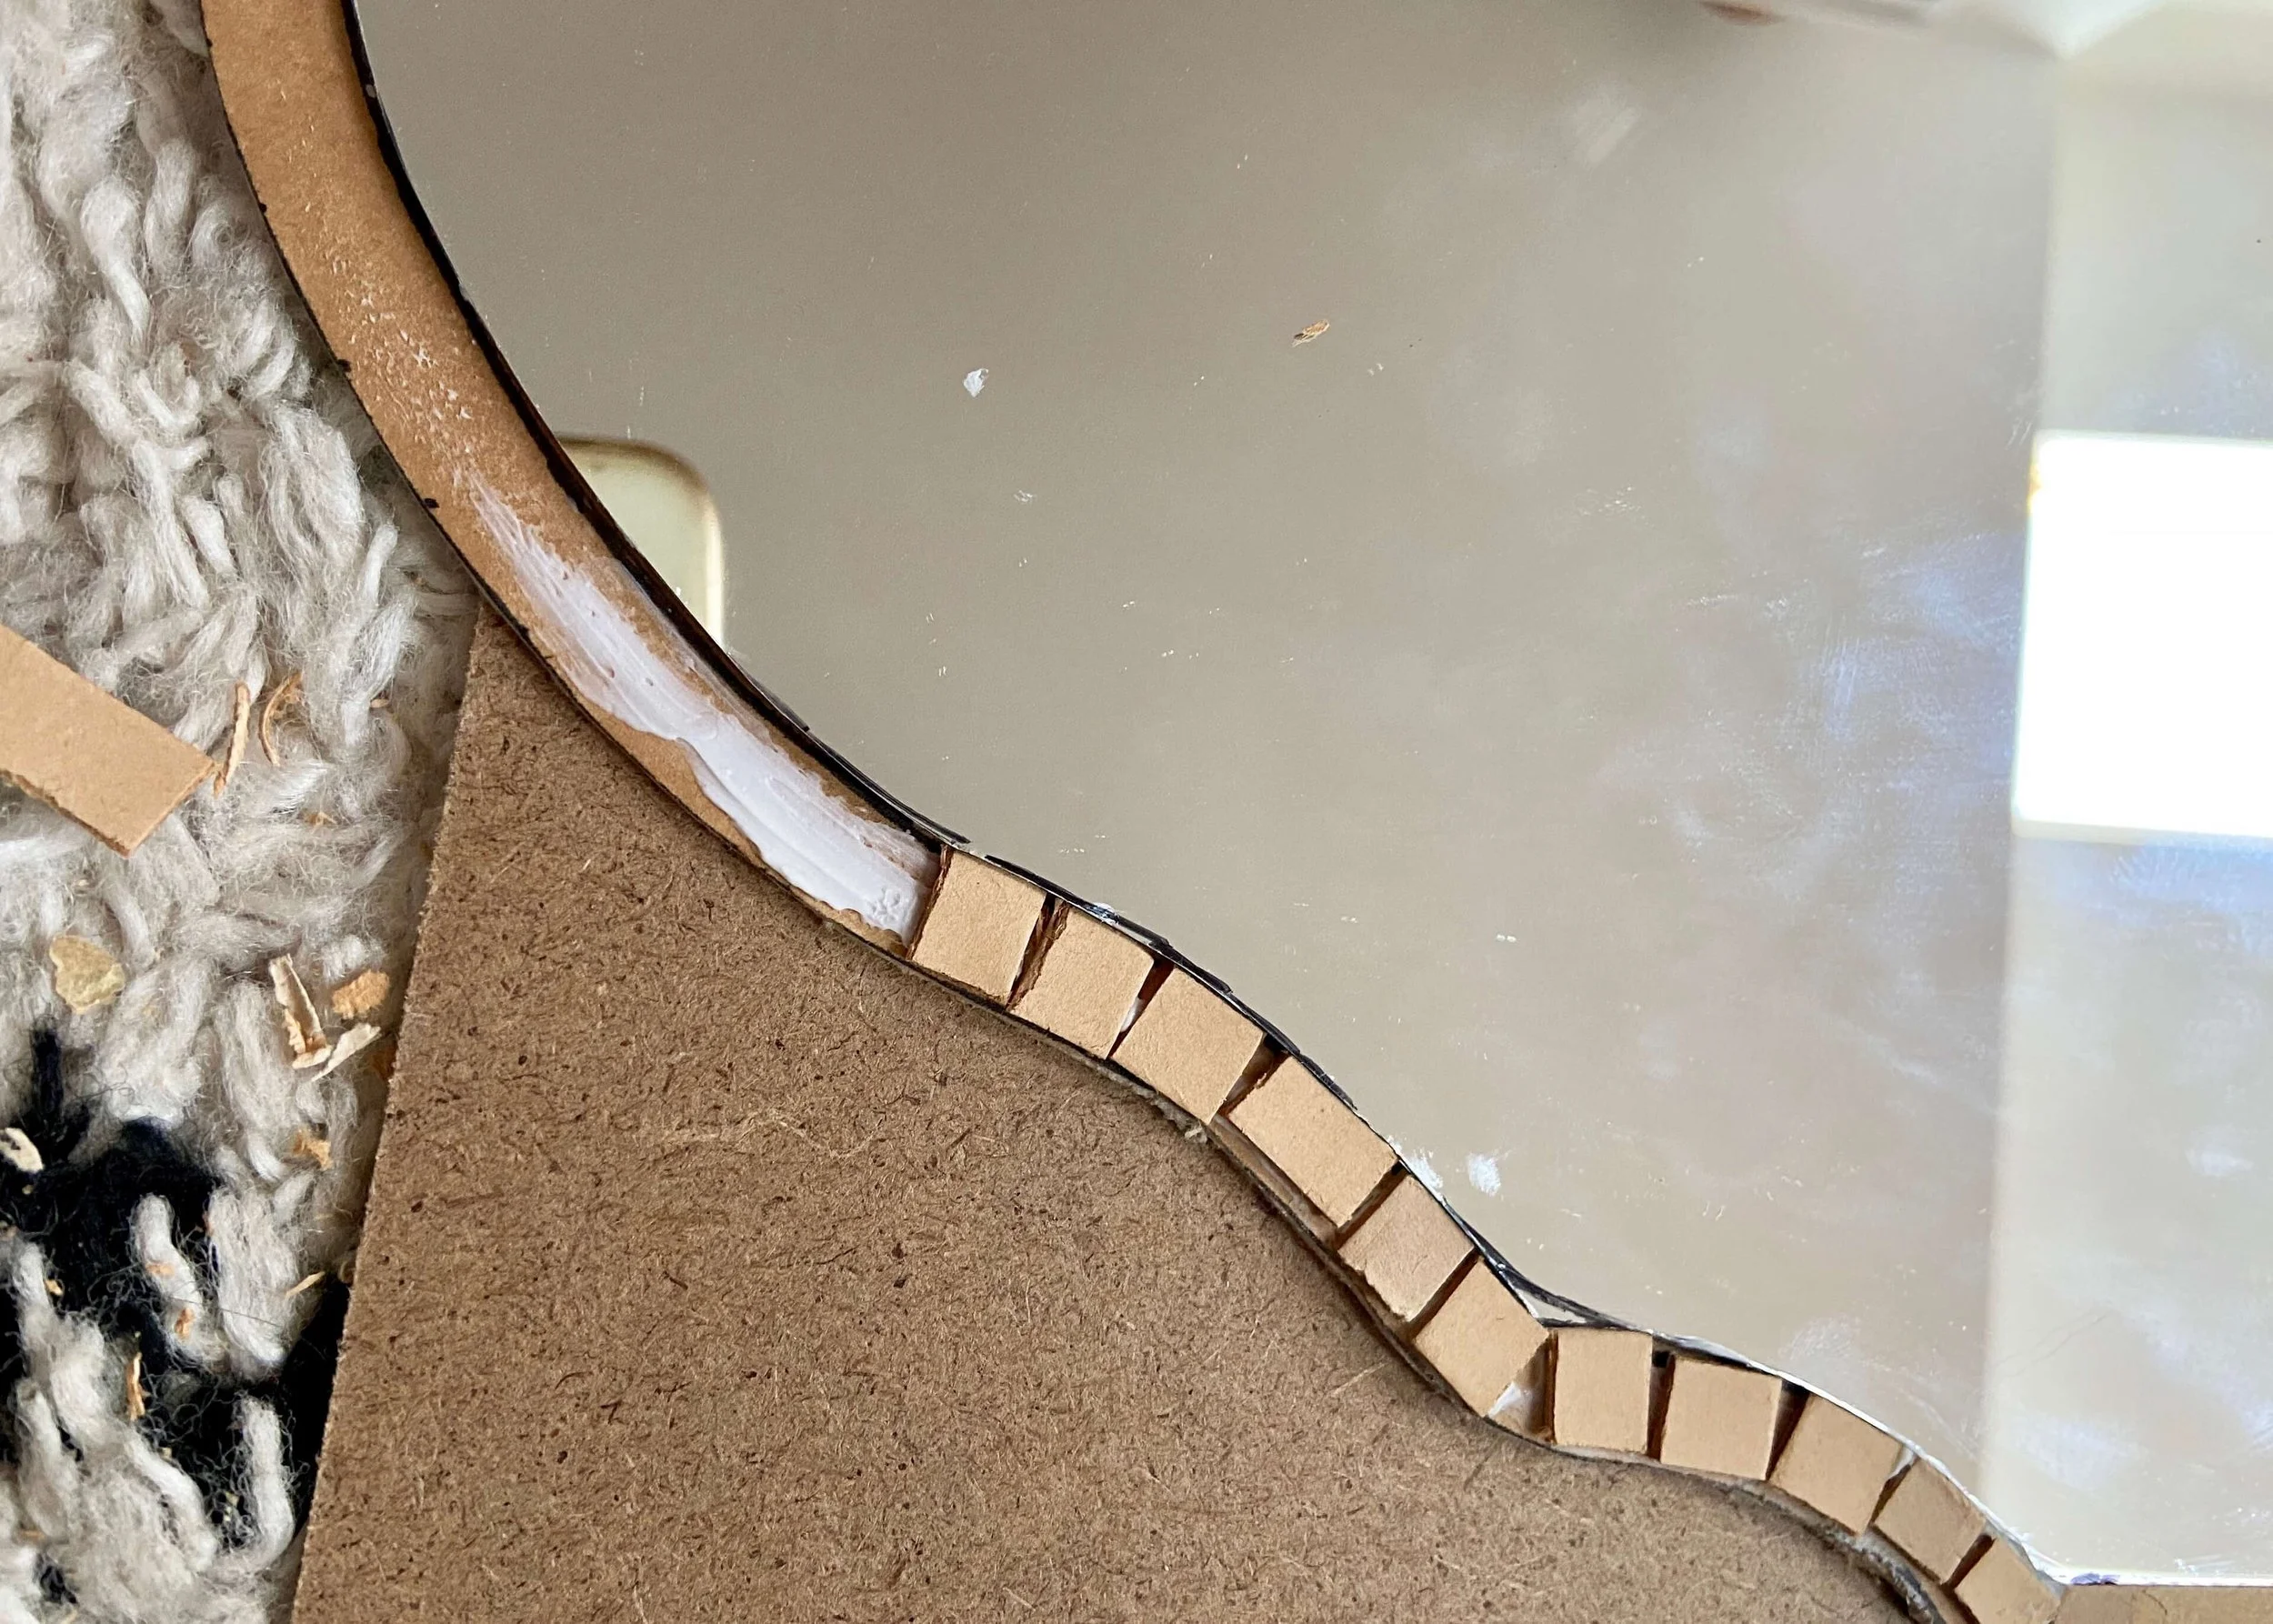
Using No More Nails or a strong adhesive, stick the mirror to the chipboard backing. You should have 1cm of the backing showing all around the mirror.
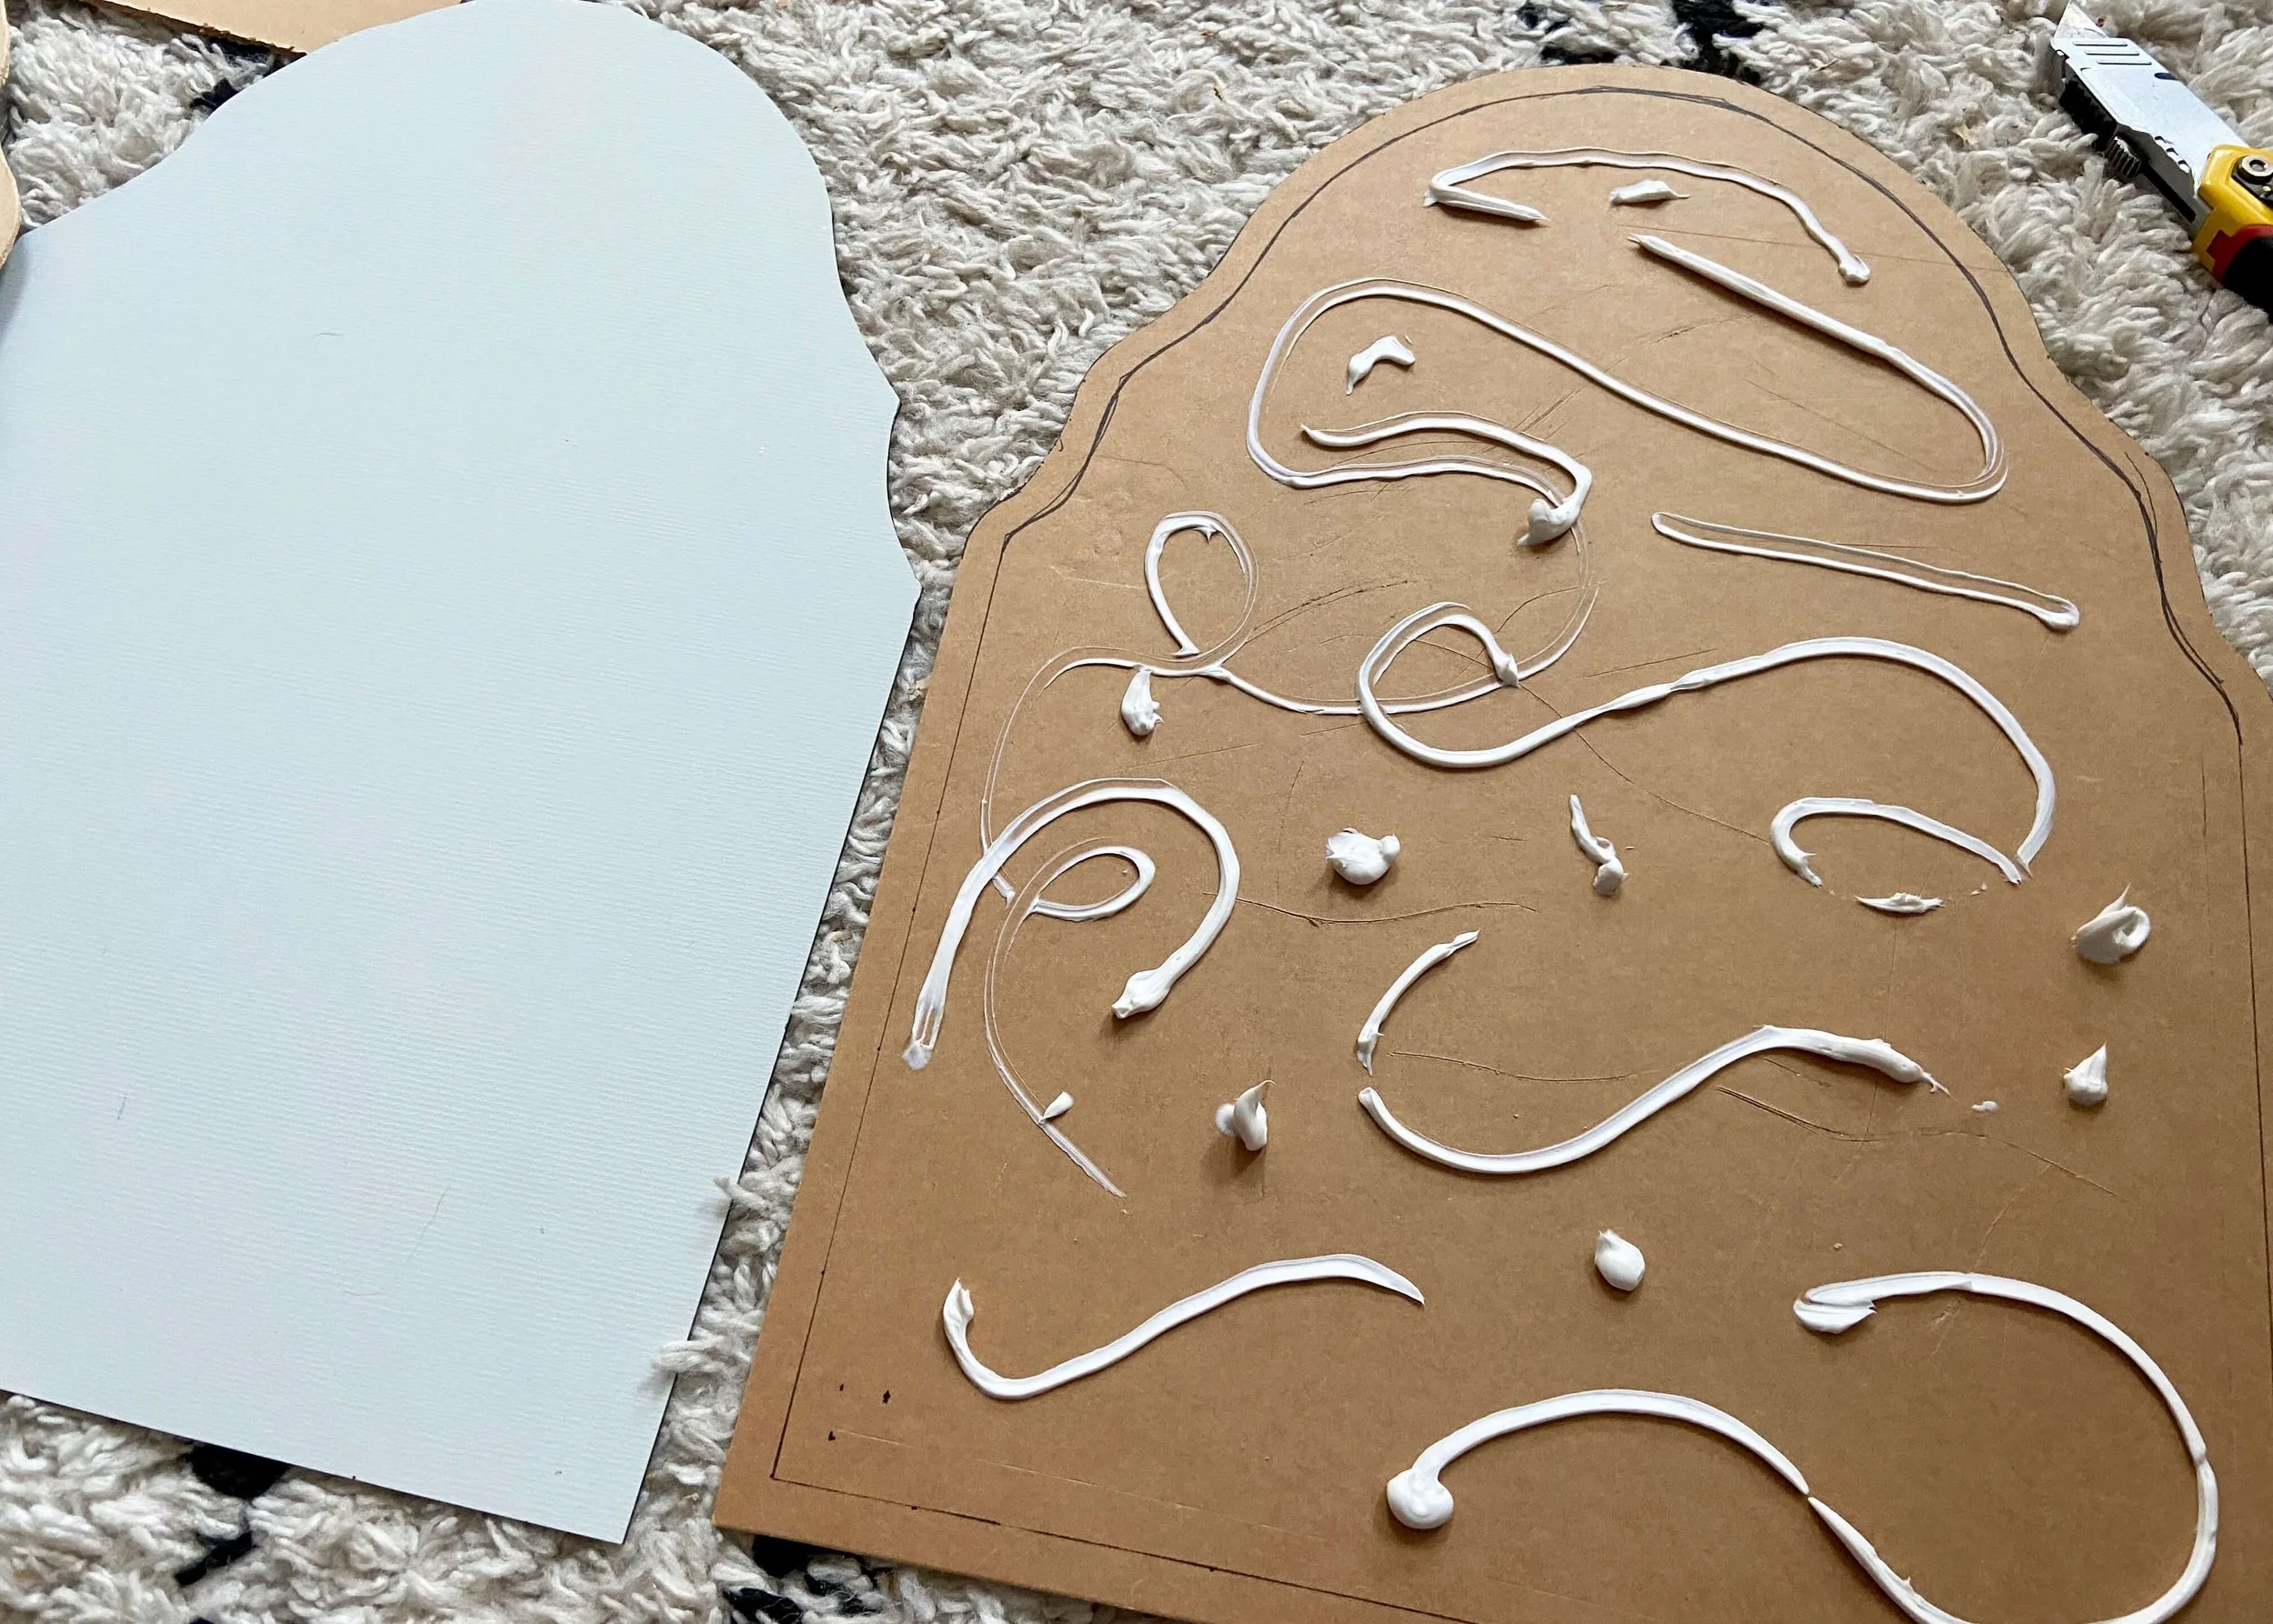
8.
There is probably an easier way to do this, but I decided I wanted my frame to sit on top of the mirror and so I next cut smaller pieces of chipboard and stuck these around the mirror and on the 1cm exposed backing to make it the same height as the mirror.
9.
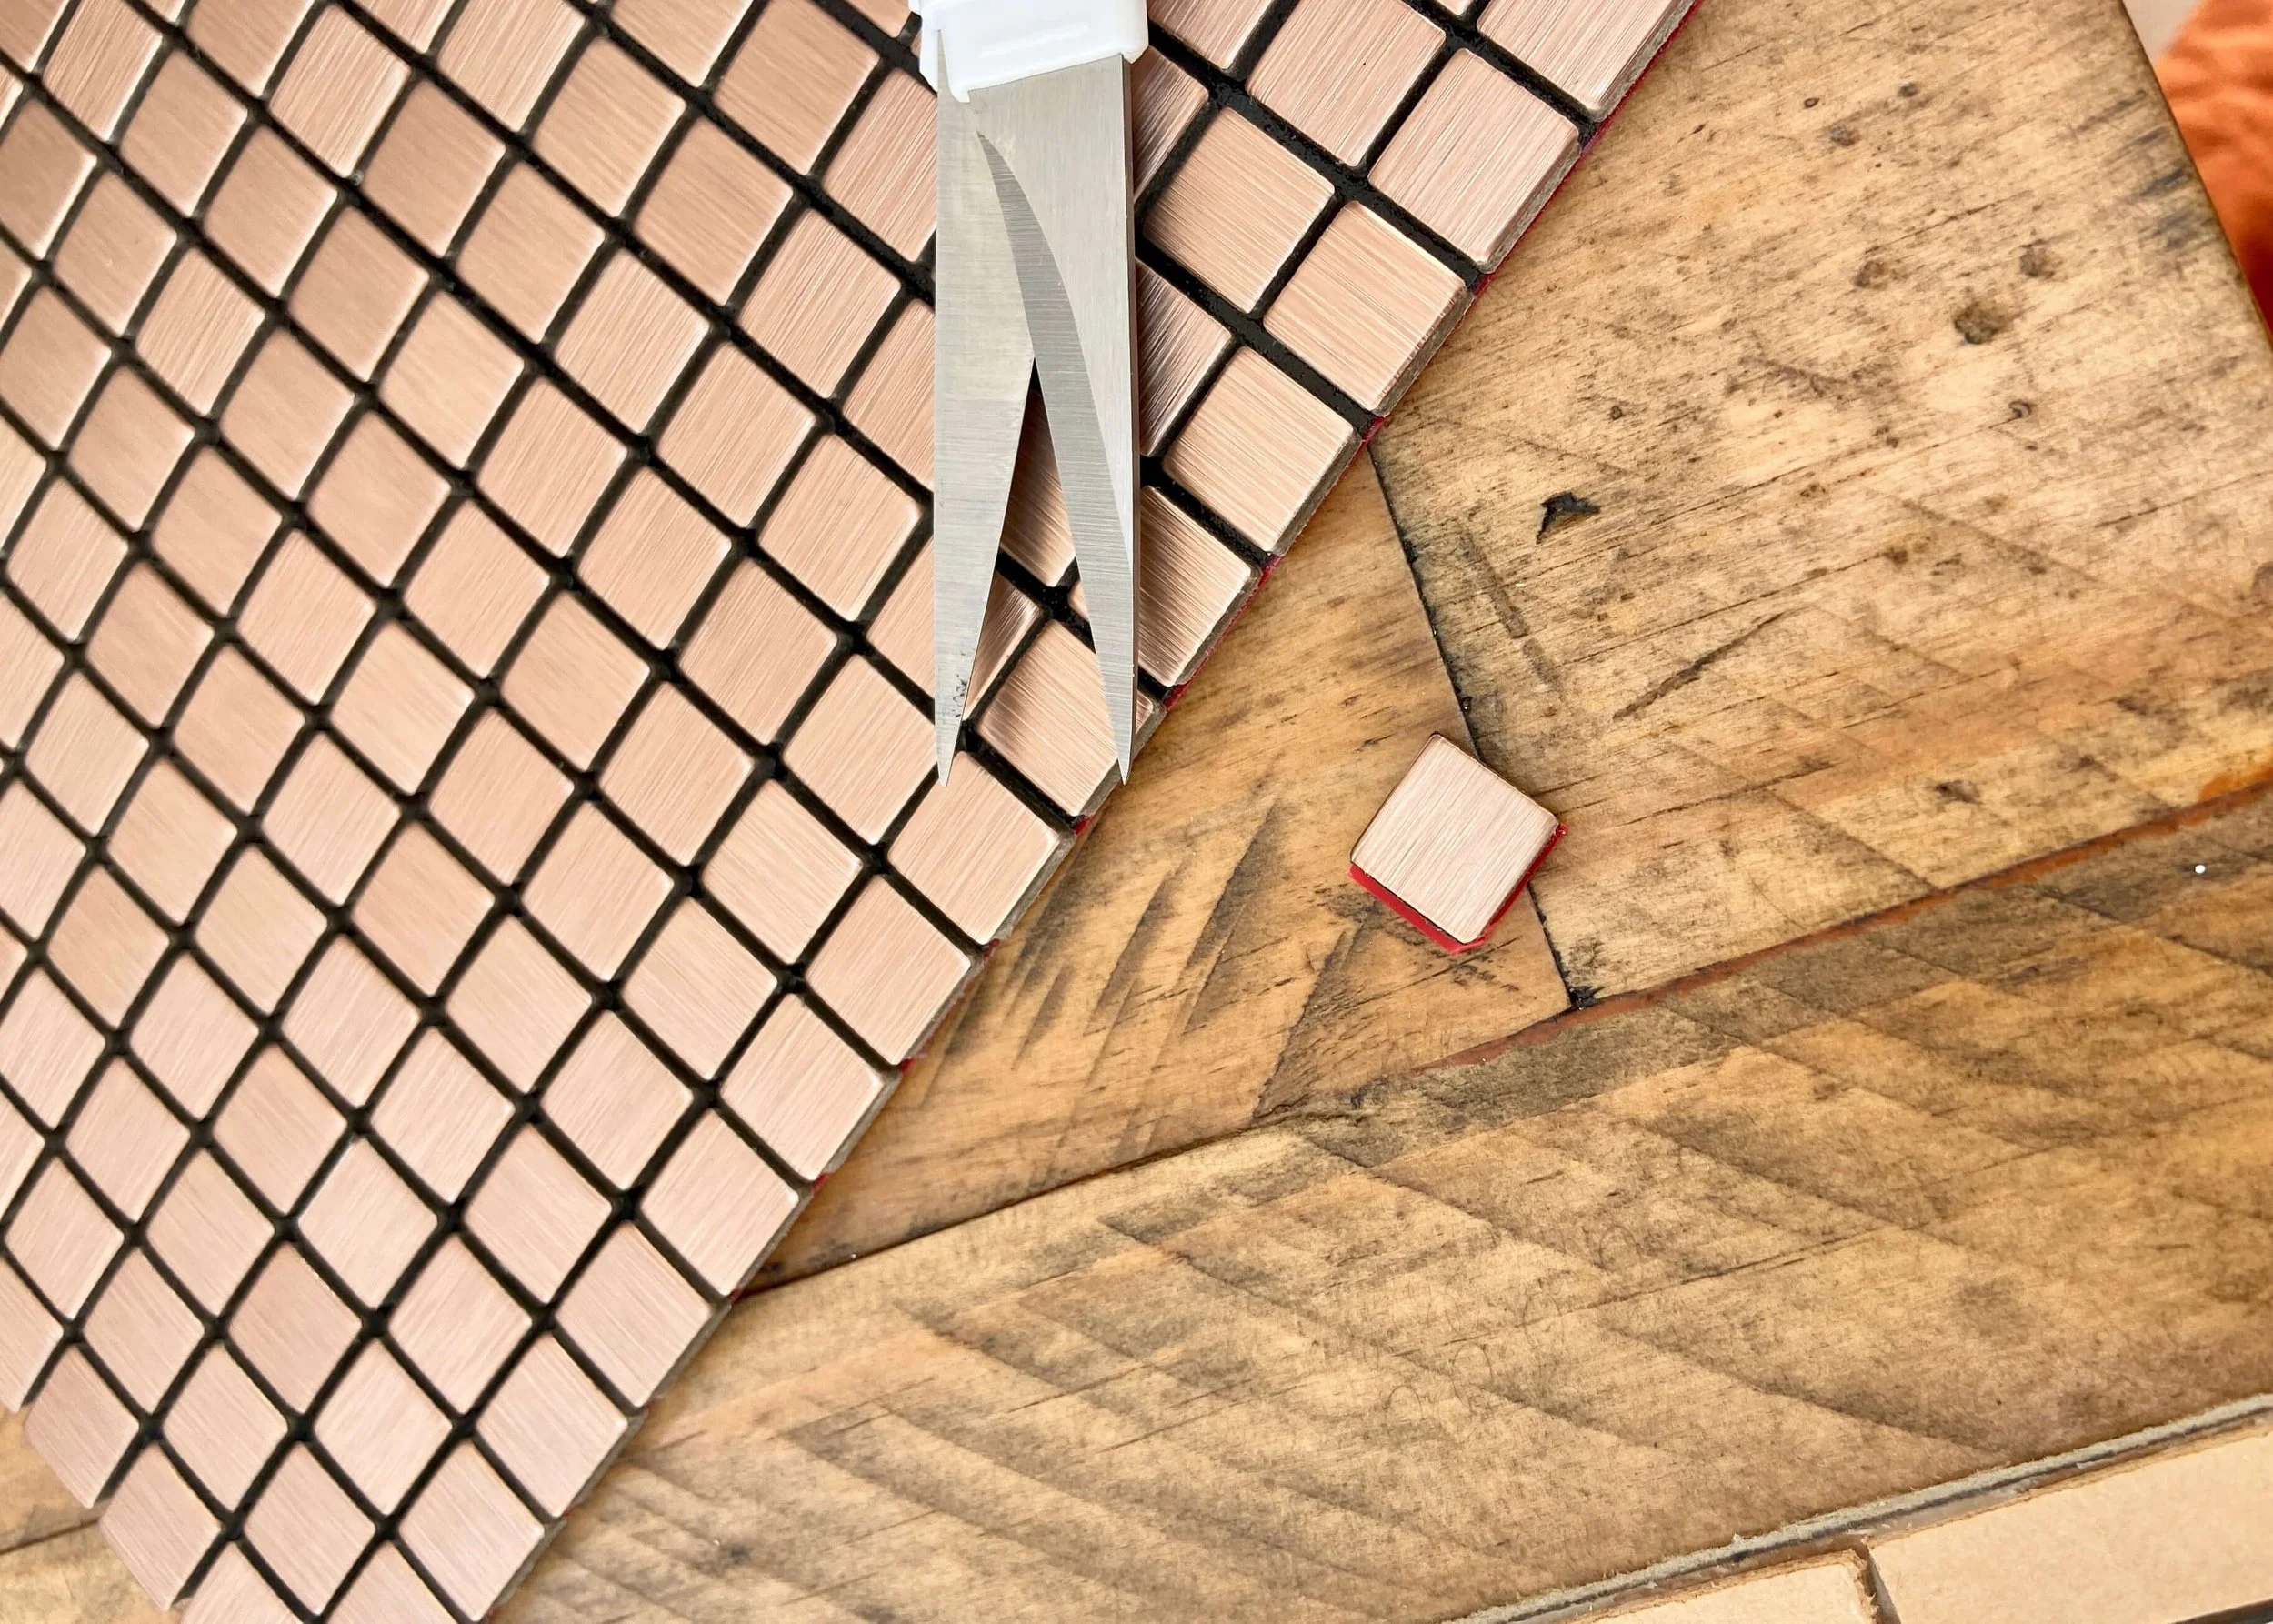
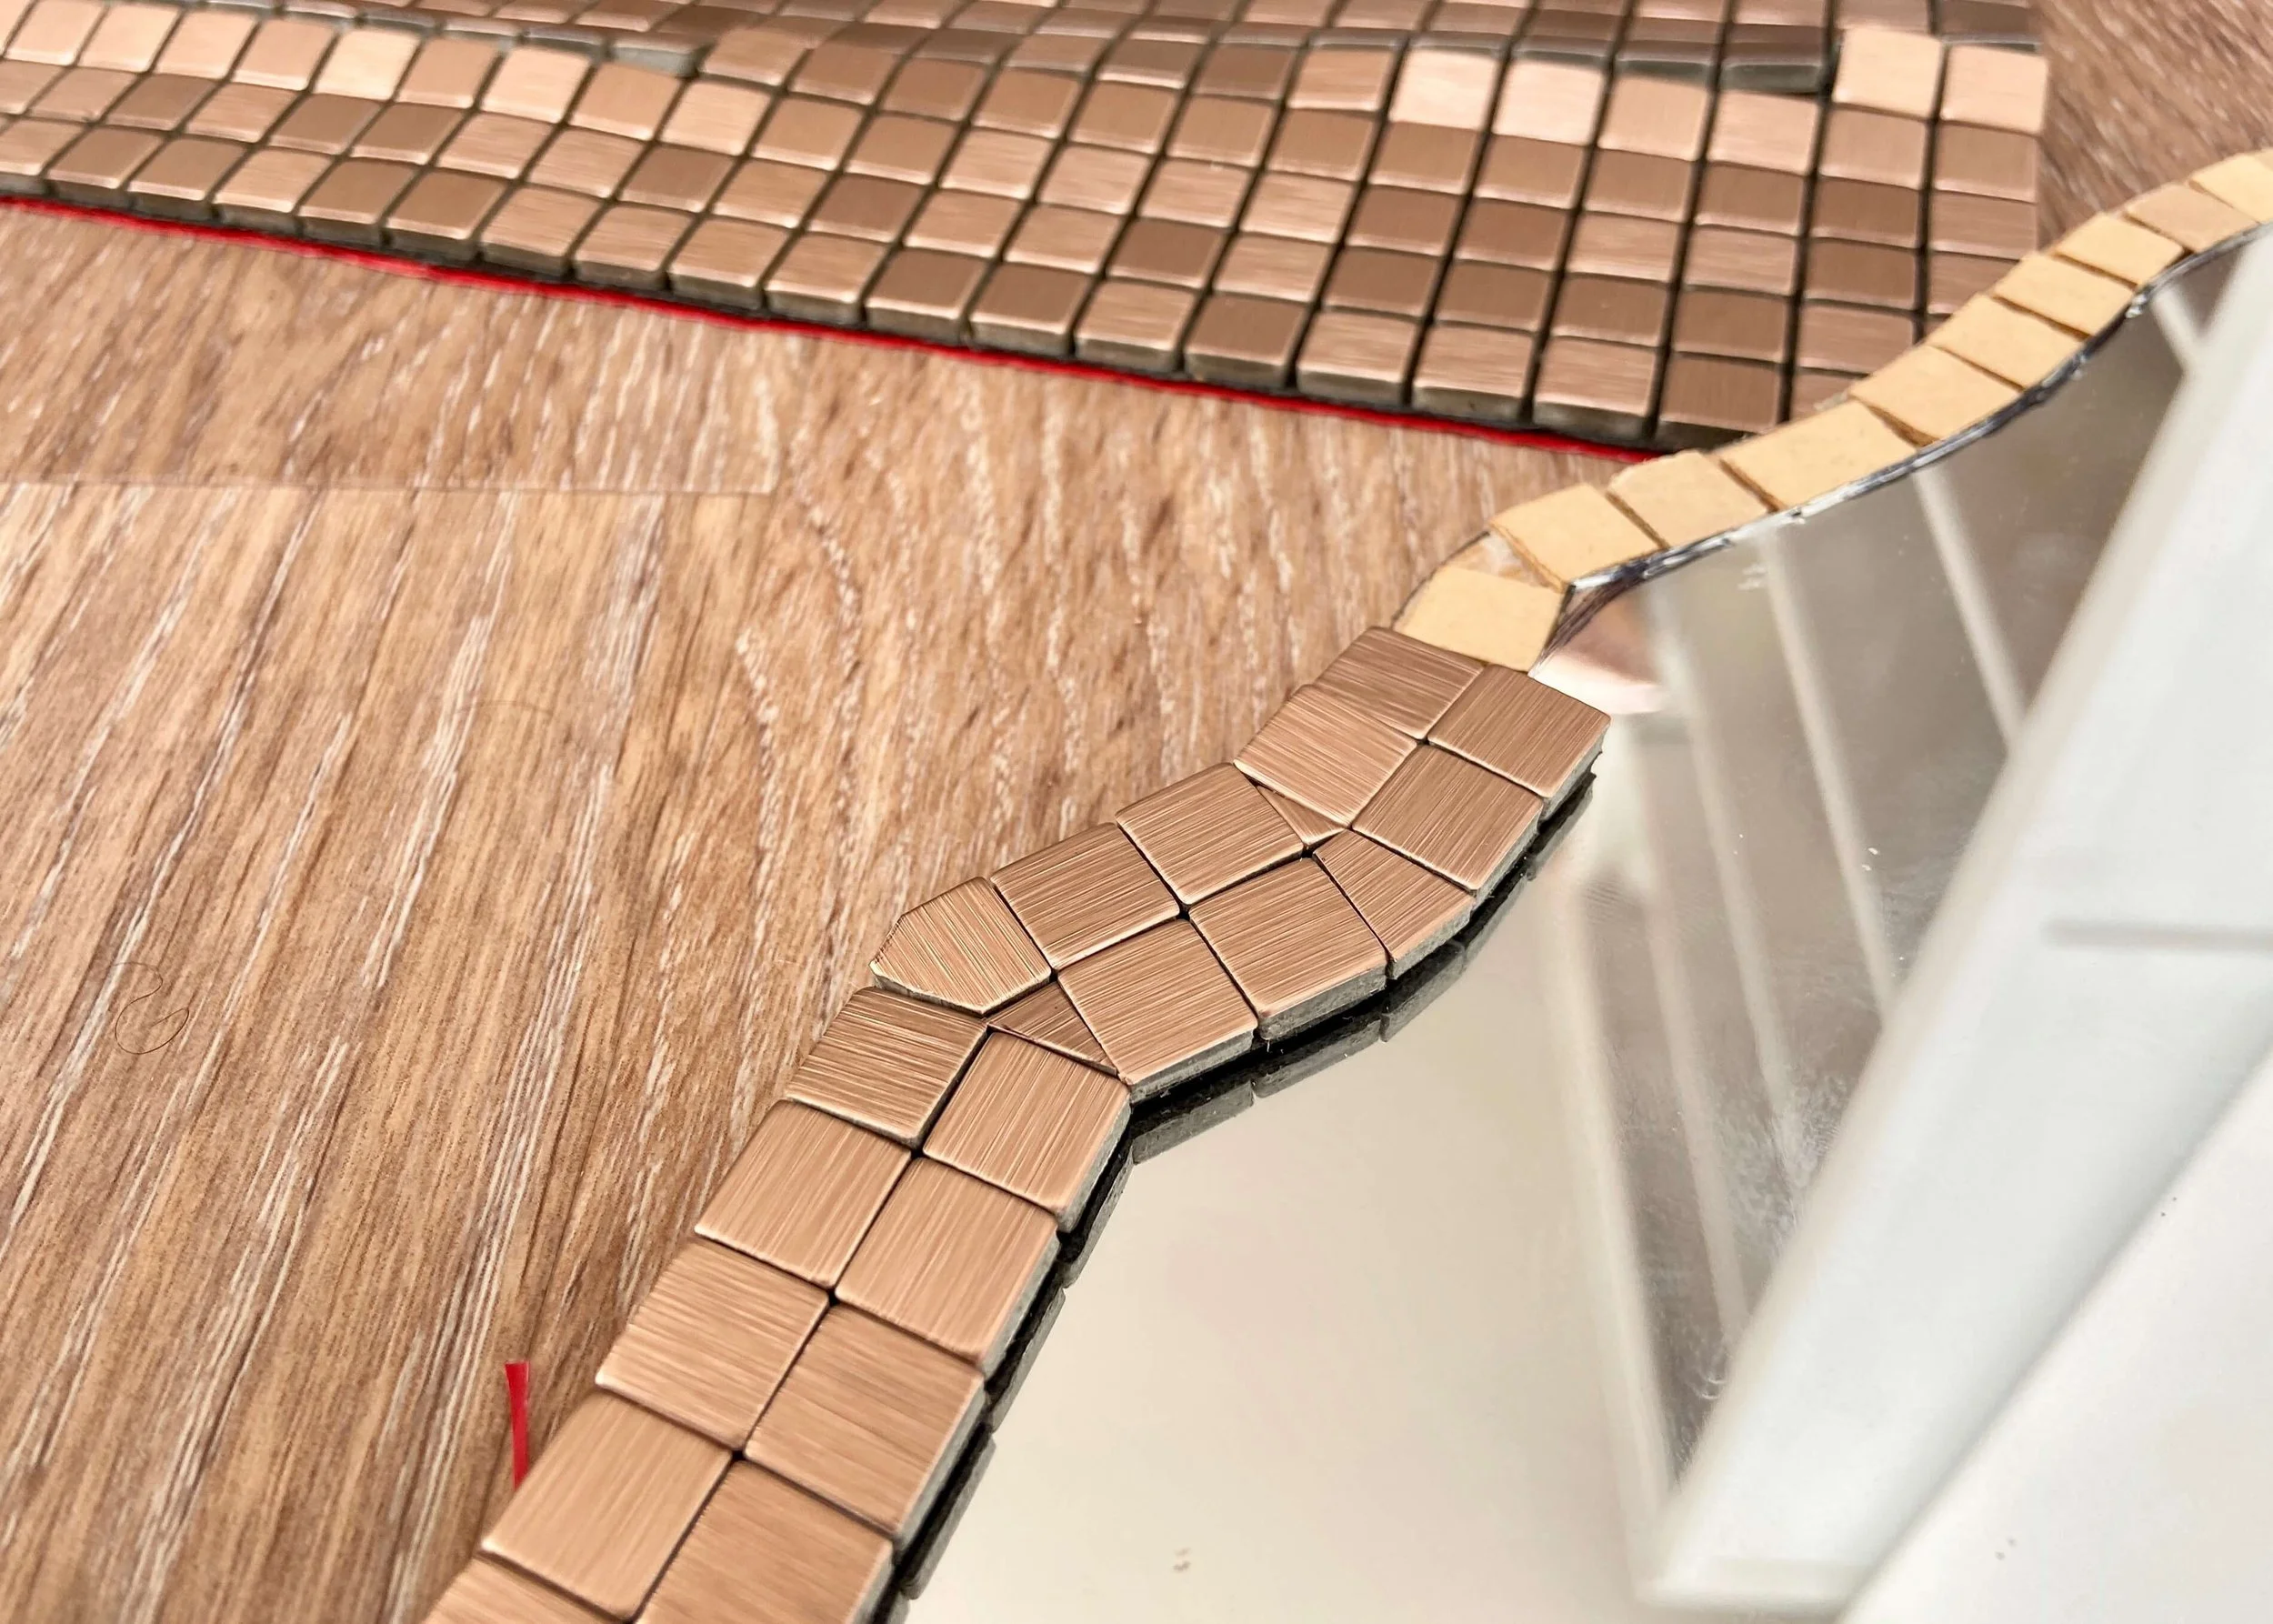
I found these self-adhesive bronze mosaic tiles for my frame, and cut out each individual mosaic tile using scissors and my stanley knife.
10.
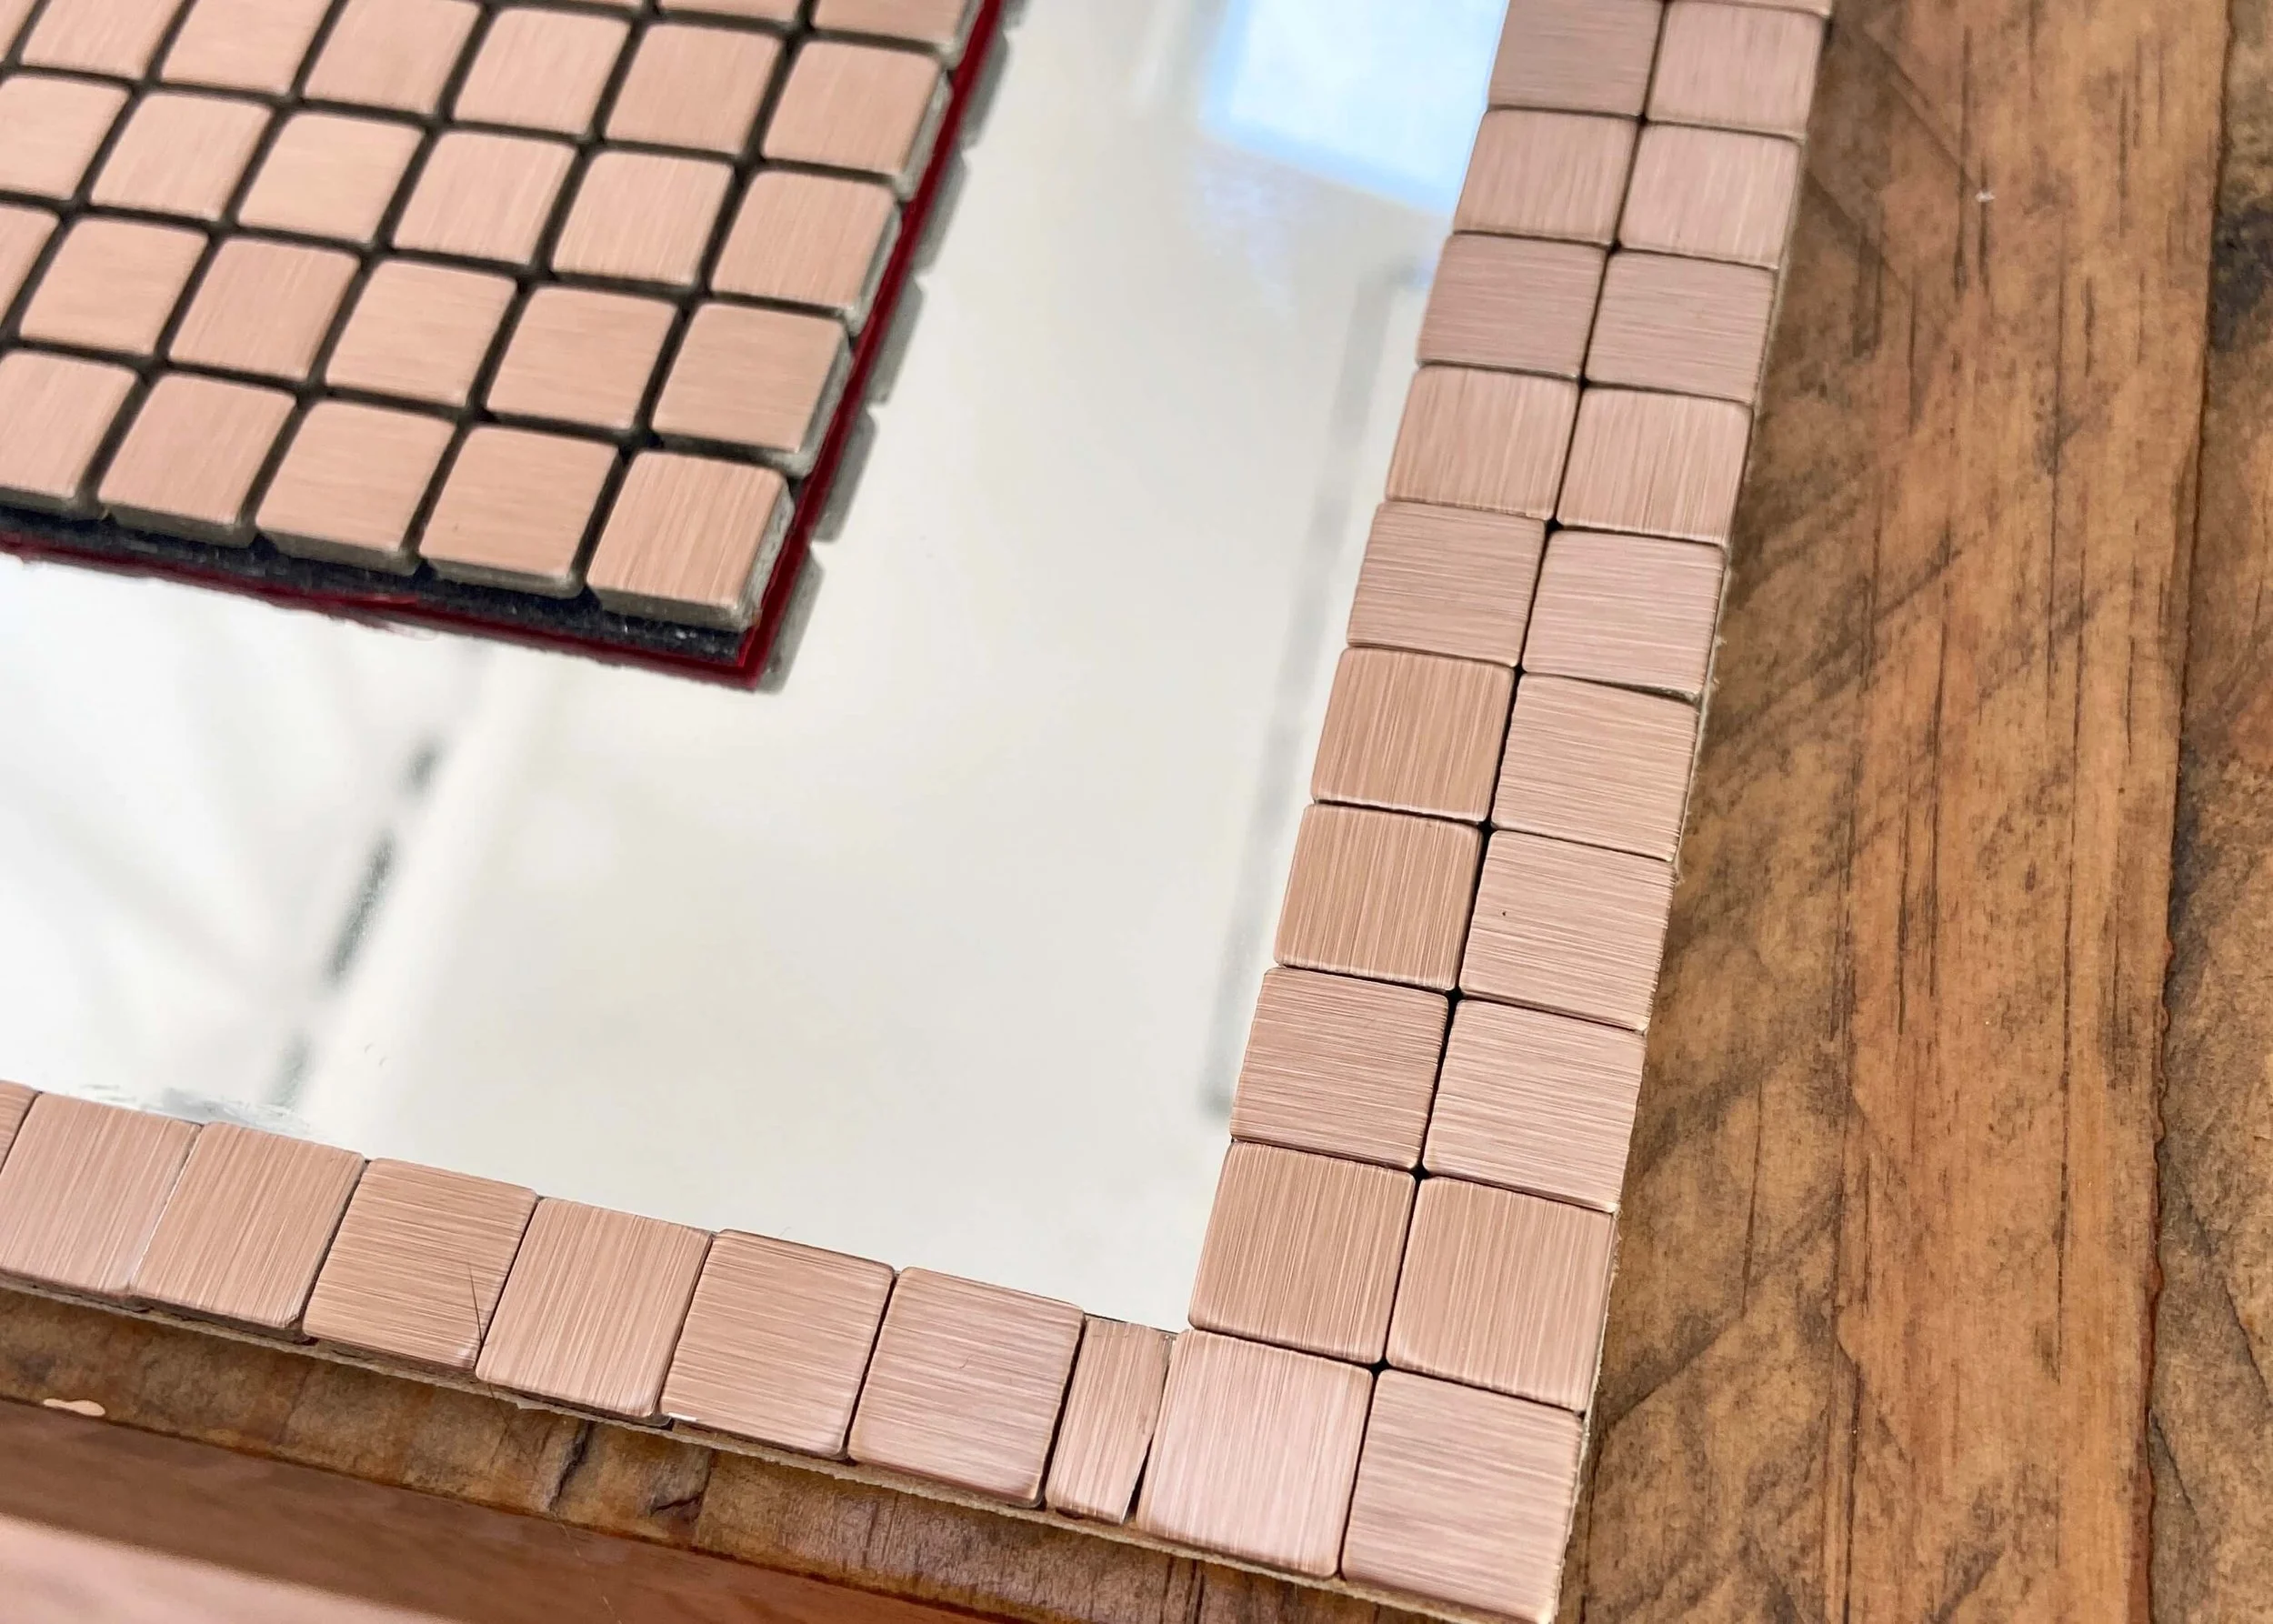
Slowly but surely, I then stuck on each individual tiles around the mirror. I decided I wanted to have the frame two tiles thick (2cm).
11.
It was quite a quick process sticking the tiles on at the base and sides of the mirror where the edge is straight. Where the mirror was curved, I carefully cut tiles at angles to follow the curves.
12.
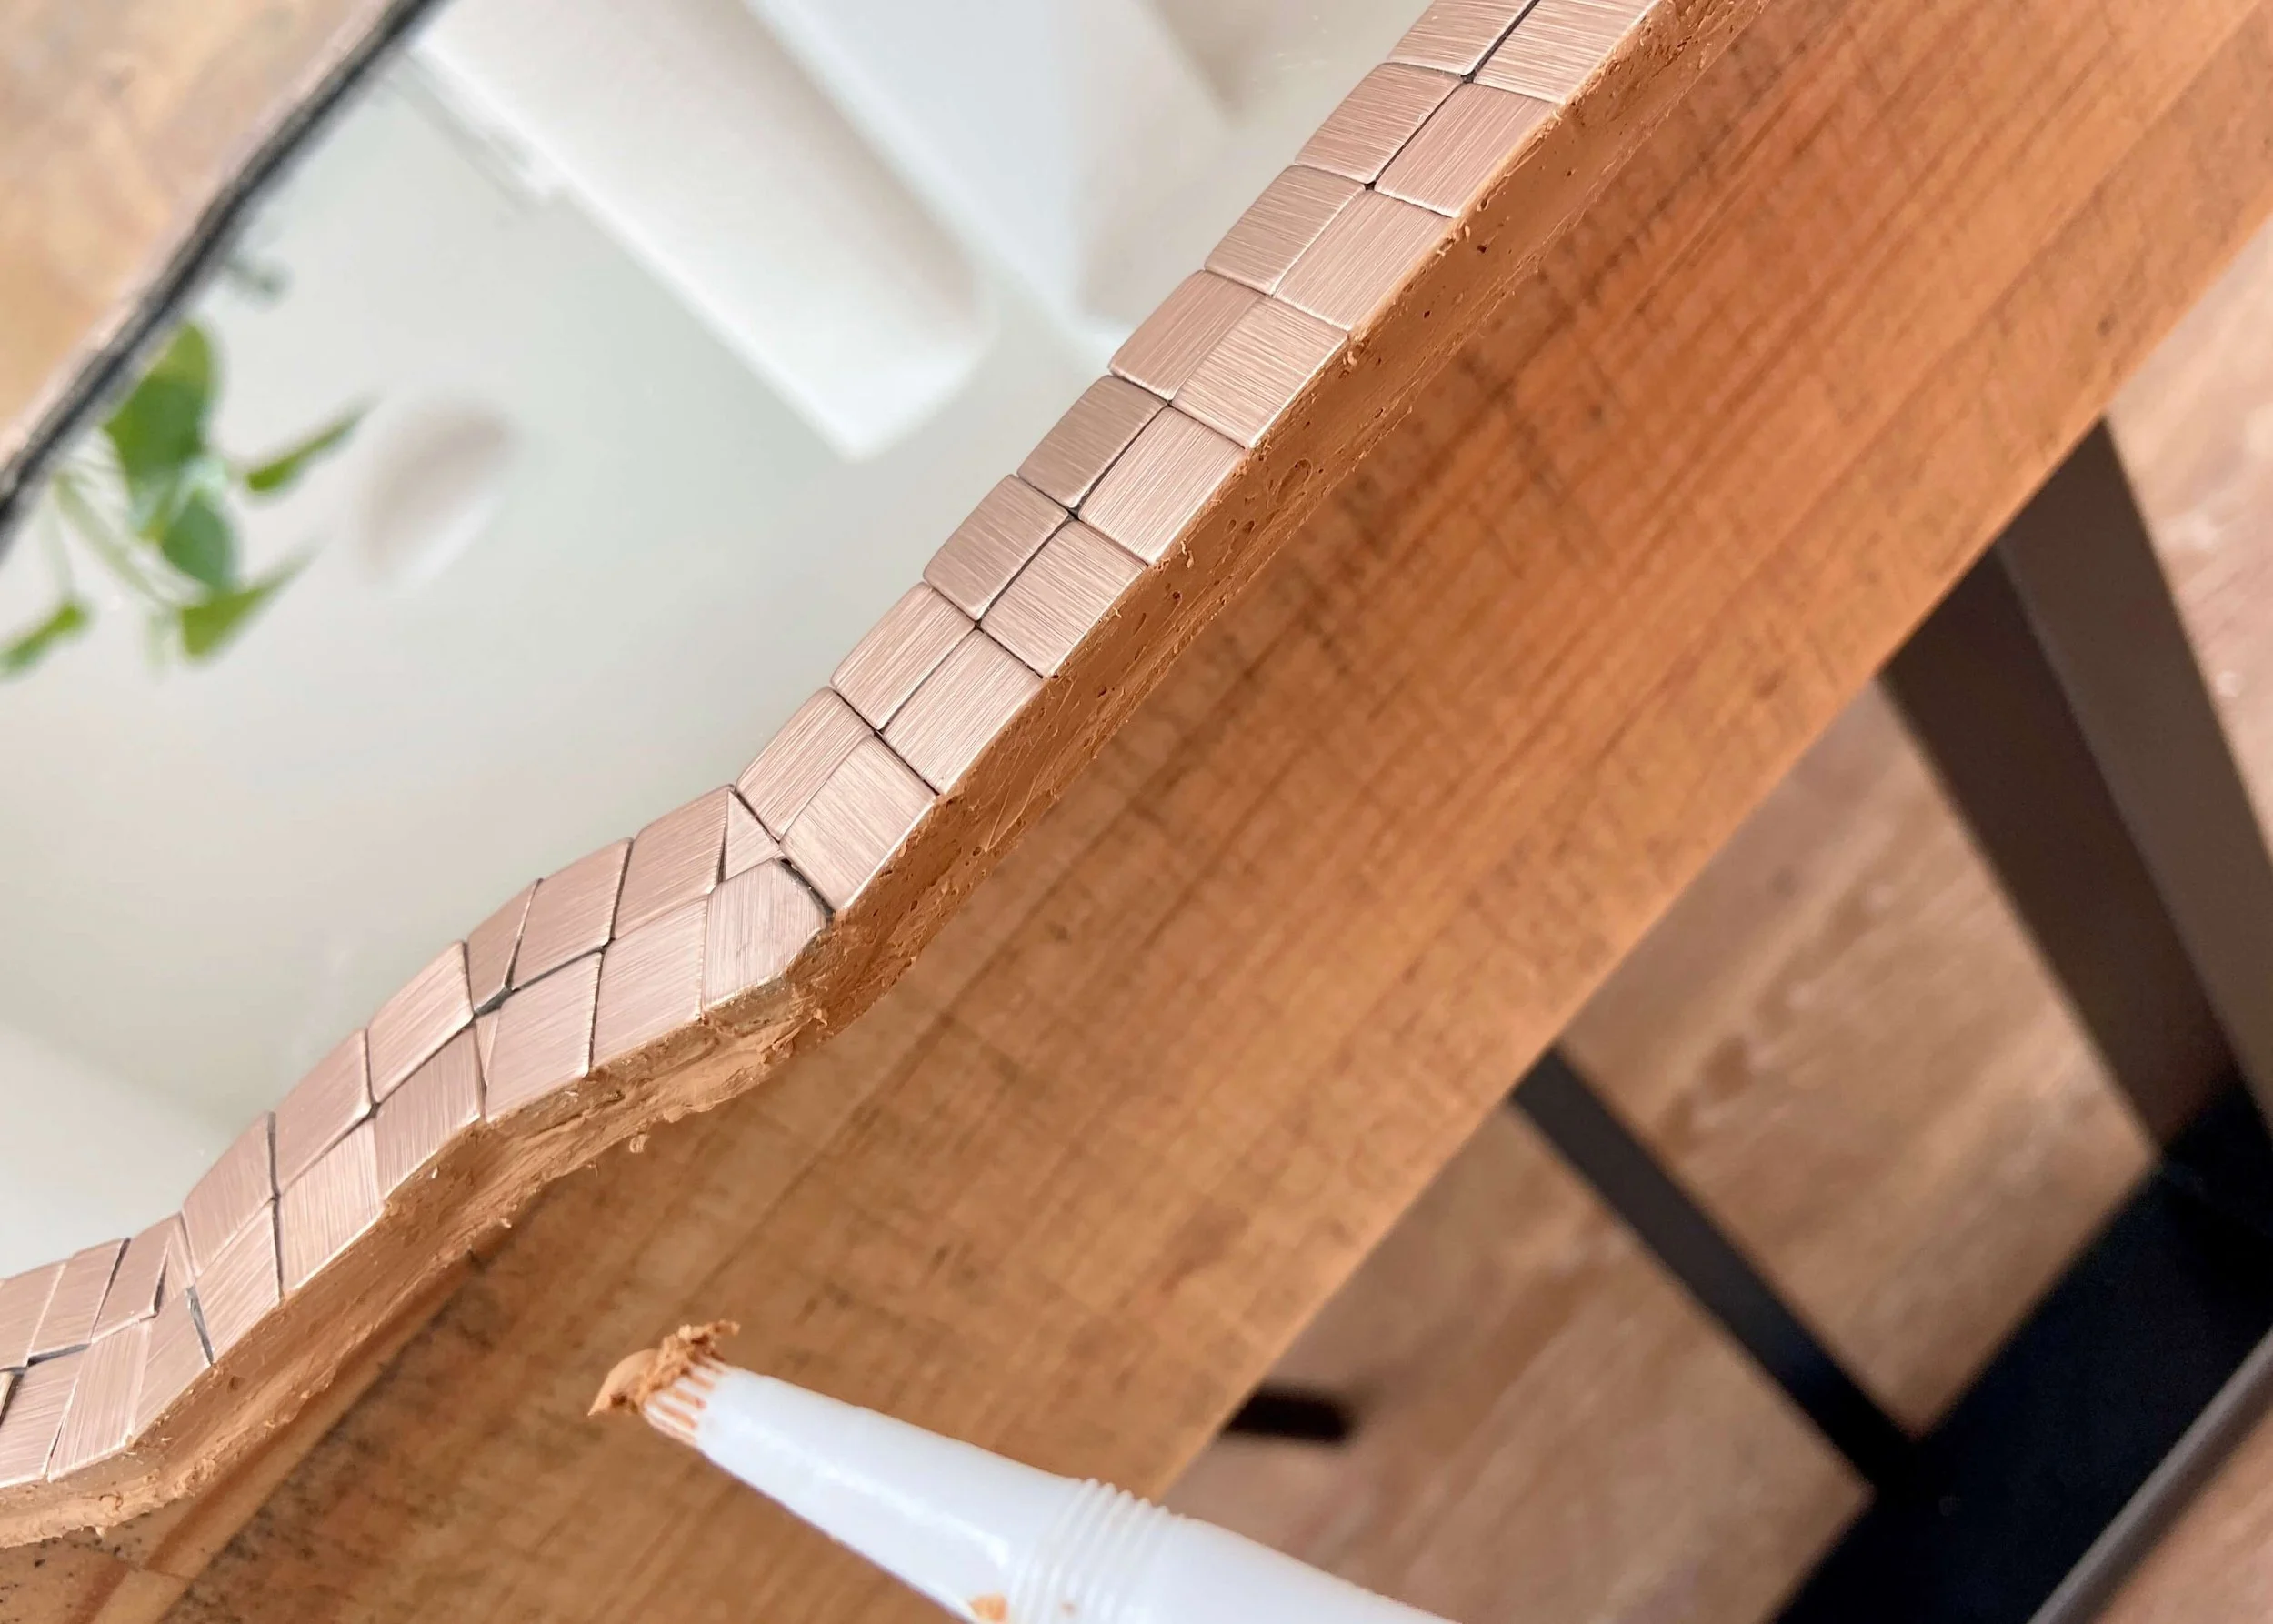
Once I had stuck on all the tiles, I used a similar coloured caulk t neaten up and smooth the edges of the mirror. Where the caulk got on the front of the mirror, I carefully wiped it off.