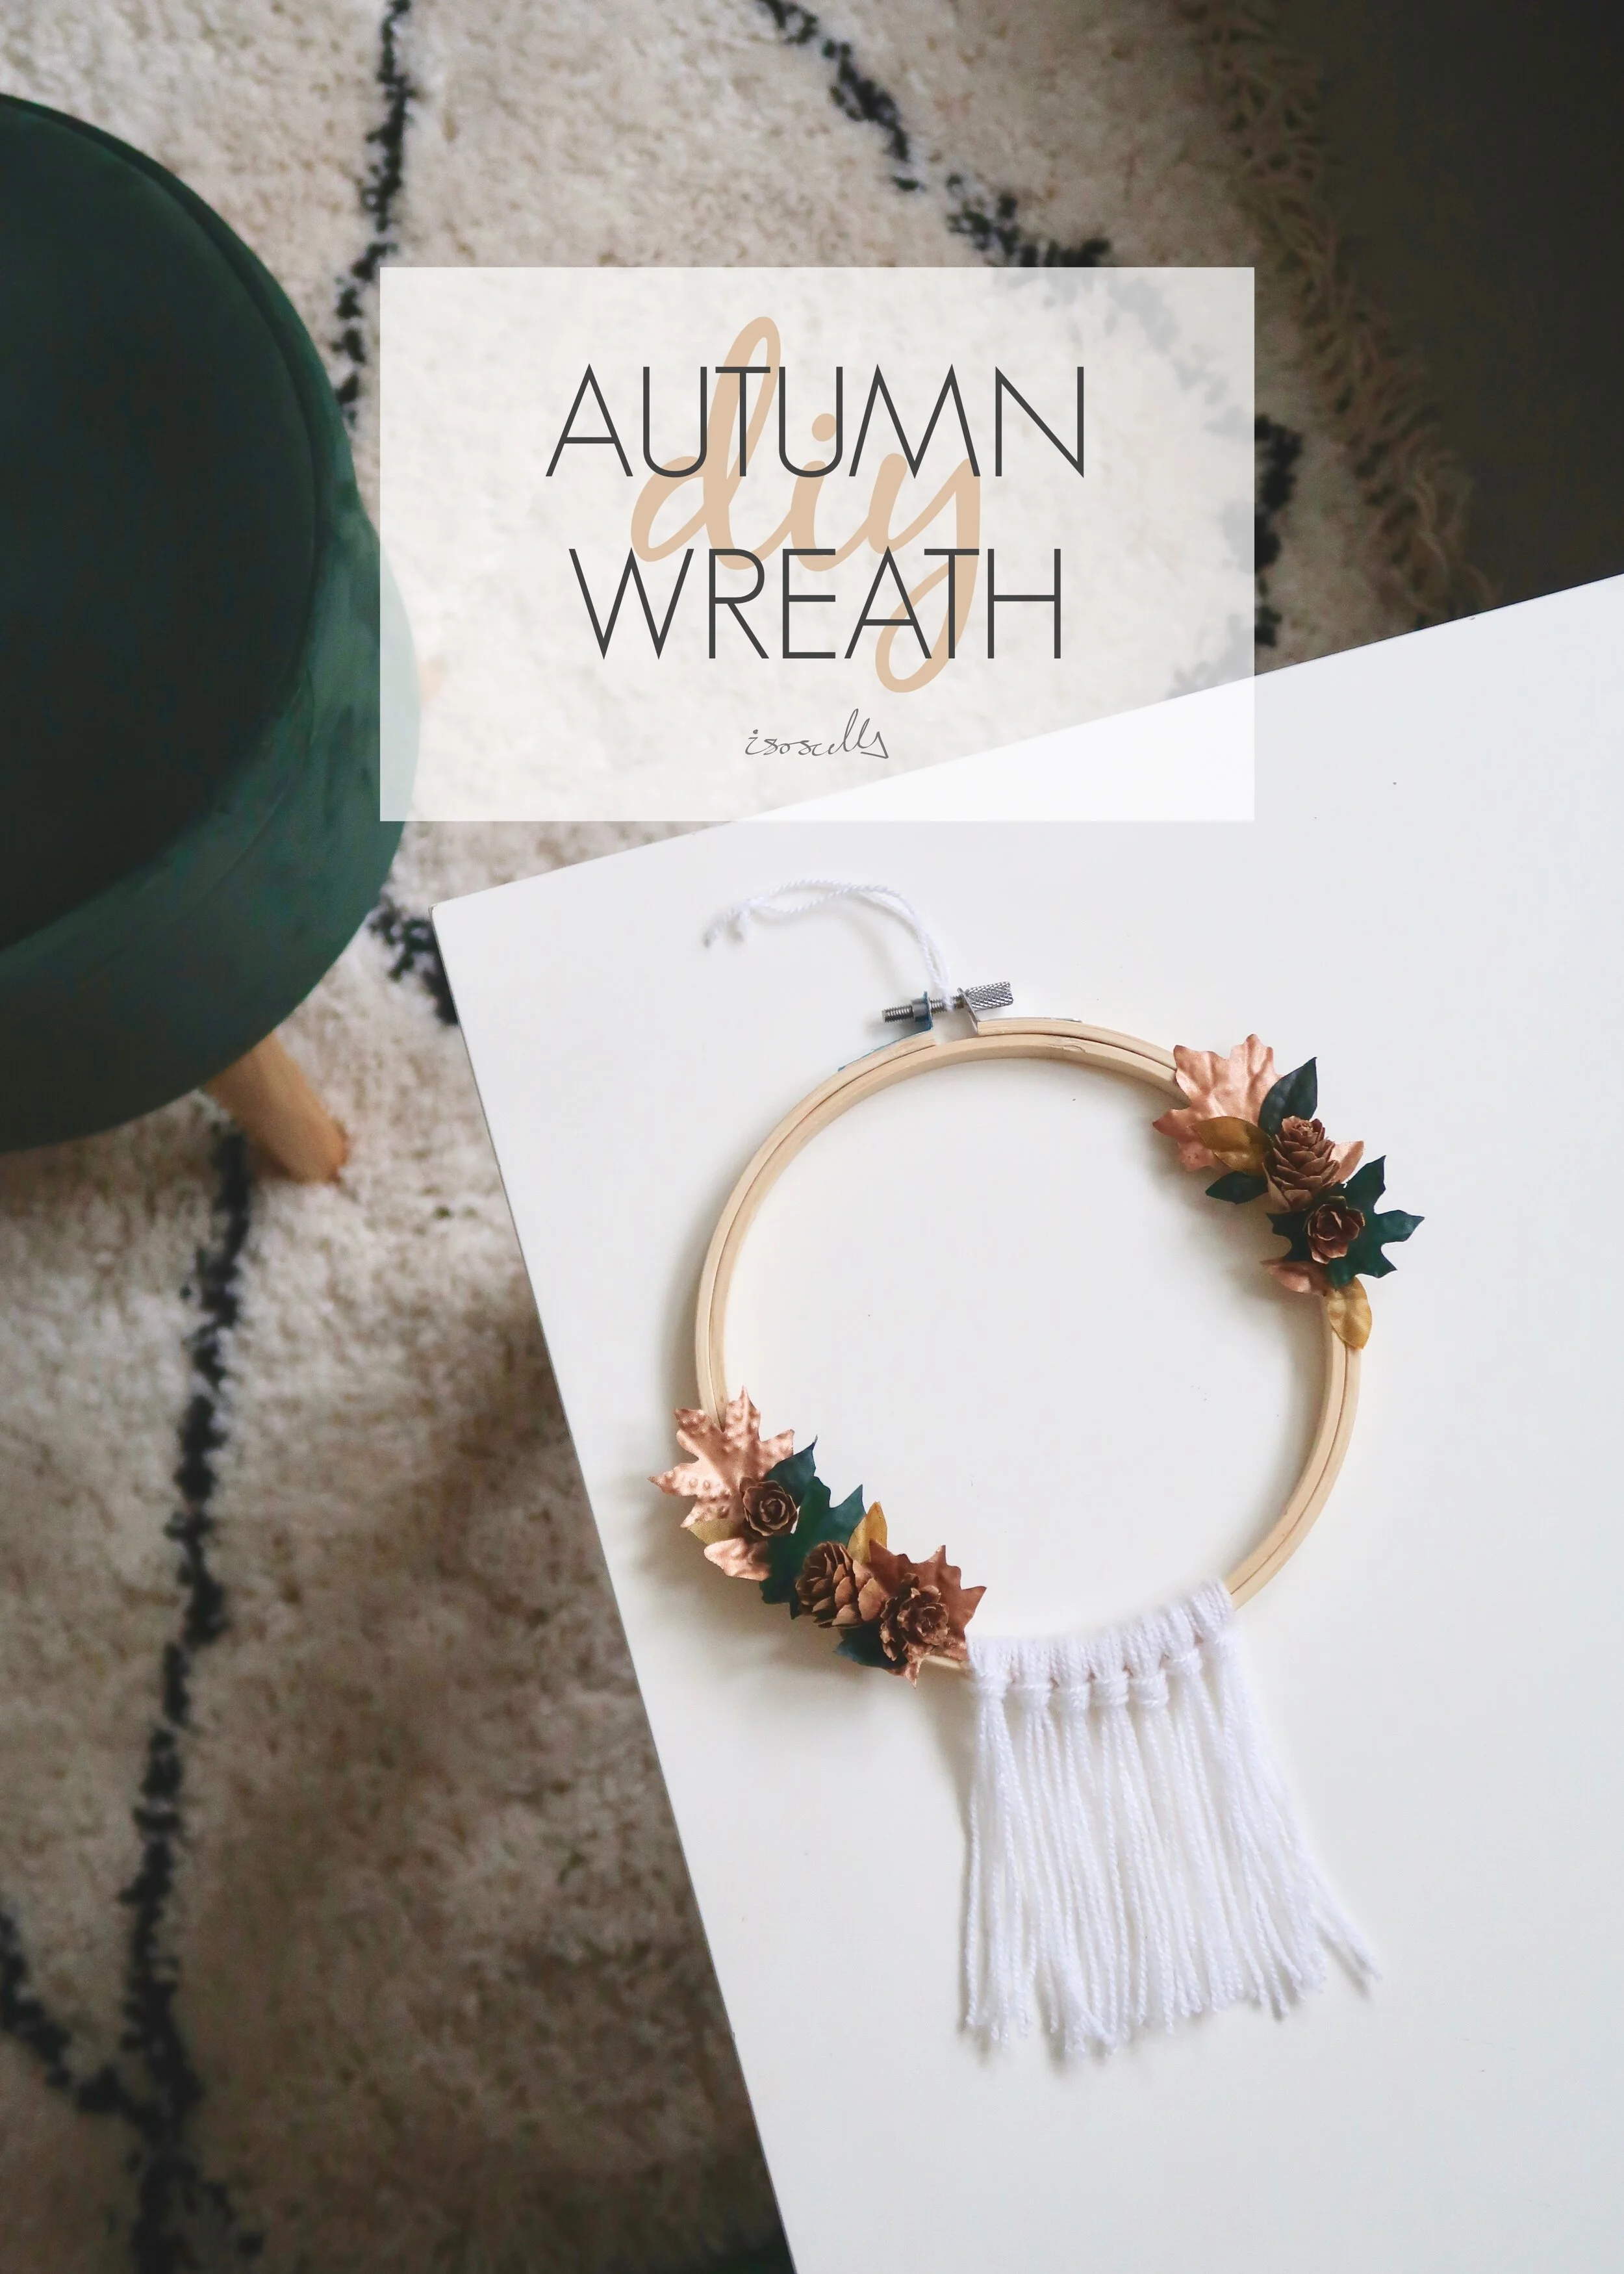

Decorate for autumn with this quick and easy artificial autumn wreath!
It’s taken me a while, but if you follow me on instagram you’ll know that last weekend, I finally started to get the autumn feels. The weather here has been relatively mild, but it’s suddenly dropped, the leaves are turning and it’s finally feeling autumnal. Autumn is such a naturally pretty season, so I love the fact that the decor at this time of year is all about bringing this prettiness inside. Every year I admire the beautiful wreaths (real and artificial) that other creatives make, but for some unknown reason, I’ve never made my own (aside from this one which I made in a wreath-making class). I’m all about recycling my craft supplies, and so when my boyfriend declared he was getting rid of an old embroidery project of mine (it was on it’s last legs to be fair), I took the project off the hoop and decided that 2019 was the year that I would have a go at making my own autumn wreath. Keep reading to find out exactly what I used and how I made it…


1.
First of all, decide how long you want your tassels to be from your hoop. Cut off 34 lengths of wool or twine that are double this length.

2.
Cluster four of these lengths together, holding the tops together and fold them in half.

3.
Place the wool loop under the bottom of the embroidery hoop. Bring the loose ends of the wool cluster up and over the embroidery hoop, and through the wool loop.

4.
Pull the ends until the wool loop is nice and tight and creating a tassel with the loose ends dangling downwards.

5.
Repeat steps 2-4 for the rest of the wool lengths until you have 7 tassels hanging from the bottom of your hoop. Secure them in place with a little hot glue.

6.
Using scissors, take your craft leaves and trim them to make them different sizes. Create some different shaped leaves from the scraps.
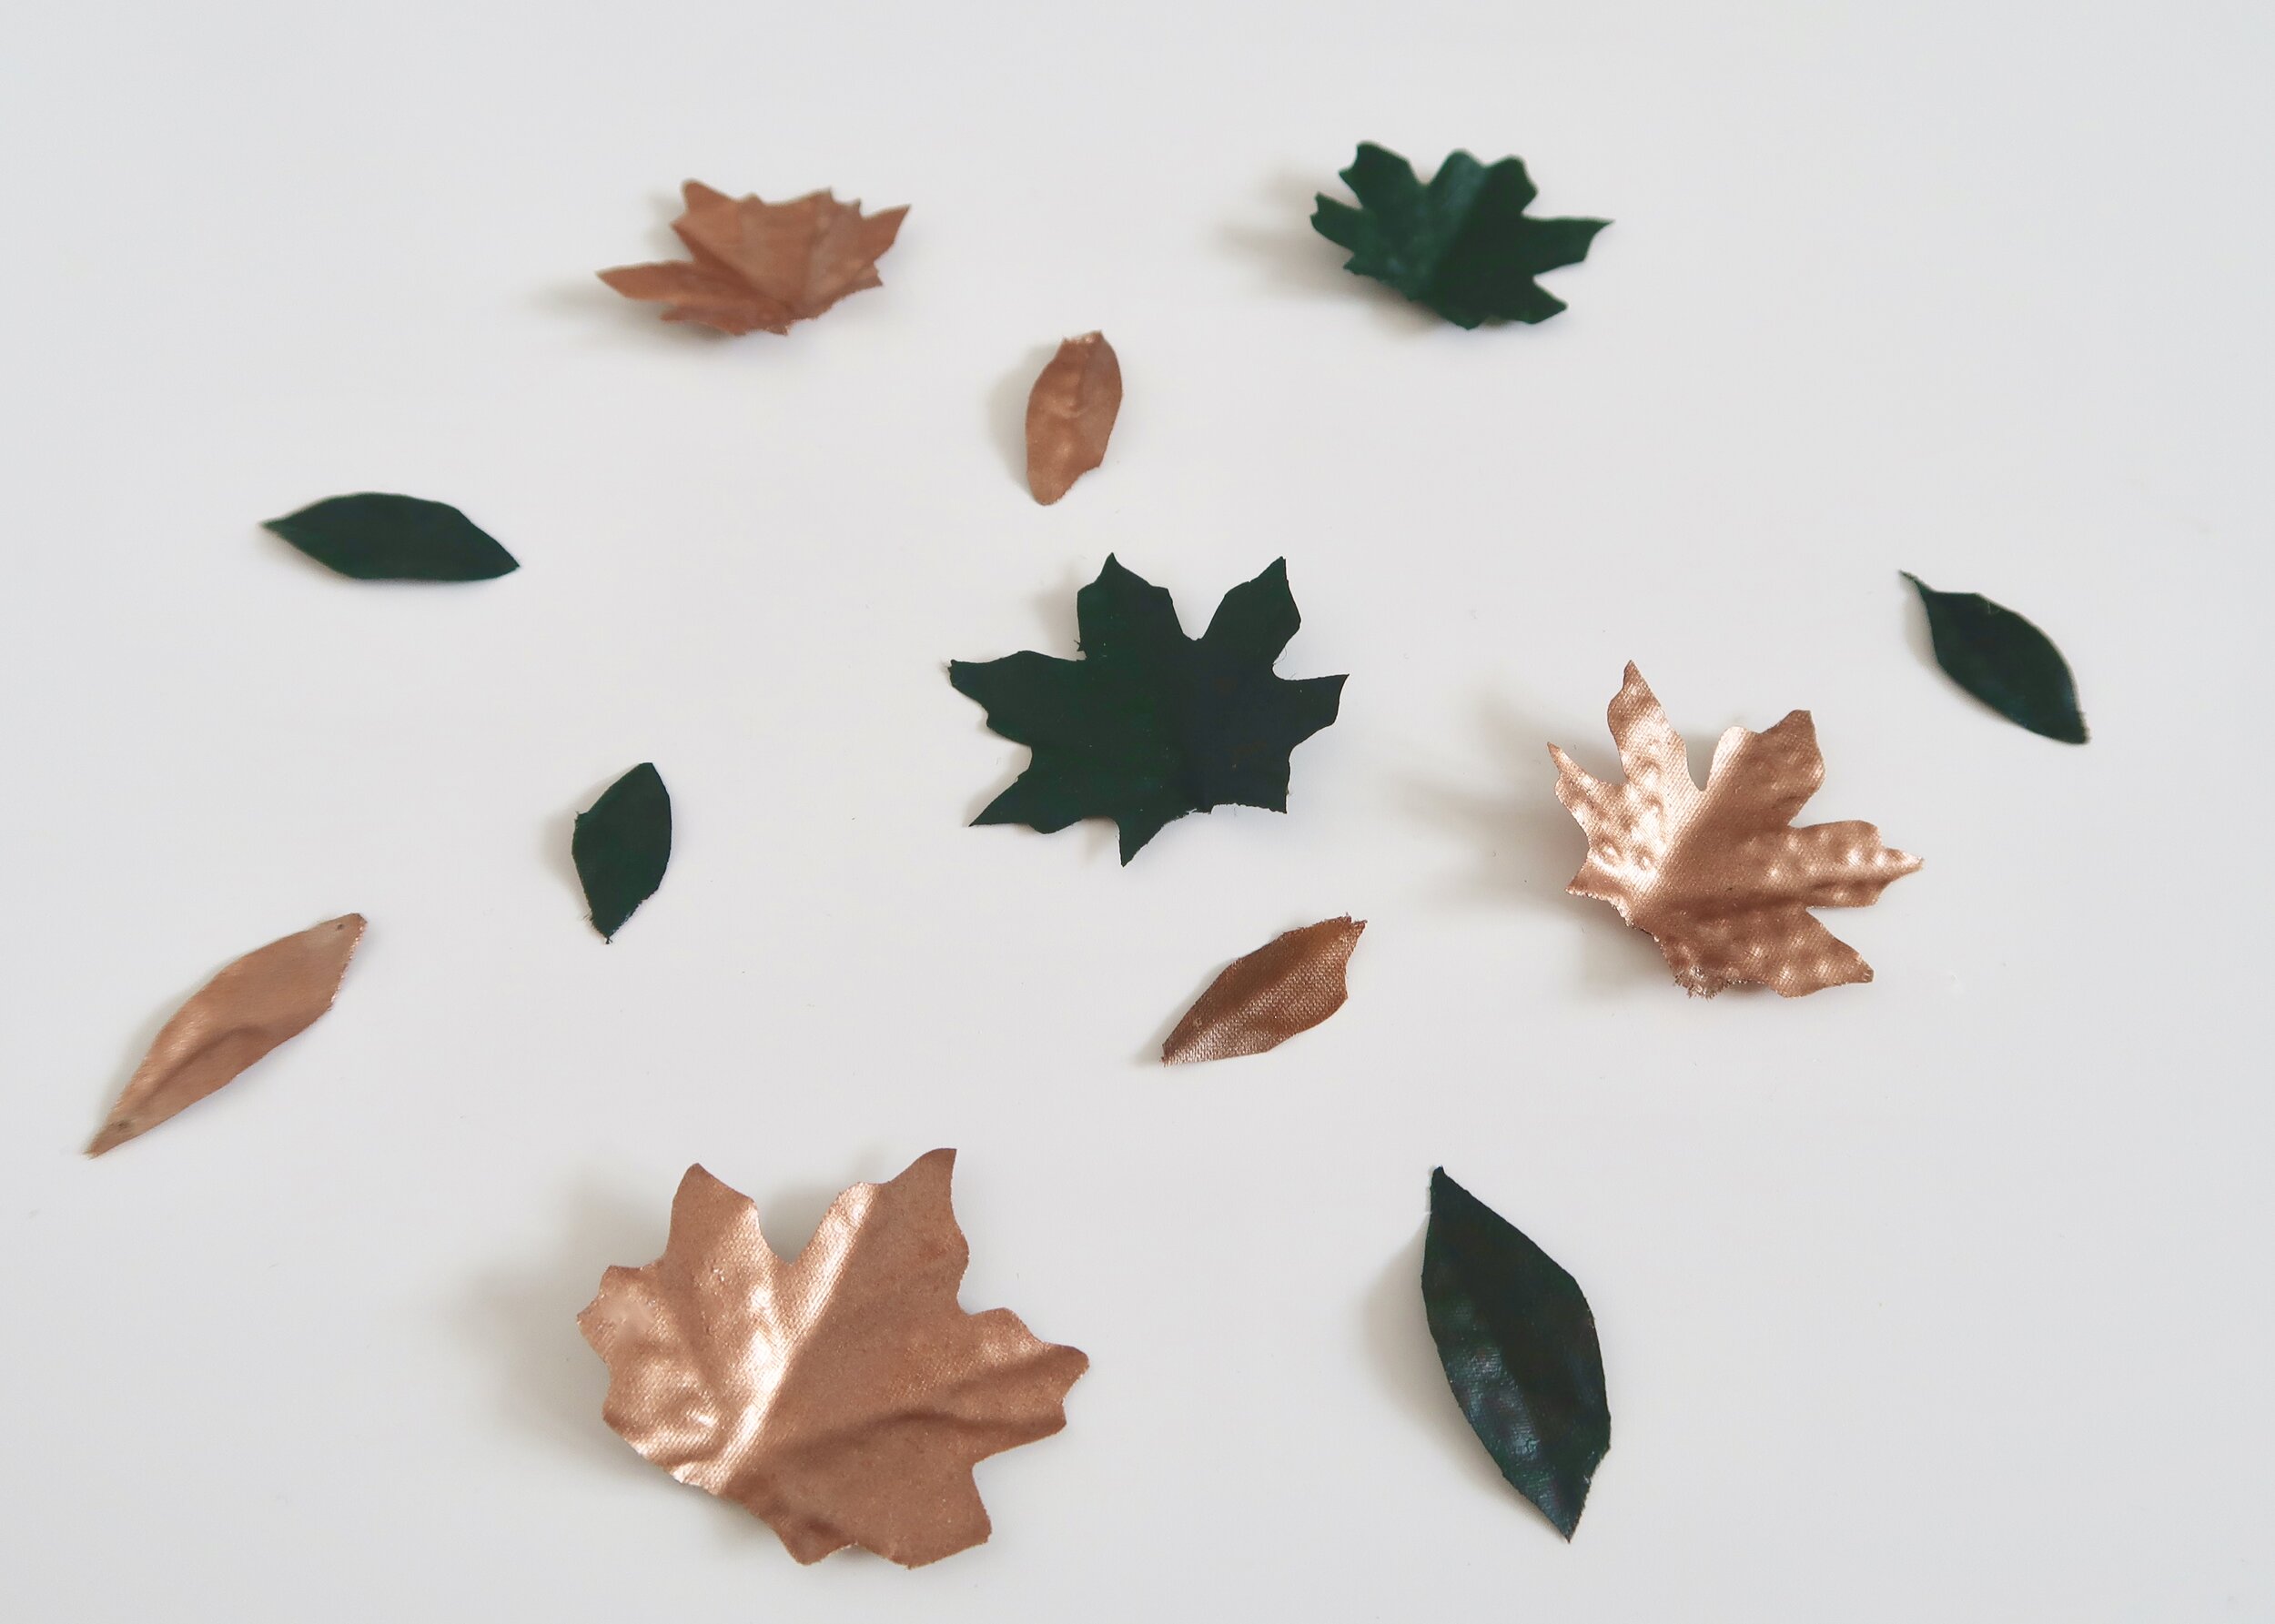
7.
I wanted my wreath to match my decor, and so I then sprayed half of my leaves with copper paint, and painted the other half in a dark green.

8.
Use a scalpel or craft knife to trim off the top of a couple of the pine cones, and to make some of them flatter on one side to stick to the wreath.

9.
Decide where you want to add your leaves and pine cones. I decided to just keep mine in the bottom left and top right corners of my hoop but it is entirely up to you what design you go for. Once decided, stick on the larger leaves before adding the smaller leaves and pine cones.

10.
Keep going until you’re happy with your design. Try to avoid sticking the leaves on completely flat to the hoop, to give the leaves a more realistic and 3D shape. After adding my painted leaves, I then decided to add a few in this mustard yellow to really make it pop.