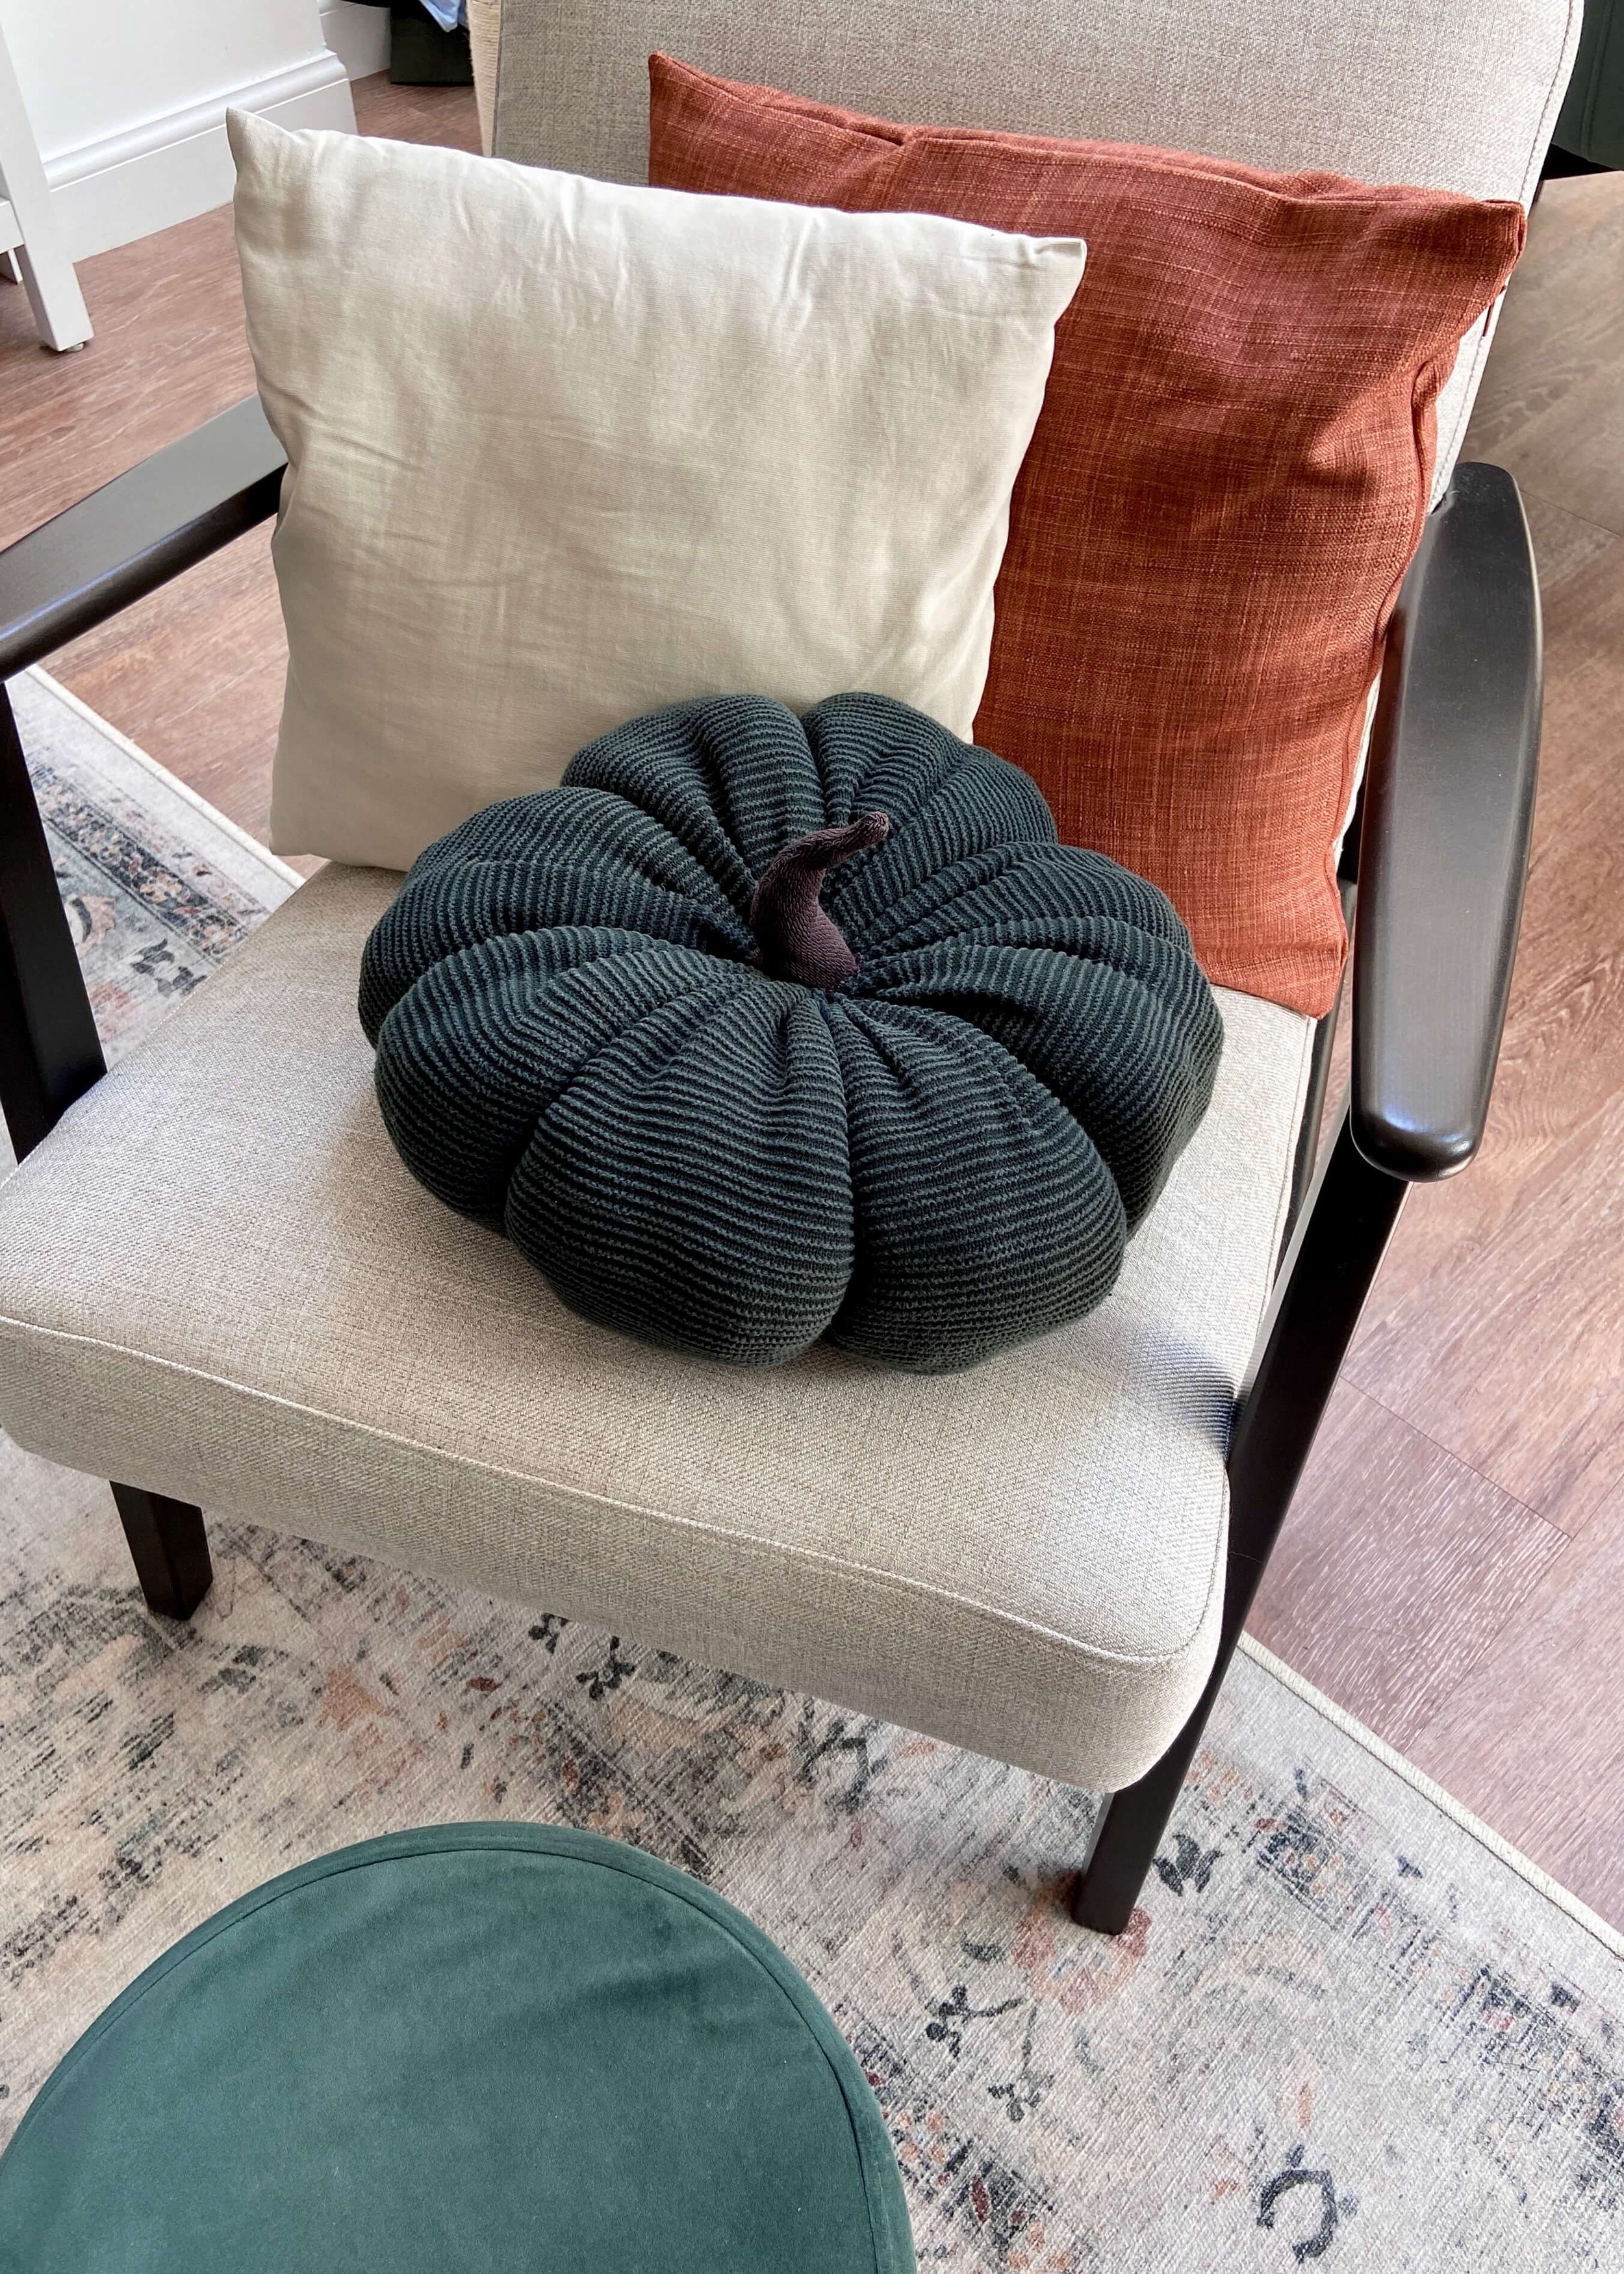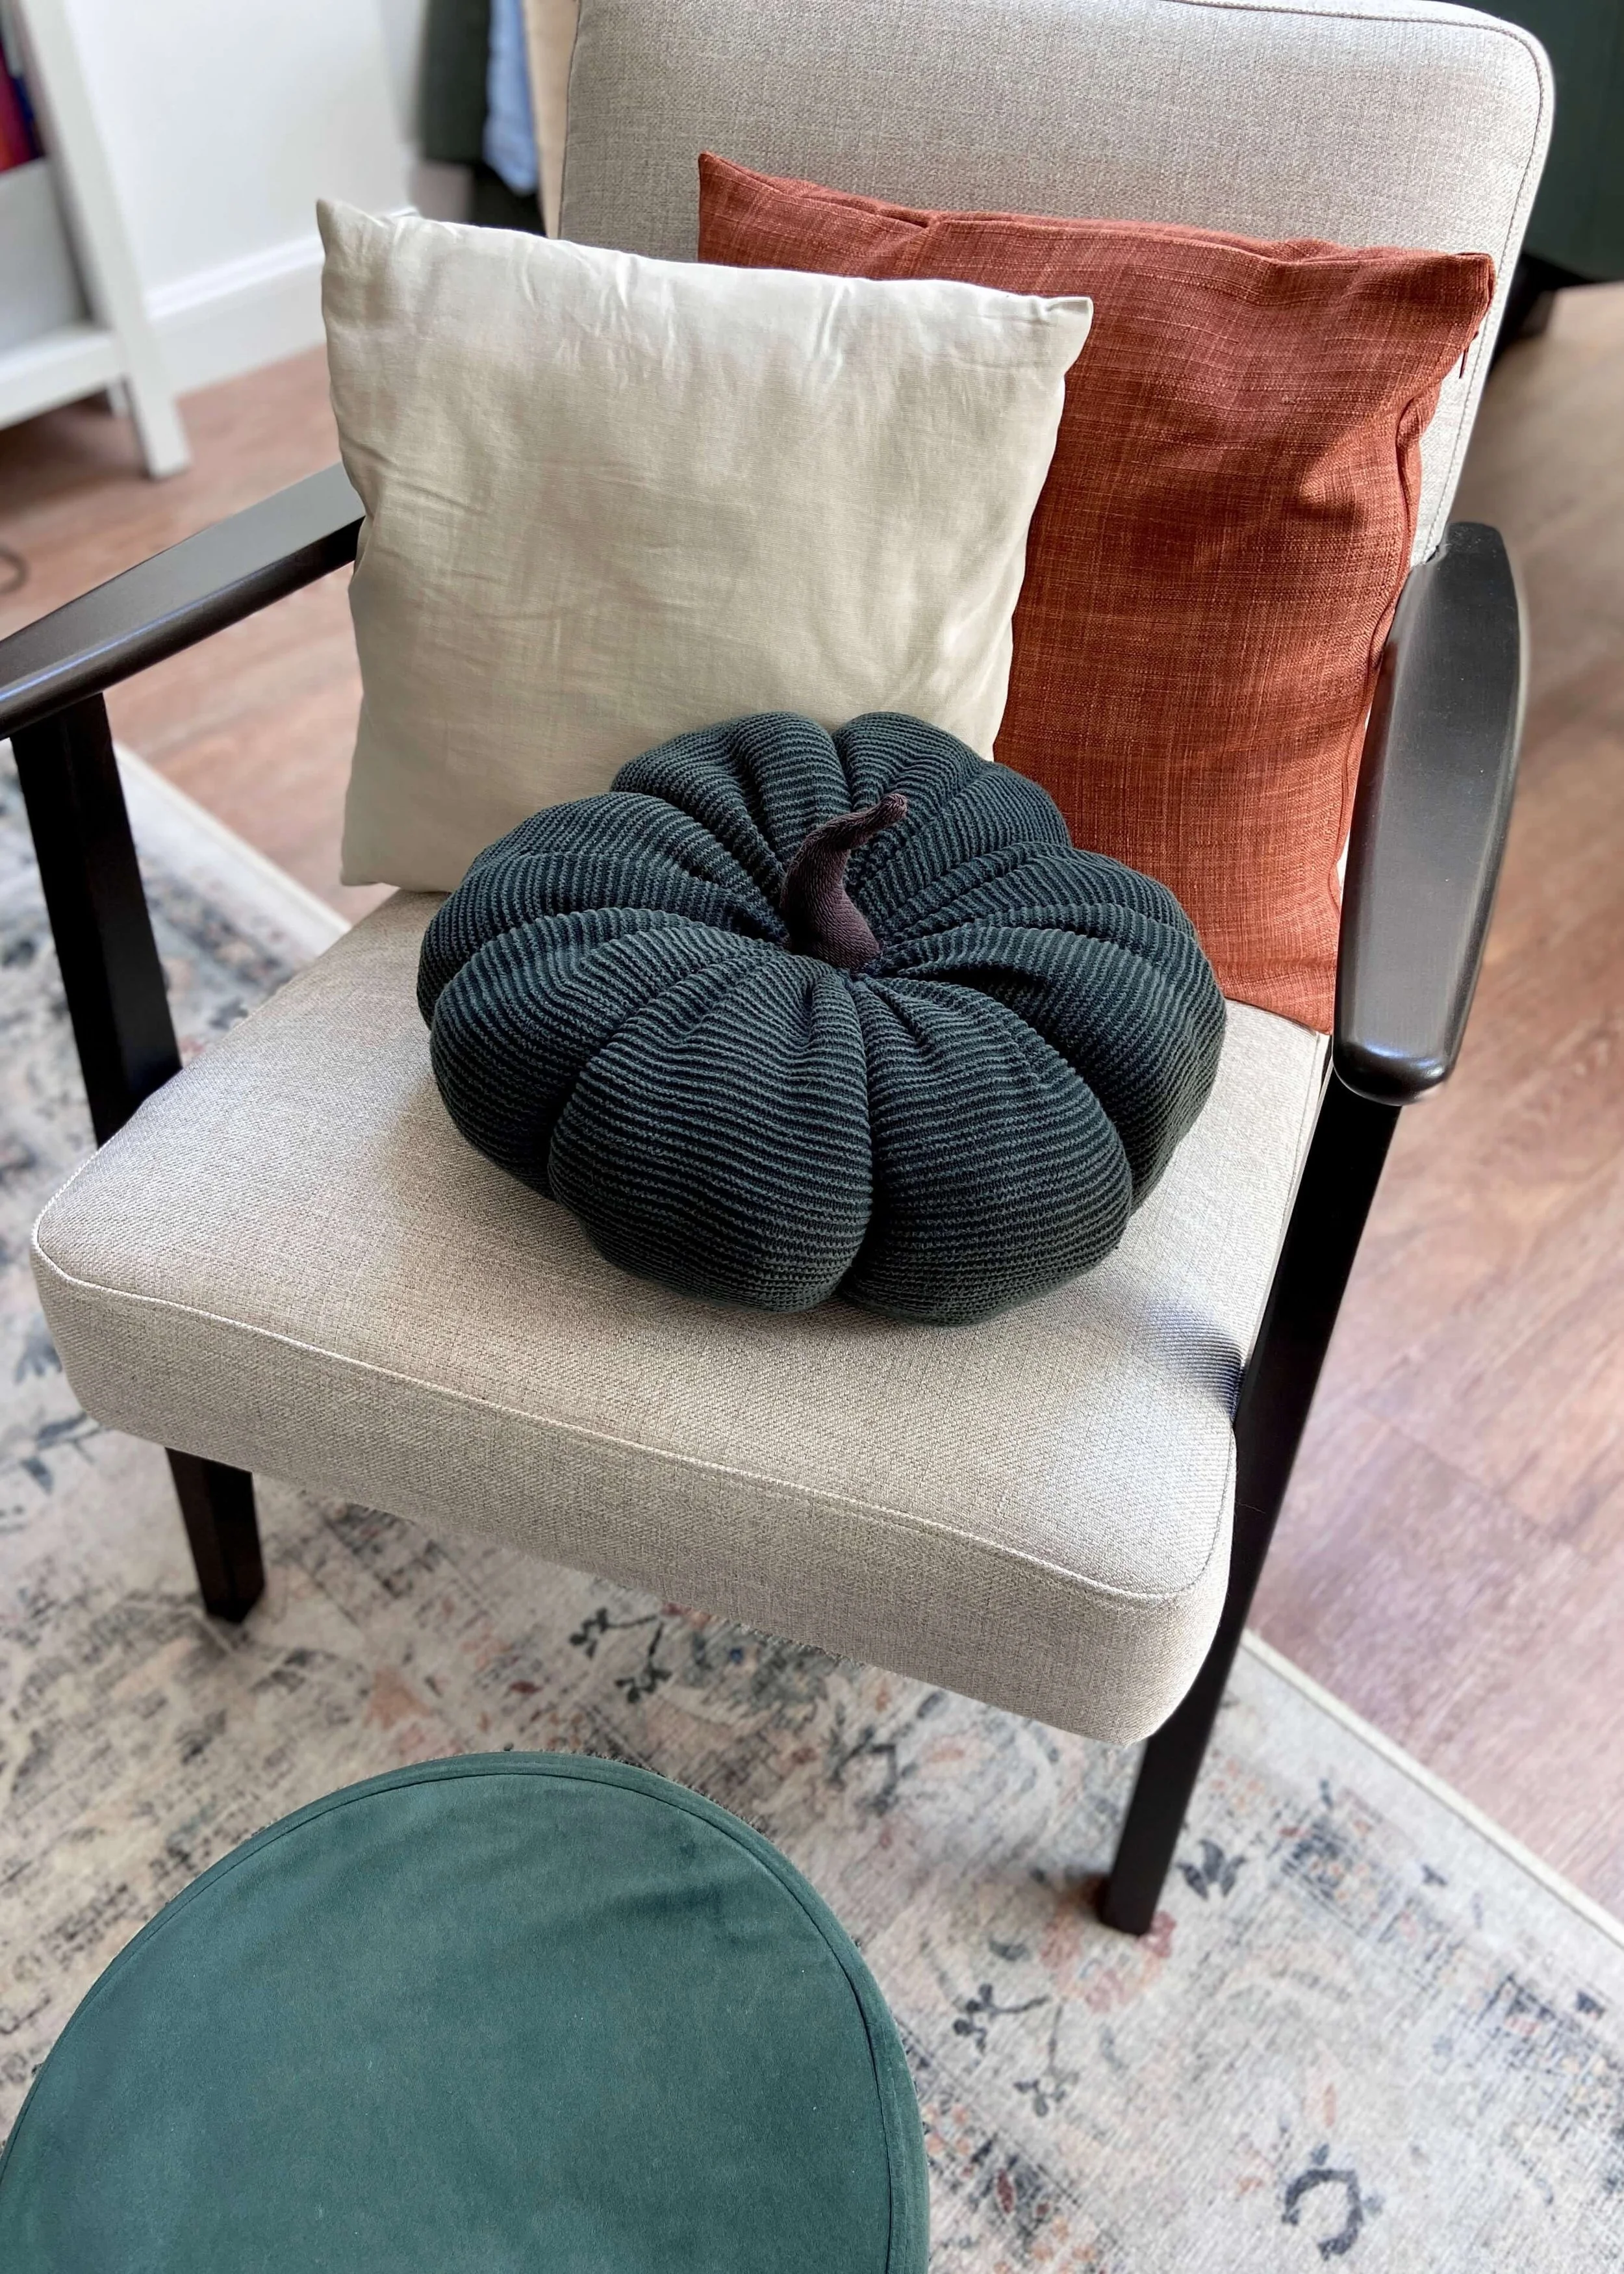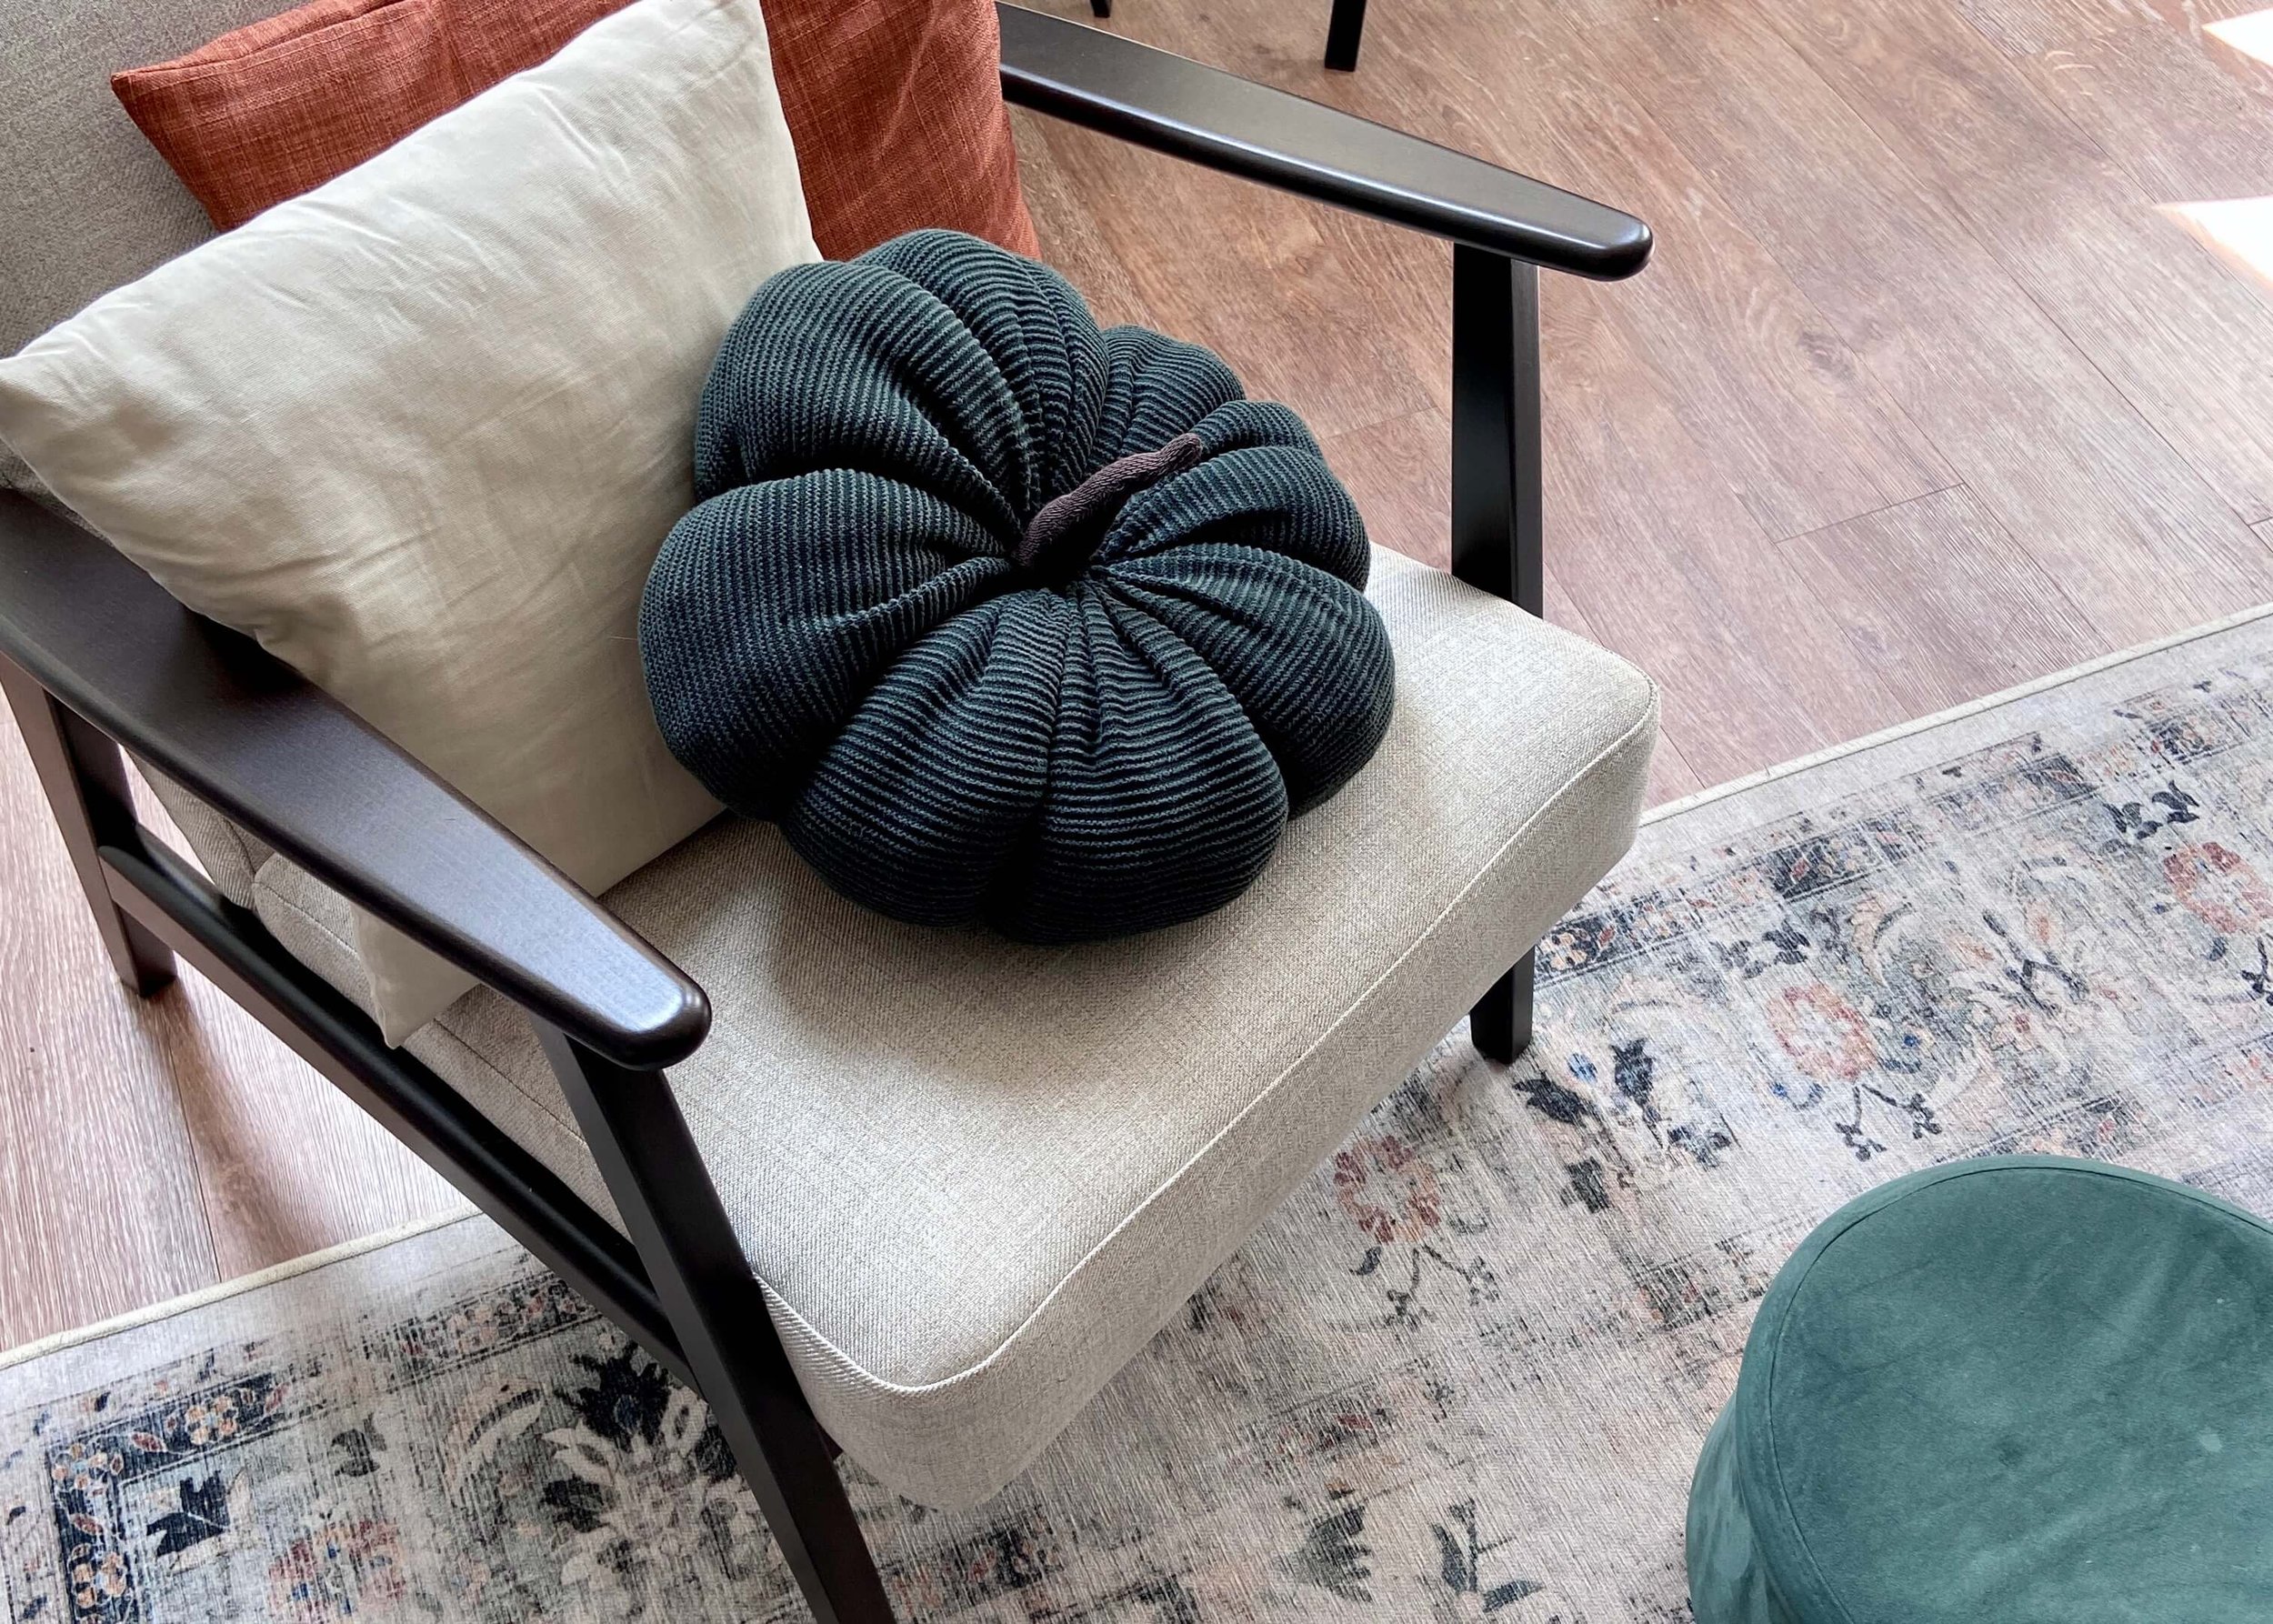
Transform an old jumper into a cosy pumpkin cushion ready for Autumn!
Hello, it’s been a while! What better way to return to the blogosphere than with an Autumn DIY! Autumn is one of my favourite seasons, I love the cosiness, the jumpers, candles and decor... One of the pieces of decor I’ve been seeing everywhere in the shops, since the summer, are pumpkin shaped cushions. You can find them in all different sizes, fabrics and colours, but they’re also pretty easy to make yourself!
Why make a pumpkin cushion?
When there’s so much already available you might be wondering why you’d take the time to make one yourself! Well, not only is it so satisfying to make something with your own two hands, but it’s a great way to use up those old jumpers and fabrics that might otherwise have gone to waste. When my husband reluctantly decided to throw a green knitted jumper away that had an irreparable hole in it, I jumped at the chance to give it a new lease of life as a pumpkin cushion. I also used an old pair of socks for the stem, so this project cost me hardly anything.
AUTUMN IS HERE
I can’t quite believe it’s Autumn. If you follow me over on instagram, you might have seen my announcement that I’m pregnant, and also that I’ve been suffering quite badly with Hyperemesis Gravidarum. From around 6 weeks to 18 weeks I spent most of my days in bed, unable to keep food and fluids down, constantly battling dehydration and attempting to sleep my way through the unrelenting nausea. This year has gone both incredibly slowly, but as I didn’t see much of the summer, the Autumn also seems to have sprung up on me all of a sudden. I do love the cosy season though, and thankfully more recently I’ve been able to do the odd bit of crafting and DIY here and there (with help from my wonderful husband), so you can expect to see some more projects and ideas on here soon.
I’d love to know what you think of this project, and also if you’ve experienced Hyperemesis. It really is a beast. Anyway, enough of my rambling, keep reading to find out what materials I used and the step-by-step tutorial!


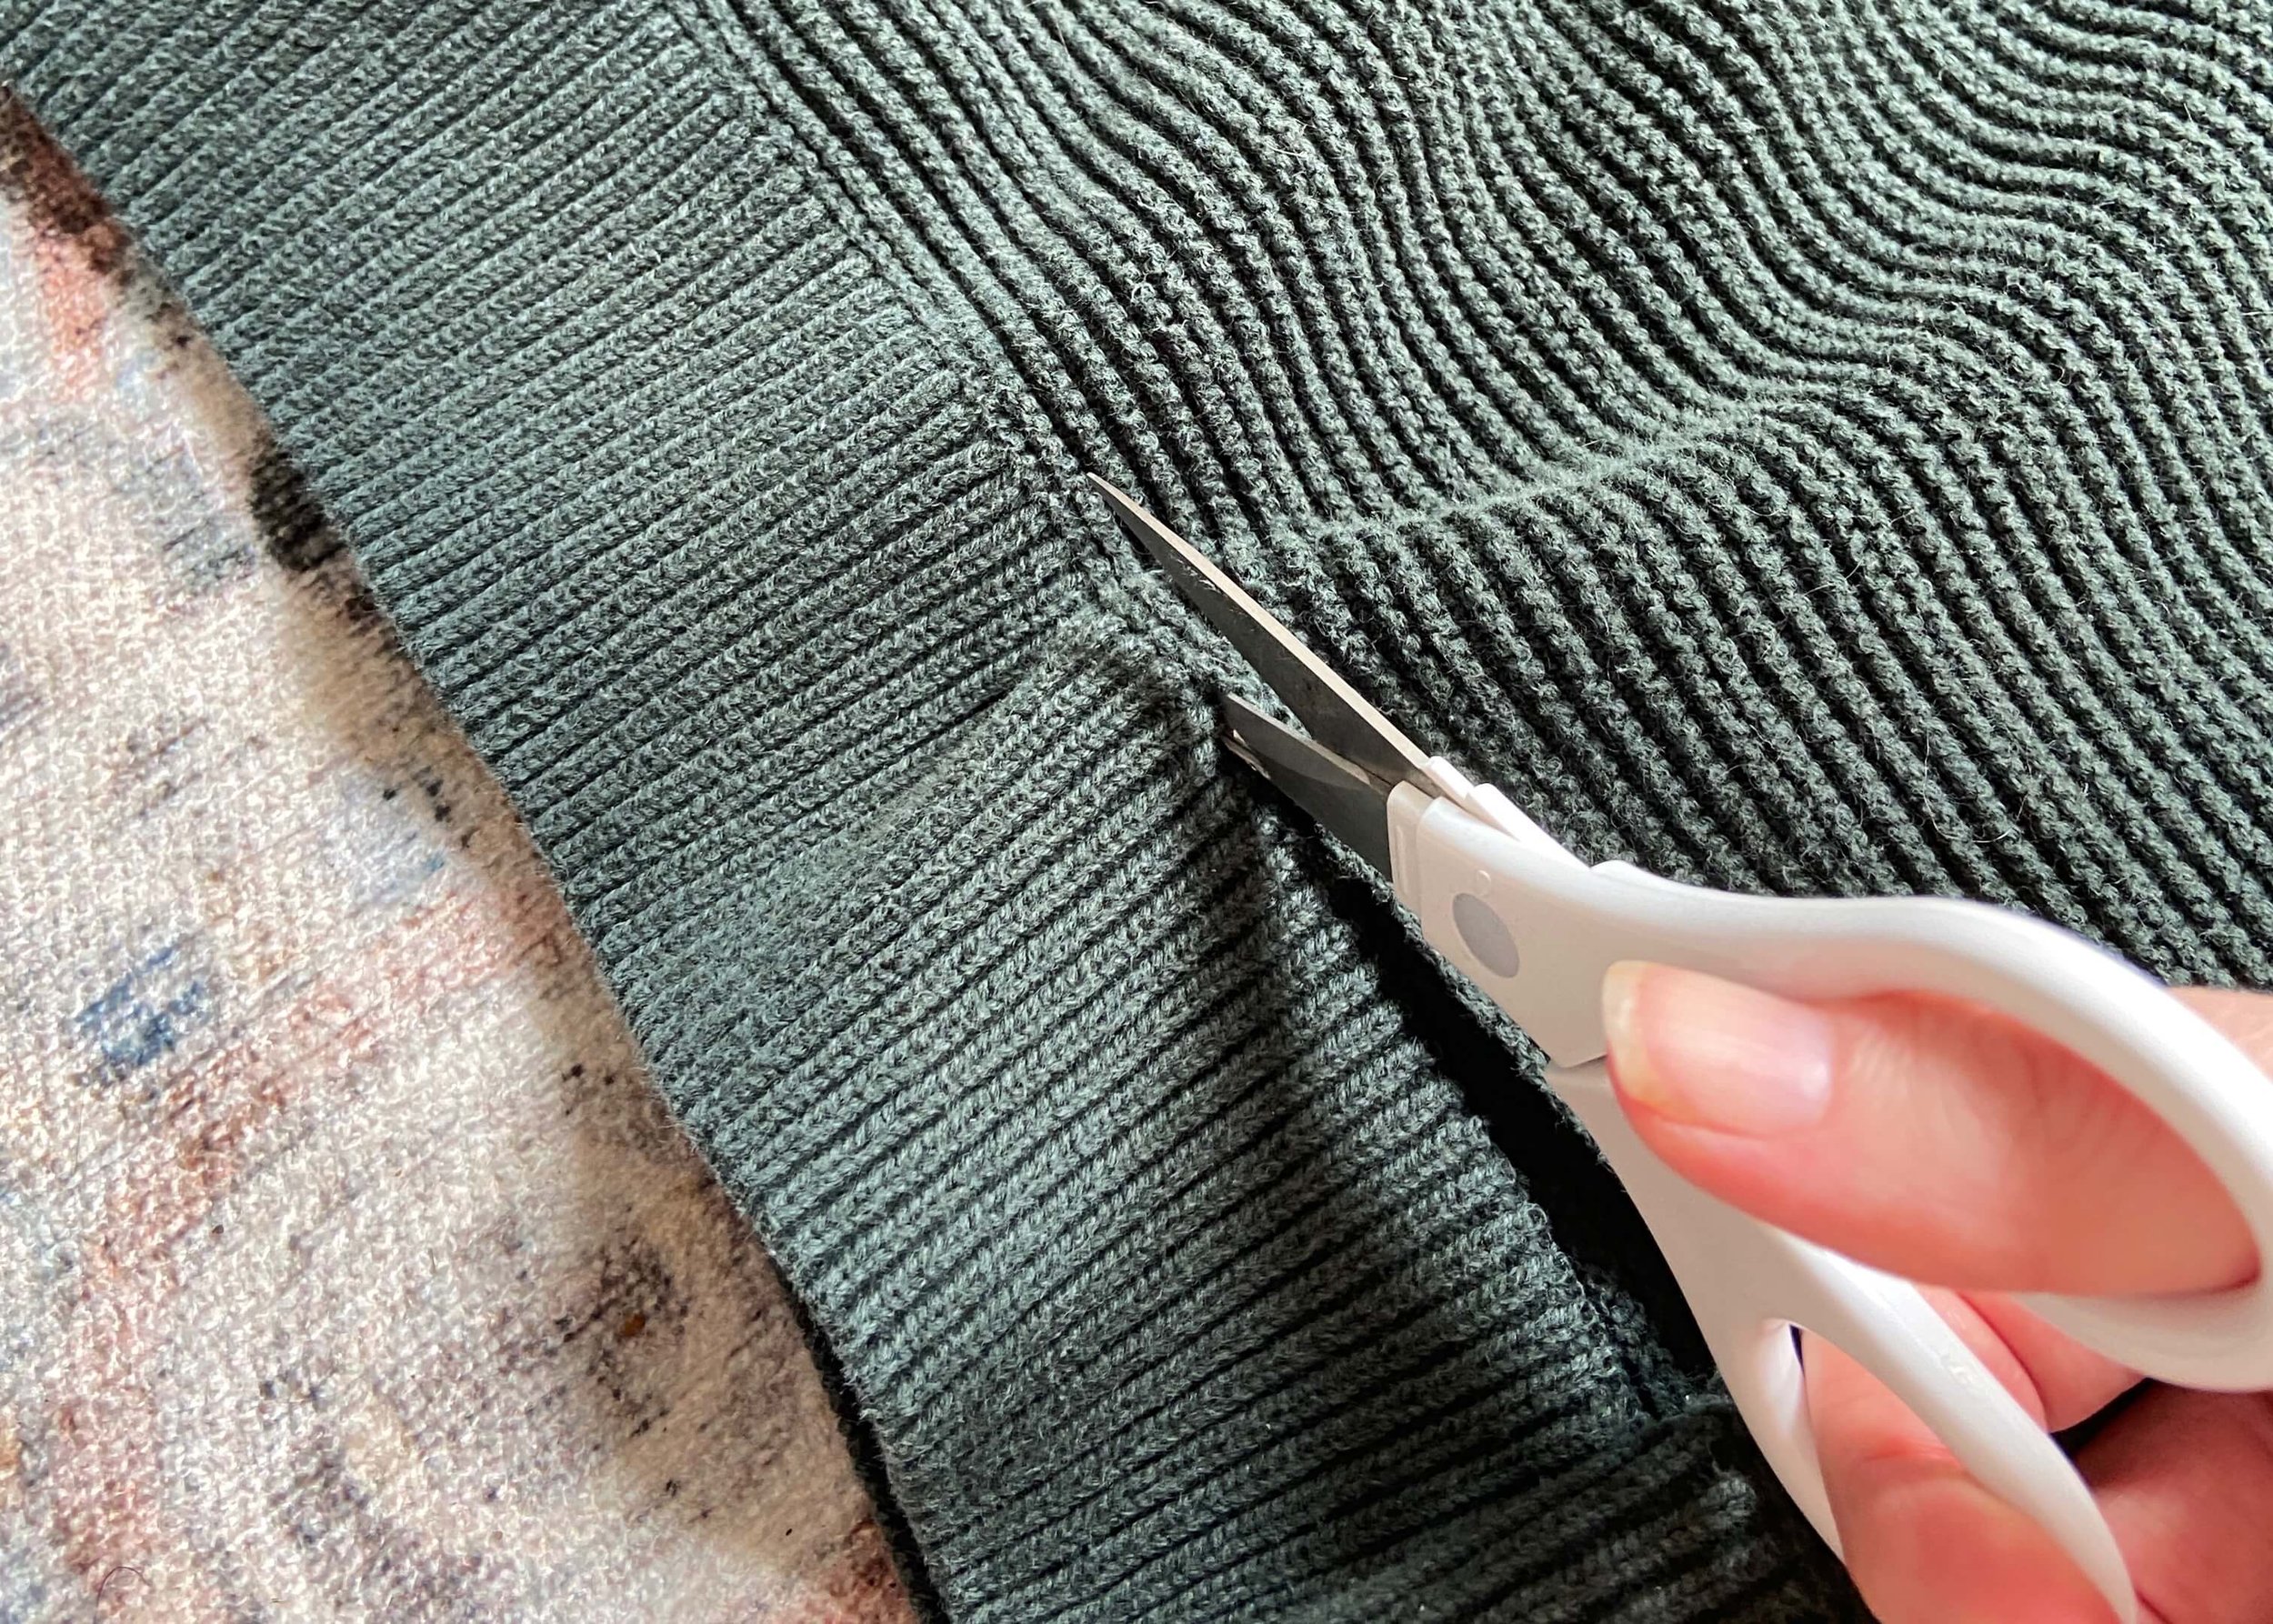
1.
Grab your old jumper and cut off the bottom and top to give you a cyllindrical piece of fabric.
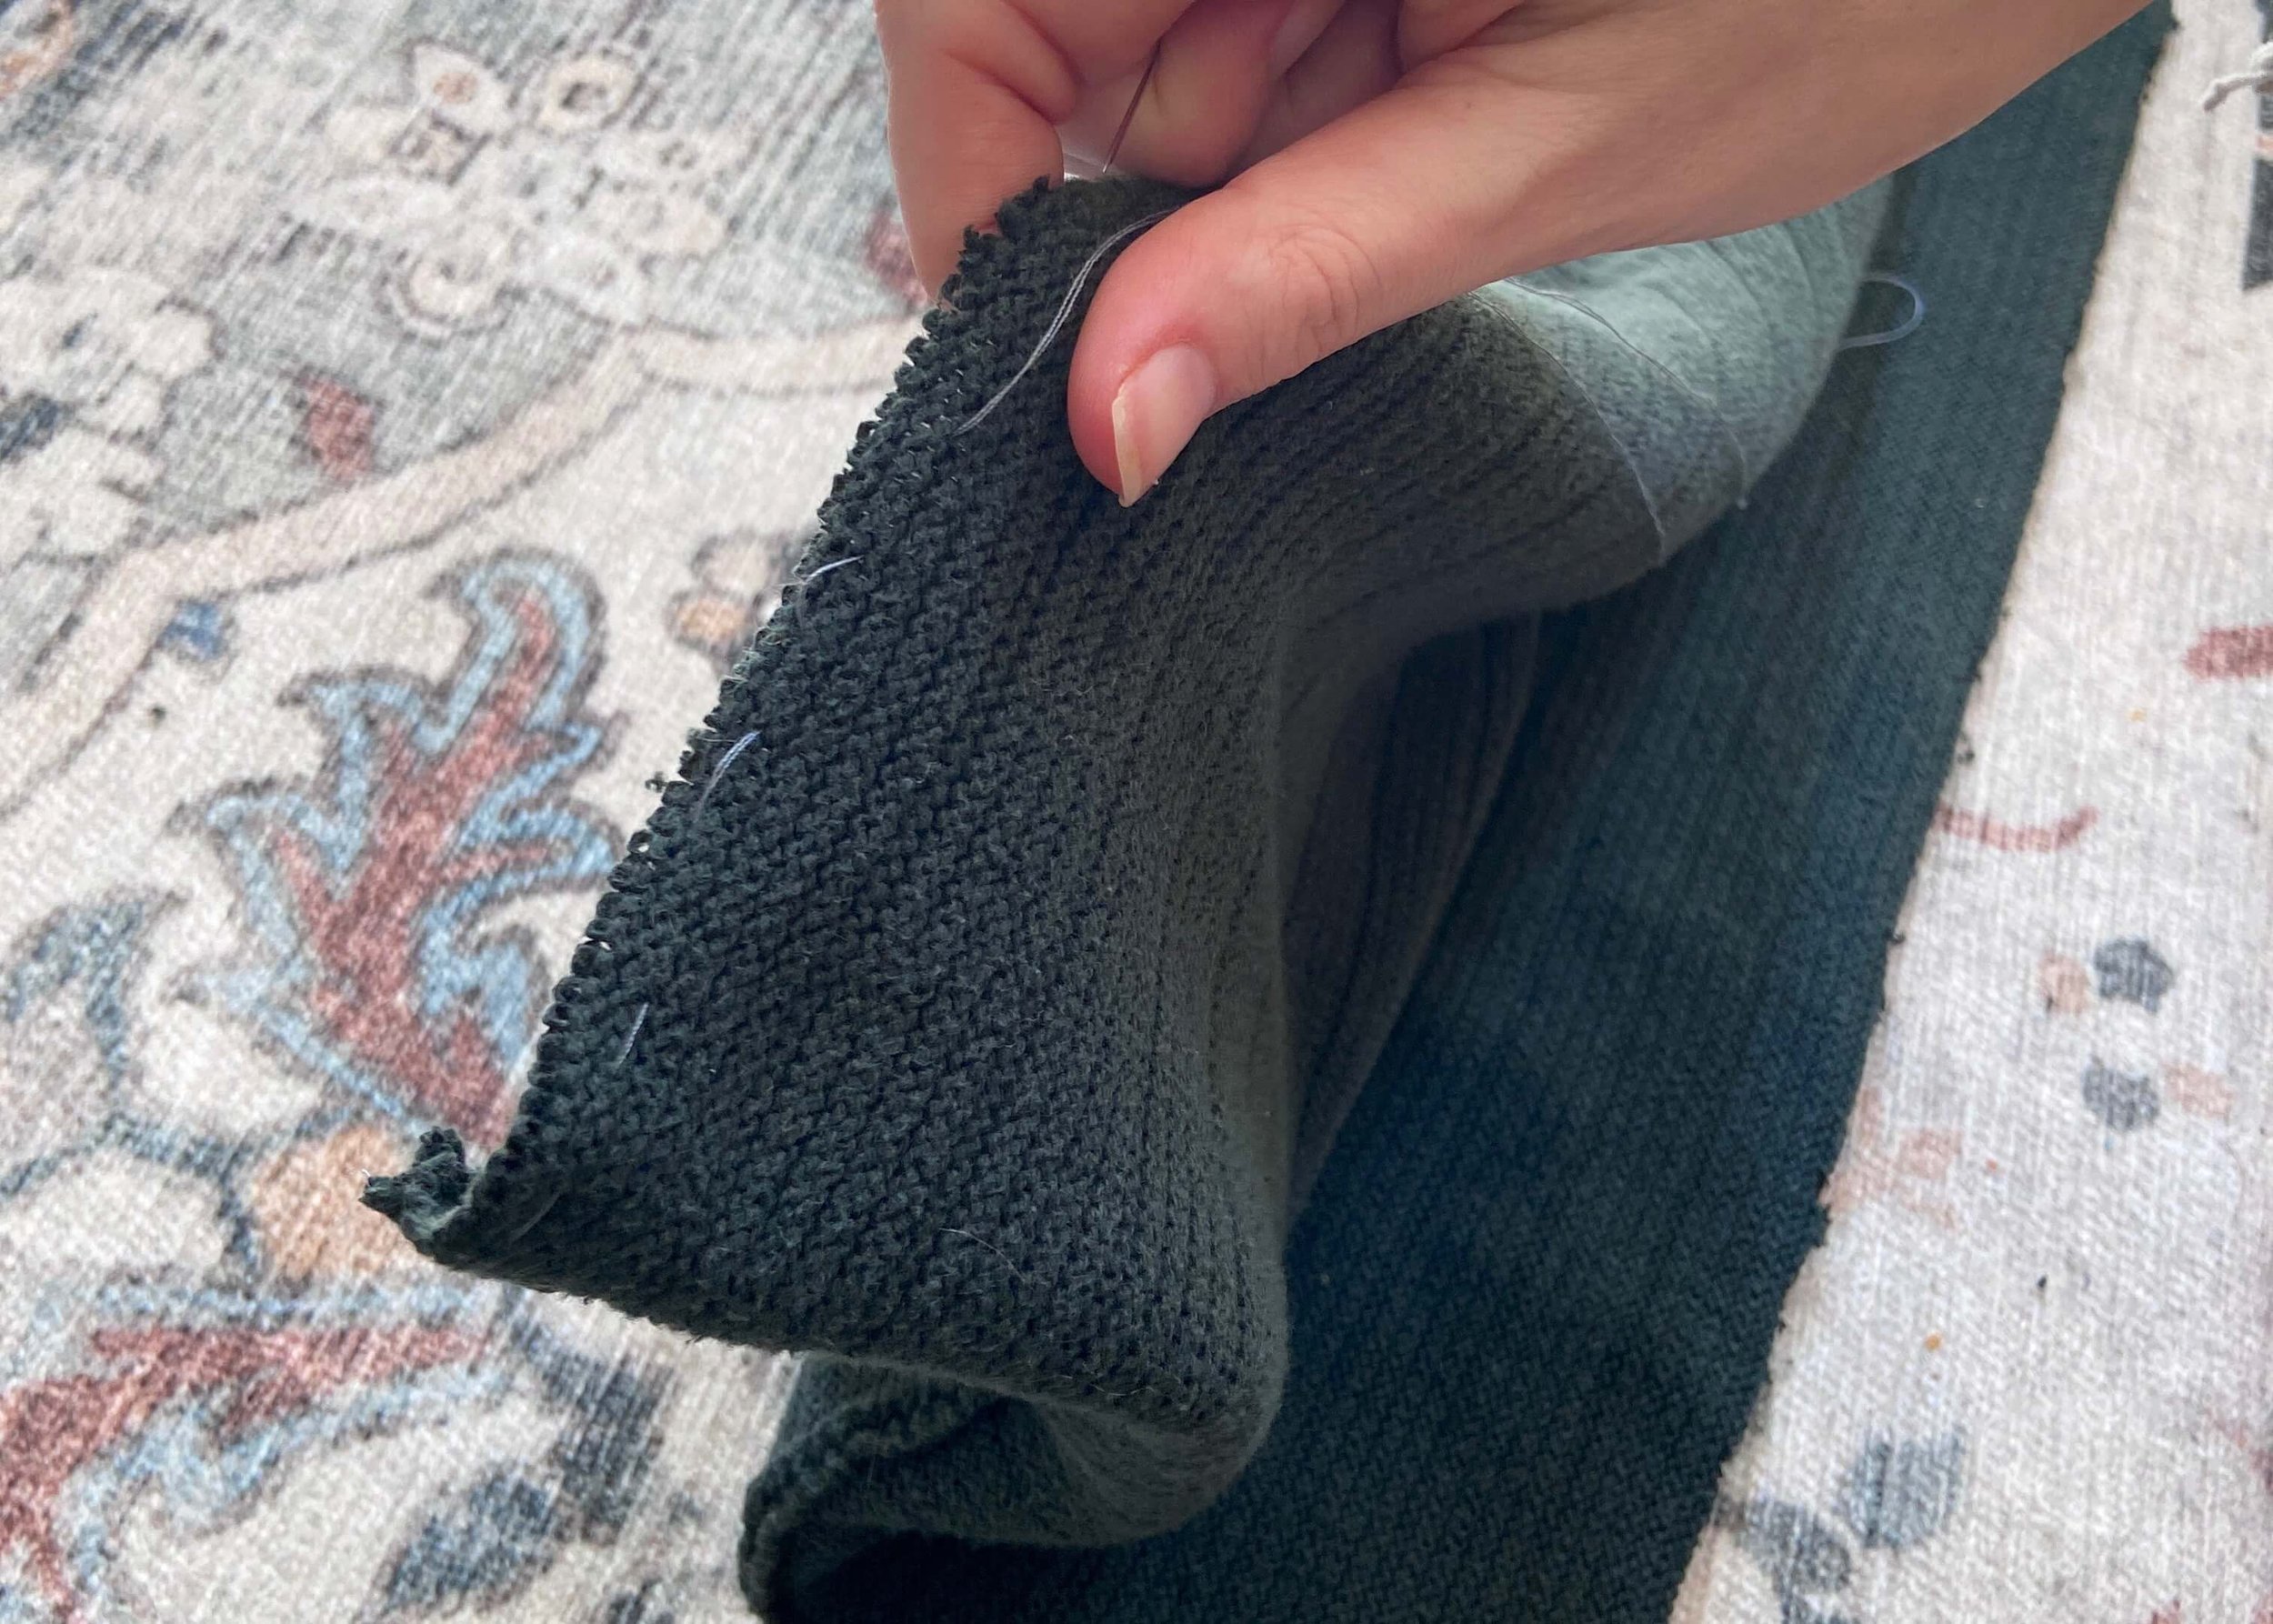
2.
Turn the fabric inside out, so that the good side is on the inside, and do a running stitch all around one of the open ends of the fabric.

3.
When you have been all the way around, pull the thread to bring the edges together.

4.
Use a needle and thread to sew the edges together. Once secure, tie off and cut the thread.

5.
Next, turn the fabric so that you have the right side facing outwards, and now do a running stitch all around the other end of the fabric.
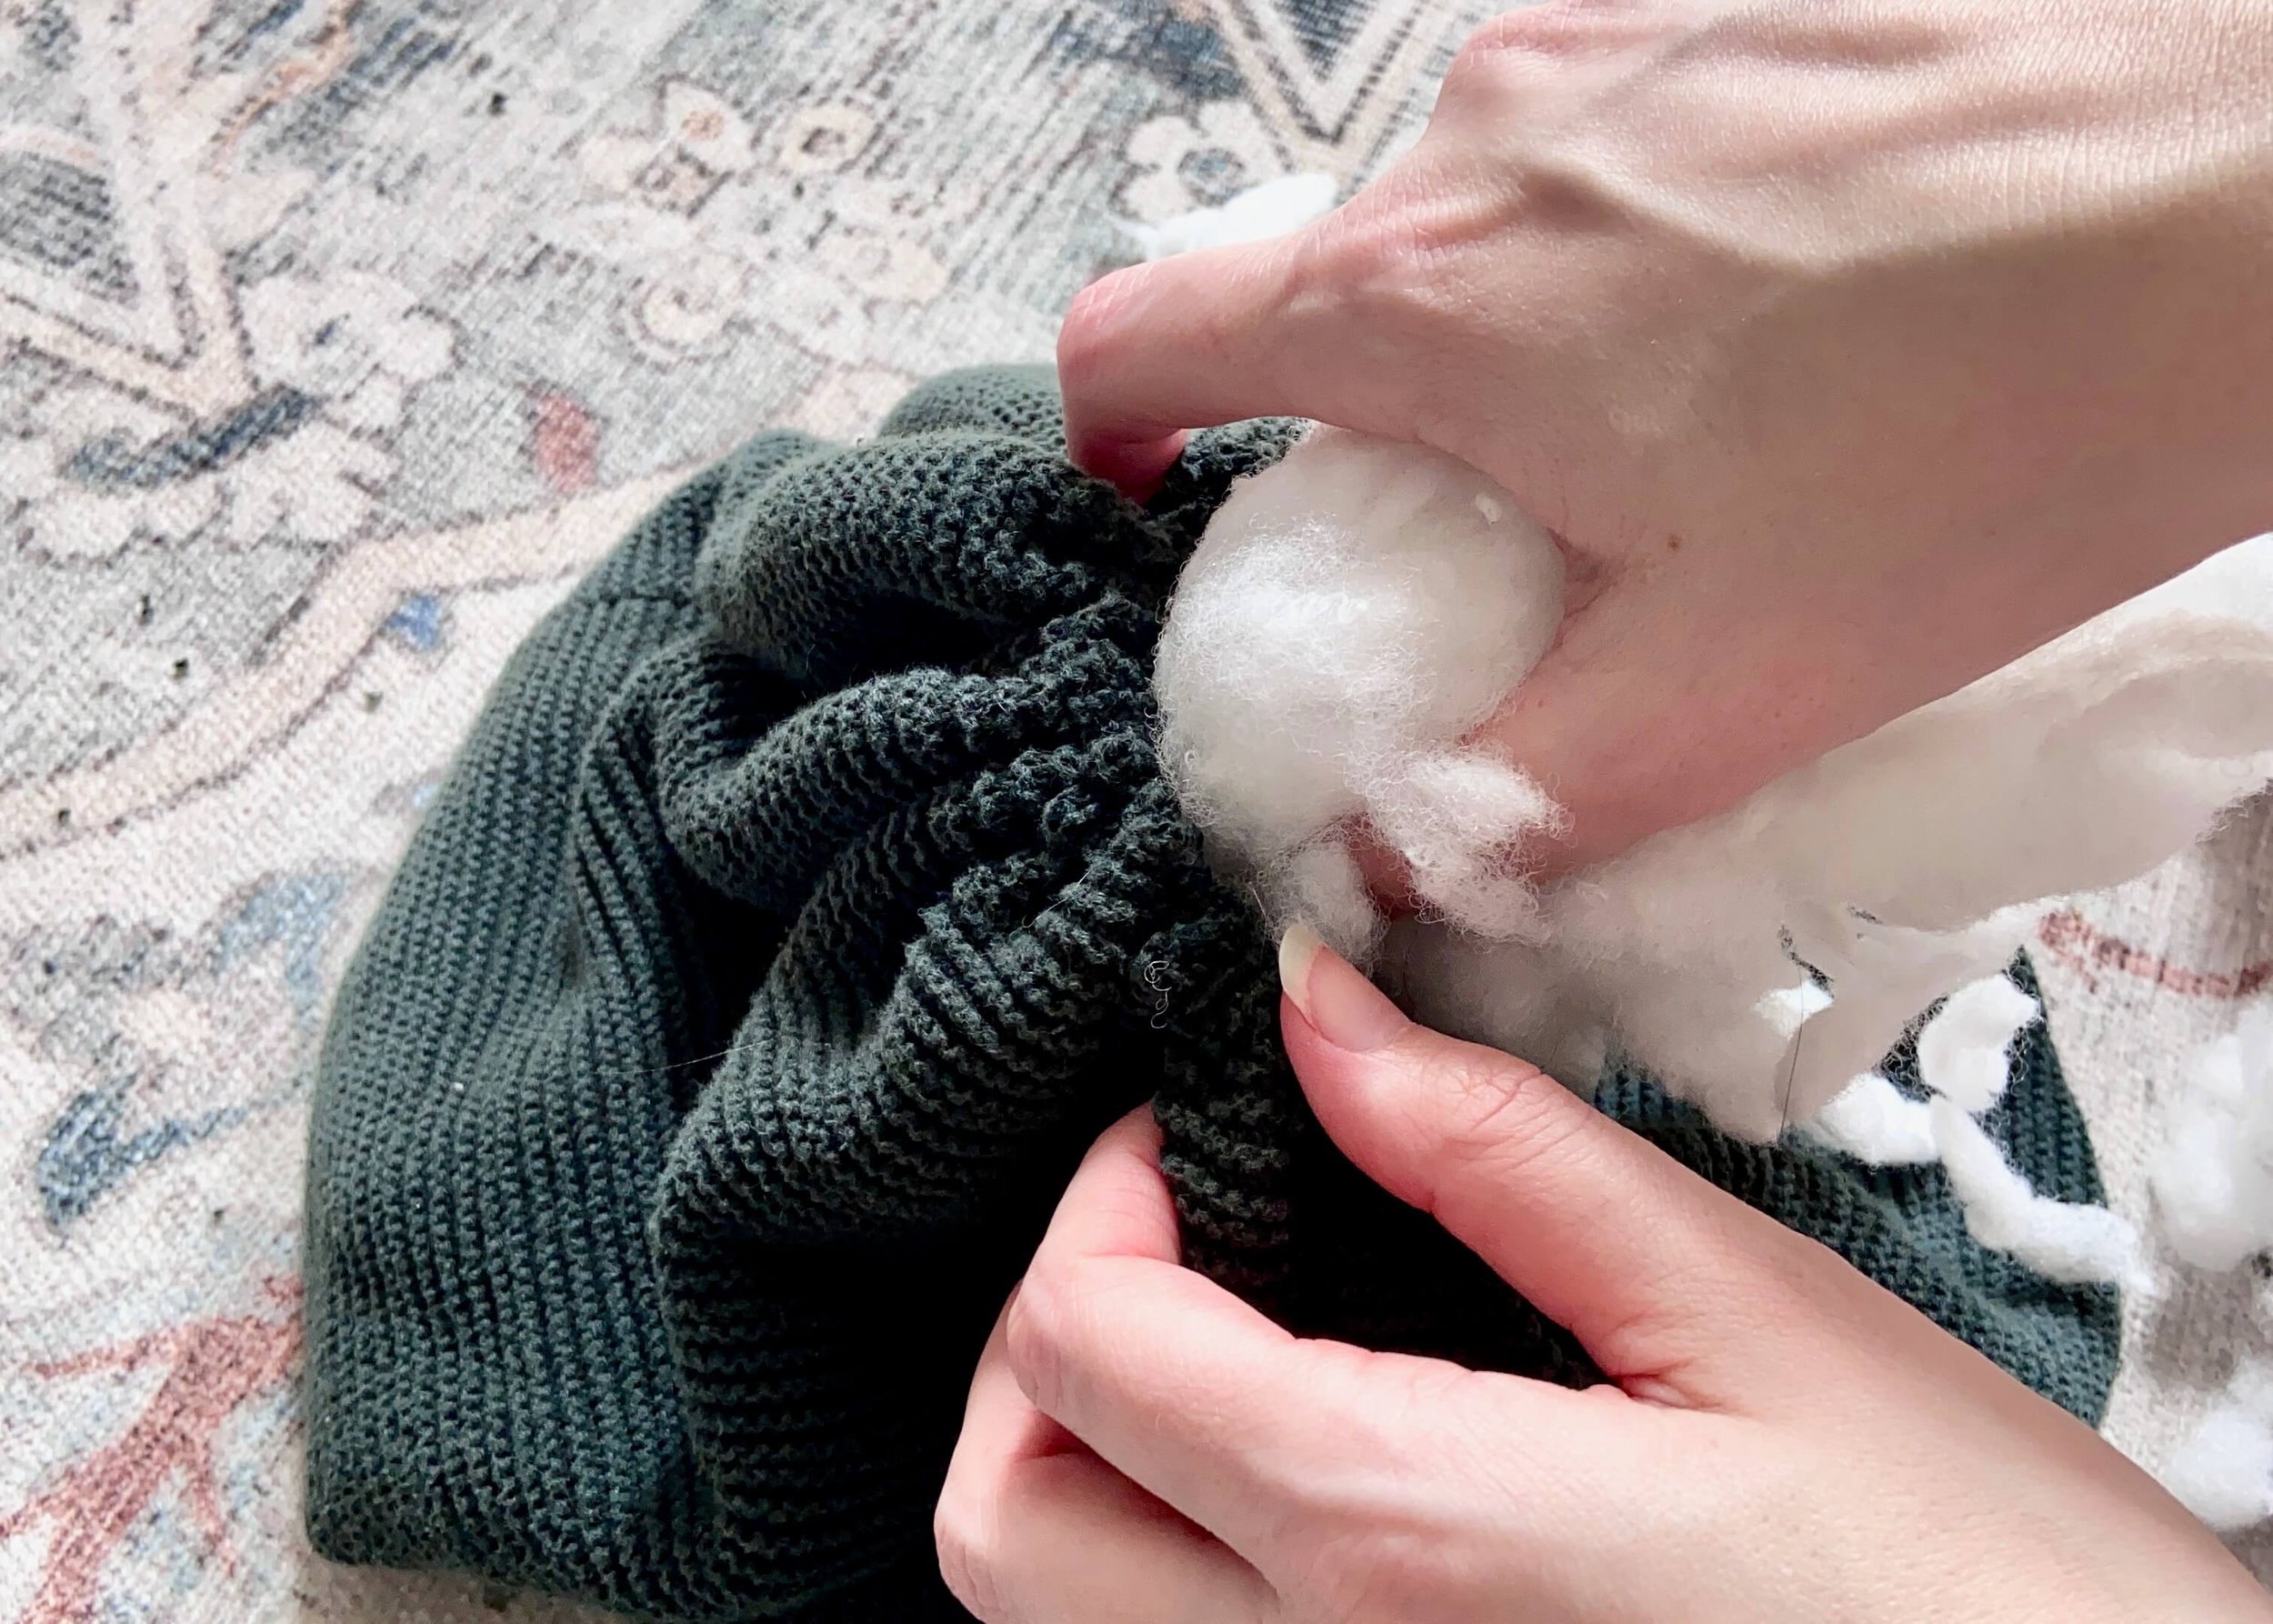
6.
When you have been all the way around, pull the thread, but don’t pull it too tight, as you’ll want to now stuff your fabric cushion wadding.

7.
Once full of wadding, pull the thread to bring the edges closer together and sew the gap securely shut. Tie off and cut the thread.
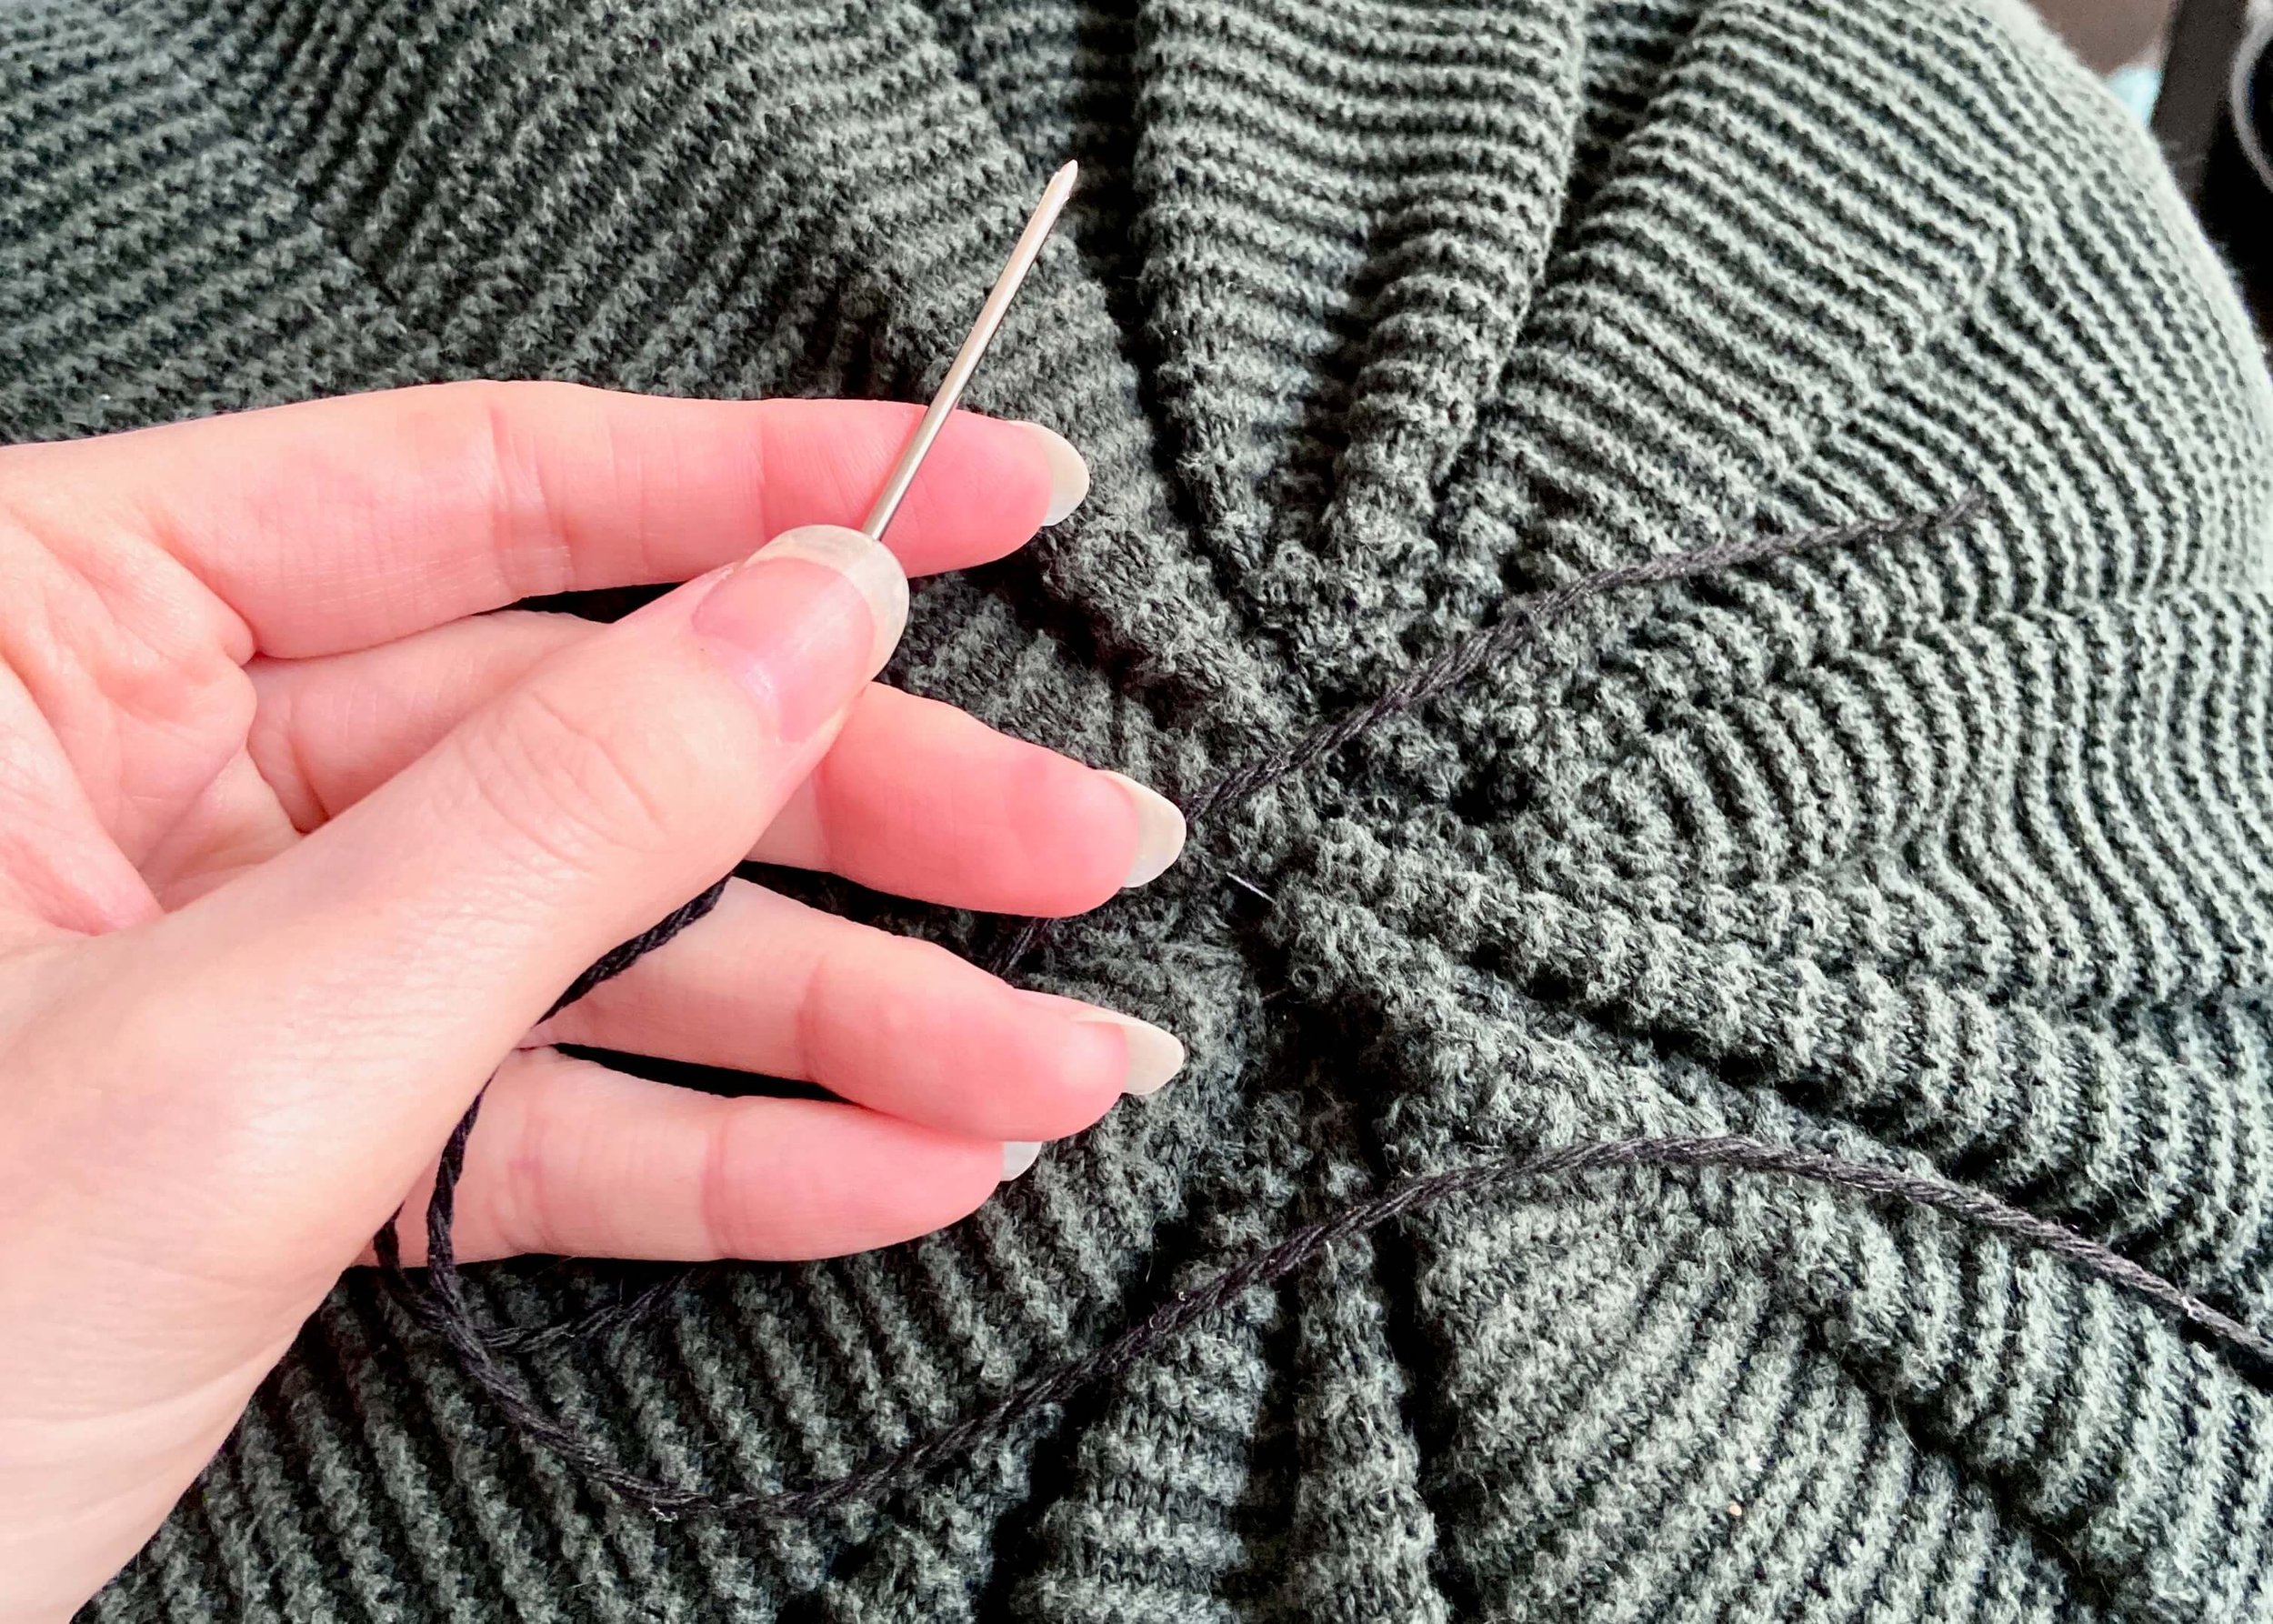
8.
Next thread a large needle with some thicker string, and tie a knot at the end of it. Push the needle through the middle of the pumpkin and pull it taught.

9.
Bring the string around the side of the pumpkin and thread it again through the middle of the pumpkin. Continue this so that the string creates the segments of the pumpkin. Tie off and cut the string.
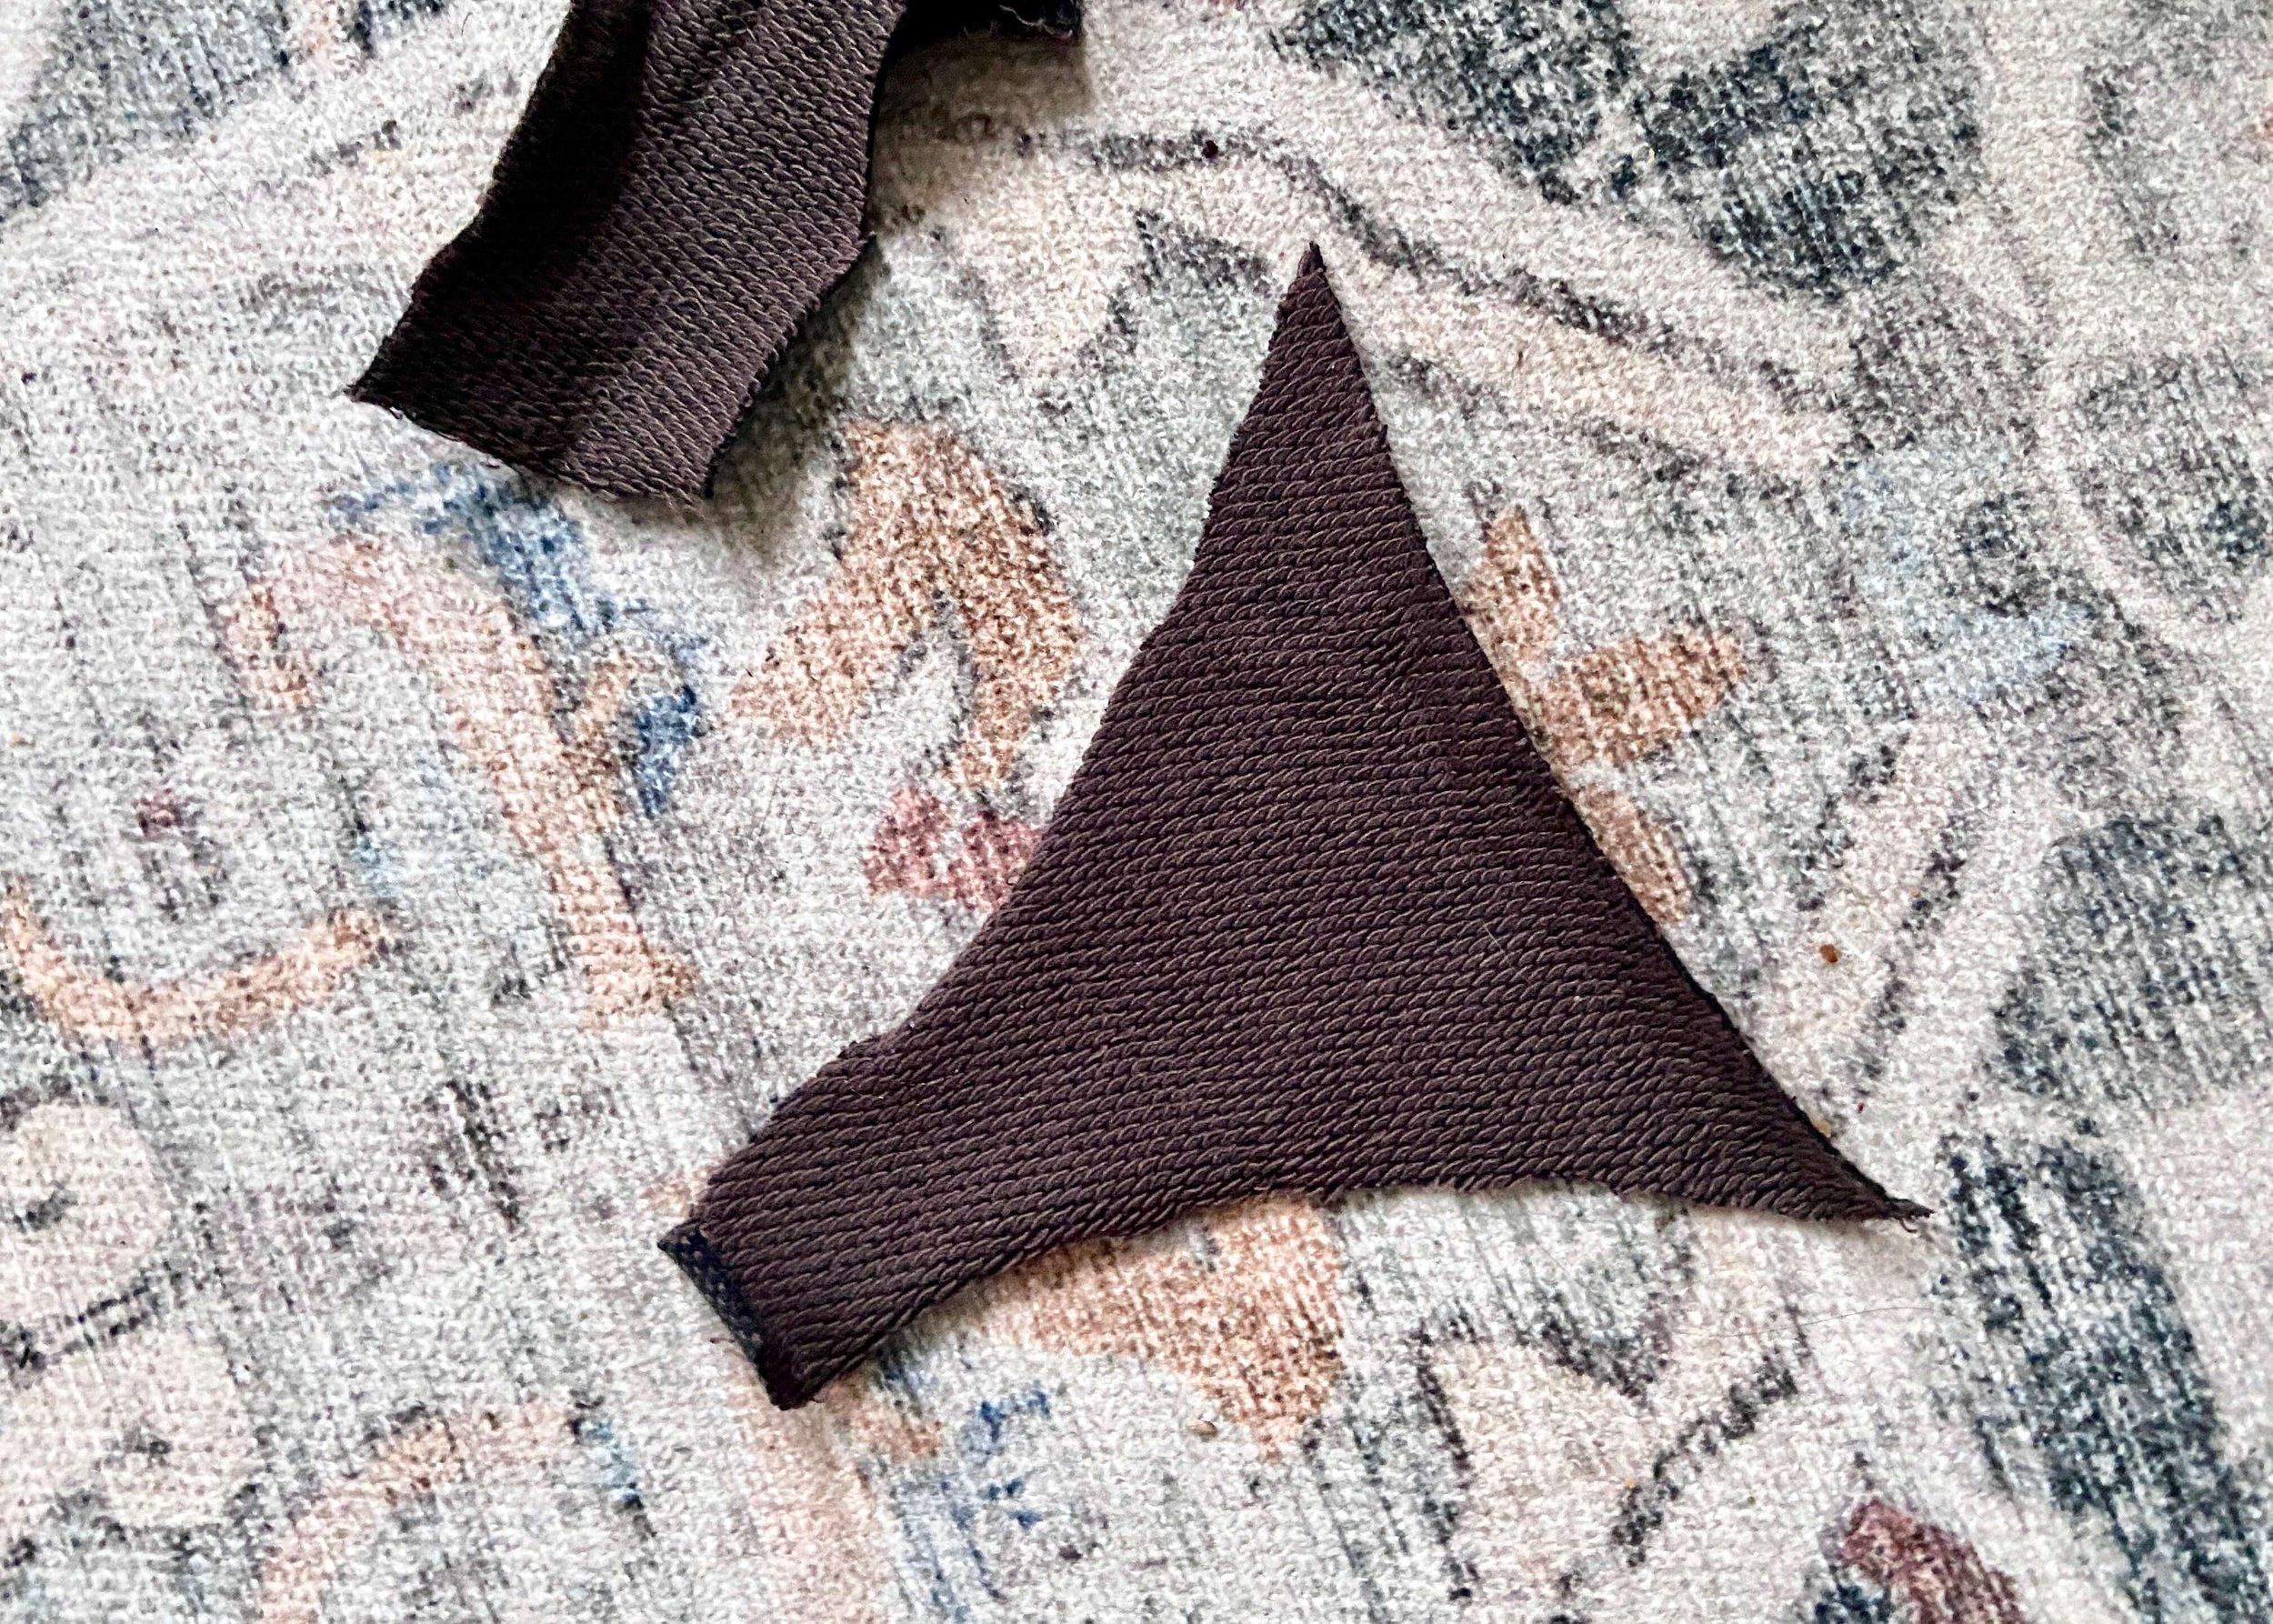
10.
Next, grab some brown fabric and cut it into a slightly curved funnel shape (as shown). Fold this in half (right side inwards) and use a needle and thread to sew the sides together.
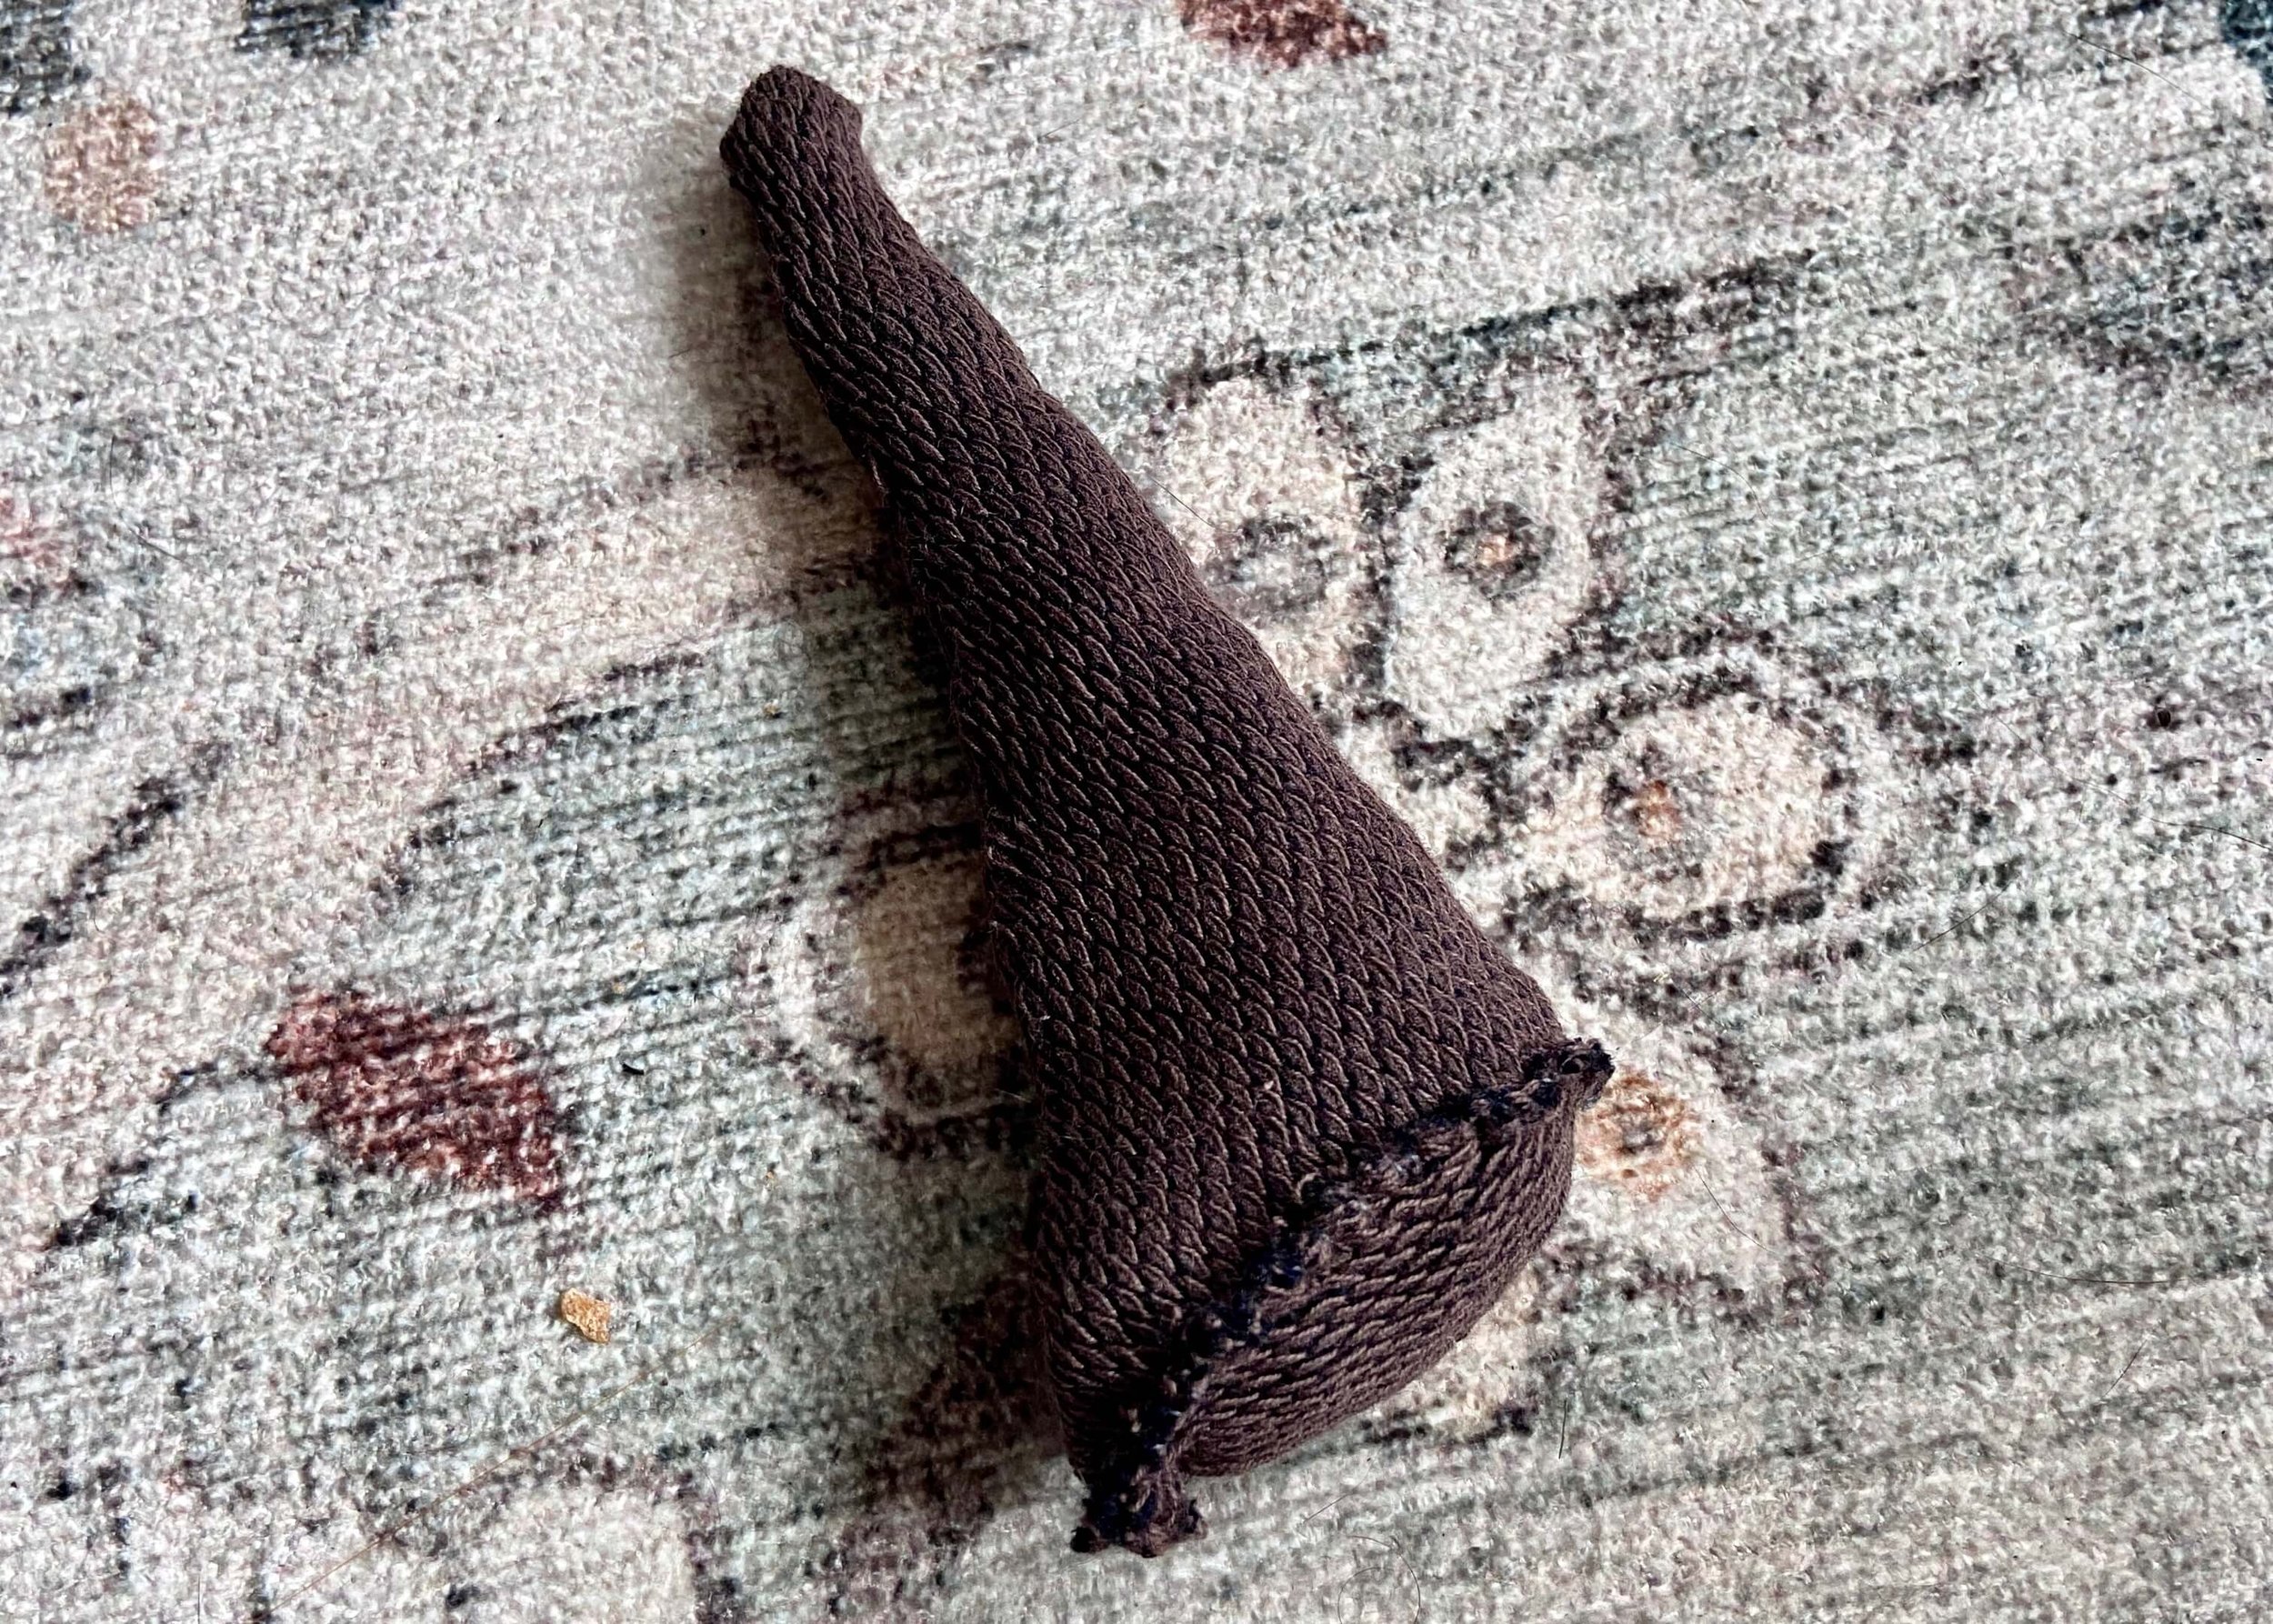
11.
Turn the stem the right side out and then fill with wadding. Cut out a circle of brown fabric and sew this on the bottom to keep the wadding in.

12.
Finally, use a needle and thread to sew the stem to the centre and top of your pumpkin cushion.