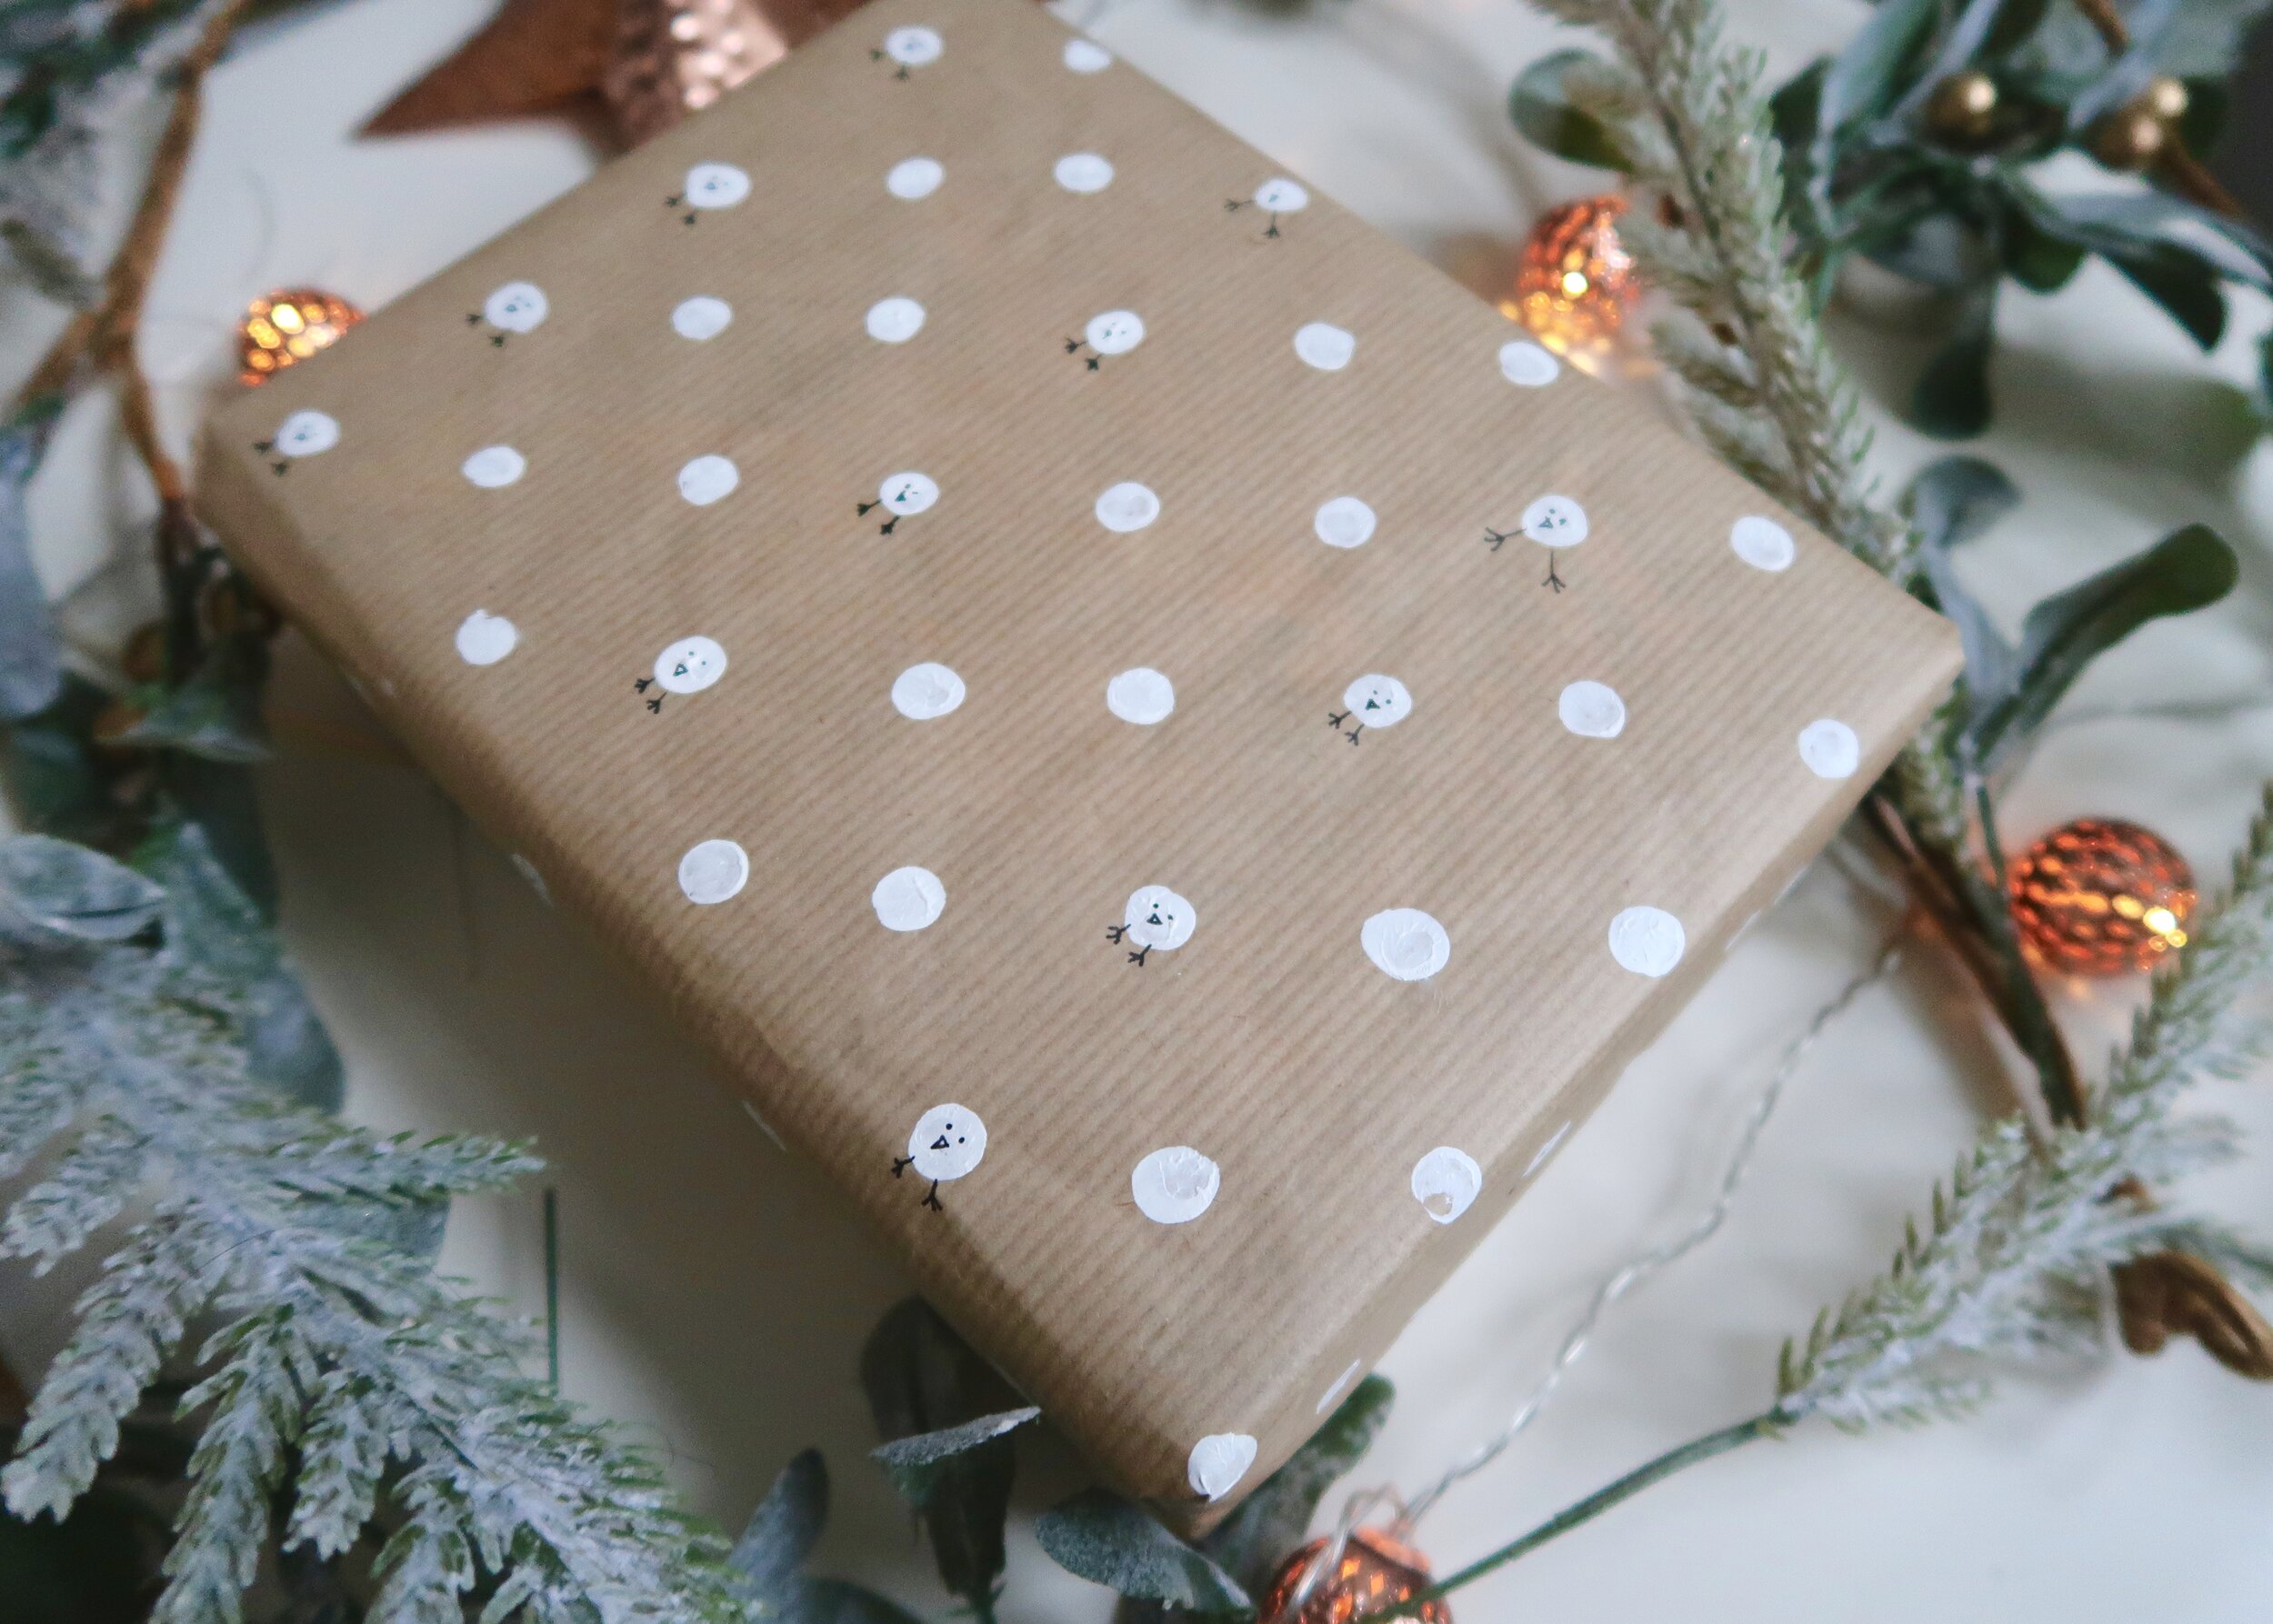
Wrap your presents in style whilst doing your bit for the environment with this quick and easy rubber stamp wrapping paper!
There’s not long to go and believe it or not but I’ve actually almost done my Christmas shopping. I’m usually a Christmas eve panic shopping kind of girl, but this year I pestered everyone early and got most of it ordered online. It’s quite amazing what you can do with this unheard-of type of organisation and the amount of time it gives you before Christmas. Although I’ve used decorated brown paper for my presents the last few years, I’ve never had the time to photograph it or share it on here… until now! Now if you’re as disorganised as I usually am, you might be wondering why on earth you would consider taking the time to decorate your own wrapping. Well, unbeknown to me until a few years ago, most wrapping papers that you can buy in shops aren’t recyclable, and so all that waste from Christmas, ends up in landfill sites. Although shiny paper and glitter is pretty, it’s pretty rubbish for the environment. On top of that, brown paper looks chic, and there’s nothing more special than receiving a gift in wrapping that the giver has made the effort to decorate themselves. If I’ve managed to convince you, then keep reading to find out more about how to make this quick and easy rubber stamp wrapping paper…
Brown parcel paper
White acrylic paint
Pencil with rubber
Black fine liner
Cut off how much brown paper you think you will need for each individual present.
Lay each piece of brown paper out flat and secure each corner down to a flat surface with masking tape.
Squeeze out some white acylic paint onto a flat surface.
Dip the rubber at the end of your pencil into the acrylic paint, ensuring that it is evenly coated and press it firmly onto your brown paper.
Repeat step 4 until your paper is covered in white circles. For the holly pattern, stamp three white circles close together, and repeat all over, whilst for the robin/animal pattern, do individual circles all over with an equal distance between them.
Once dry, grab your black fine liner and draw some details onto, and around, your white circles.
Draw three holly leaves in the gaps between the circles for the holly pattern.
Add the appropriate ears, whiskers, noses, legs and antlers to each circle to create a cute animal pattern.
Or, let your imagination run wild and create whatever you fancy! Why not add little ears and a horn to make unicorns? Or use the white circle as a centre of a flower and draw the petals around it?


